July 2026 - Page 3 of 4 - Web Maniacs

How to Optimize WooCommerce Product Pages for Sales

Table of Contents

Last Updated: July 11, 2026

How to Optimize WooCommerce Product Pages: Core Principles

Learning how to optimize WooCommerce product pages for sales is one of the most direct paths to increasing revenue without scaling your traffic. The difference between a product page that converts and one that sits idle often comes down to a few critical, fixable elements. Most store owners focus on driving traffic, but the real opportunity is what happens once visitors arrive.

A product page is where browsers become buyers, or abandon their carts and never return. Every element, from the product title to the call-to-action button, either moves visitors closer to purchase or pushes them away. You don’t need to redesign everything at once. Strategic optimization, tested and implemented step by step, delivers measurable results.

Pro Tip
The fastest wins come from fixing what’s broken, not adding what’s missing. Audit your current product pages for missing images, slow load times, or unclear CTAs before implementing new features.

Why Product Page Optimization Matters for Your Bottom Line

Your product pages are the final sales pitch before purchase. Many store owners treat them as static information displays, but high-converting pages treat every element as part of a persuasion sequence. The product title must answer "Is this what I’m looking for?" The images must build confidence. The description must address objections. The CTA button must feel inevitable.

Optimization directly impacts your bottom line because it increases revenue from traffic you already have. A 3% conversion rate instead of 1% is a 200% revenue increase from the same audience. According to Conversion Rate Optimization best practices from Unbounce, even small improvements in page conversion rates compound significantly across an entire product catalog.

Key Takeaway
Product page optimization is about removing friction at the point of decision. Every element should answer a customer question or address a doubt.

Step 1: Craft High-Converting Product Description Examples

Your product description bridges what someone wants and why your product solves it. High-converting descriptions connect features to benefits that matter to your audience. Instead of "water-resistant material," say "stays dry in rain and sweat, so you can wear it to the gym or hiking without worry."

Start with a one-sentence hook capturing the primary benefit. Follow with a short paragraph addressing the main use case or problem the product solves. Then list features with corresponding benefits. End with social proof or reassurance, like "trusted by over 5,000 customers" or "backed by our 60-day guarantee."

Most effective product descriptions run 150-300 words, long enough to address questions but short enough that readers don’t bounce. Mobile users especially need concise, scannable text.

Structure Your Description for Conversions

Break your description into digestible sections using short paragraphs and bullet points. Walls of text kill conversion rates. Use second-person language ("you") instead of third-person ("customers"). "You’ll love how lightweight this is" works better than "This product is lightweight."

Include specific details that build trust. "Handmade in our Portland workshop" beats "locally made." "Available in 8 colors" beats "multiple color options." Specificity signals authenticity.

Optimize Your Product Title for Search and Click-Through

Your product title serves two audiences: search engines and humans. Include your primary keyword naturally in the title. For a wool beanie, "Merino Wool Beanie for Winter Hiking" works better than "Cozy Hat" because it signals what the product is and who it’s for.

Avoid keyword stuffing. Keep titles under 70 characters so they don’t truncate in search results. Test different title variations if you have traffic to measure which version gets more clicks.

Step 2: Implement WooCommerce Speed Optimization Tips

Page speed directly impacts both search rankings and conversion rates. Research from Google’s Core Web Vitals documentation shows that pages loading in under 3 seconds have significantly higher conversion rates than slower pages. Every additional second of load time increases bounce rate.

WooCommerce product pages often carry heavy loads with multiple high-resolution images, plugins, and tracking scripts. Speed optimization isn’t one fix; it’s a series of targeted improvements that compound dramatically.

Reduce Page Weight and Enable Lazy Loading

Product images are usually the largest files on a WooCommerce page. A single unoptimized image can be 5MB; compressed, it might be 300KB. That’s a 95% reduction with zero visual quality loss.

Use next-gen image formats like WebP instead of JPEG or PNG. WebP files are 25-35% smaller than equivalent JPEGs while maintaining quality. Lazy loading defers image loading until they’re about to appear on screen, dramatically reducing initial page load time.

Enable lazy loading through WooCommerce settings or via a lightweight plugin. Minimize your overall page weight by auditing which plugins are actually needed. Disabling unnecessary plugins could cut your page load time by 15-20%.

Use Caching and Minification

Caching stores static versions of your pages so servers don’t rebuild them on every request. Browser caching stores files locally on visitor devices; server-side caching stores pages in memory for instant retrieval.

Enable both. Browser caching tells visitors’ browsers to hold onto images, CSS, and JavaScript files for 30 days. Server caching (using a plugin like WP Super Cache or W3 Total Cache) stores rendered HTML pages so WordPress doesn’t rebuild them from scratch.

Minification removes unnecessary characters from code without changing functionality. Minified CSS and JavaScript files are 30-50% smaller. These three tactics combined typically reduce product page load time by 40-60%. Test your page speed before and after using Google PageSpeed Insights.

Watch Out
After implementing caching or minification, test your product pages thoroughly, especially add-to-cart buttons, reviews, and dynamic elements. A fast page that doesn’t convert is worse than a slow page that does.

Step 3: Design for Mobile-First User Experience

Over 60% of e-commerce traffic now comes from mobile devices. Mobile-first design means optimizing for the smallest screen first, then scaling up. This forces you to prioritize ruthlessly: what absolutely must be visible above the fold?

Close-up of a smartphone screen displaying a WooCommerce product page with high-quality product images, clear product title, price, and prominent add-to-cart button in view

Responsive Layout and Touch-Friendly CTAs

Your product page layout must adapt fluidly to different screen sizes. Test your pages on actual mobile devices, not just browser emulation. Real phones reveal issues that desktop testing misses.

Buttons need to be touch-friendly. Your add-to-cart button should be at least 44×44 pixels with clear spacing around it. Place your primary CTA button prominently, ideally visible without scrolling on mobile.

Form fields on mobile should auto-fill when possible. Use input types that trigger appropriate keyboards (email for email addresses, tel for phone numbers) to speed up data entry.

High-Quality Product Images and Video

Images are the primary way mobile users evaluate products. Include at least 3-5 product images: straight-on product shot, detail shots, lifestyle image showing the product in use, and size-reference image if relevant.

Enable zoom on product images so mobile users can pinch-zoom to see fine details. This is a trust signal. Video converts better than images alone. A 15-30 second product demo showing the item in action increases conversion rates significantly.

Step 4: How to Add Trust Badges to WooCommerce

Trust badges reduce purchase anxiety. They’re small visual signals, security seals, money-back guarantees, customer review counts, or certifications, that reassure hesitant buyers.

Place your most credible trust signals near the add-to-cart button, where purchase anxiety peaks. Choose badges relevant to your audience’s specific concerns. If you’re selling to first-time buyers, emphasize guarantees and return policies. If you’re selling premium products, emphasize craftsmanship or certifications.

Avoid generic badges that claim things everyone has. Instead, use specific guarantees: "100% satisfaction or your money back" or "Tested and approved by [relevant authority]."

Customer review count is a powerful trust signal. Display it prominently: "4.8 stars from 342 customer reviews" builds more confidence than hiding reviews in a collapsed section. The number of reviews matters as much as the star rating.

Step 5: Implement WooCommerce Product Schema Markup

Schema markup is structured data that tells search engines exactly what information is on your page. For product pages, this means search engines understand your price, rating, availability, and product details without guessing.

Rich snippets are the visual result of good schema markup. When a product appears in search results with a star rating, price, and availability status, that’s schema markup at work. Rich snippets get higher click-through rates than plain text results.

Rich Snippets and Structured Data Benefits

Implement Product schema markup on every product page. This tells Google your product name, description, image, price, currency, availability, and rating. Add AggregateRating schema if you have customer reviews, which displays as stars in search results. Products with visible star ratings get 30% higher click-through rates than those without.

Offer schema markup specifies price, currency, and availability. If your product is in stock, say so explicitly. If it’s on sale, include both the original and sale price.

Most WooCommerce plugins handle basic schema markup automatically. Yoast SEO, Rank Math, and similar plugins add Product schema to your pages by default. Verify your schema is working using Google’s Rich Results Test.

Step 6: Optimize for Conversion Rate Through A/B Testing

A/B testing reveals what actually works for your specific audience. Start with high-impact elements: your CTA button text, product title variations, or description structure. Test one element at a time so you know what caused the change in conversion rate.

Test CTA Buttons, Layout, and Copy Variations

Your add-to-cart button text matters more than you’d think. "Add to cart" is default, but "Buy now," "Get it today," or "Add to bag" might perform better. Button color also impacts conversion. Contrasting colors generally outperform buttons that blend in.

Test product description structures. Does a benefits-first description convert better than a features-first one? Does adding a guarantee statement increase conversion? Does a lifestyle image above the fold increase time on page?

Run tests for at least one week and with at least 100 conversions in each variation before declaring a winner. Use WooCommerce built-in analytics or Google Analytics to track conversion rates by variation.

Key Takeaway
The best CTA button for your store might not be the best for another store. Test variations and let your actual customer behavior guide your decisions.

Step 7: Ensure Accessibility and Post-Purchase Optimization

Accessible product pages serve more customers and rank better in search results. Google favors accessible sites because they provide better user experience for everyone. Ensure your product pages meet WCAG 2.1 Level AA compliance: proper heading hierarchy, alt text on all images, sufficient color contrast, keyboard navigation support, and form labels.

Post-purchase optimization keeps customers engaged after they buy. Send a confirmation email immediately after purchase. Follow up with shipping updates and delivery notifications. After delivery, request a review or testimonial. This sequence builds loyalty and generates the social proof that converts future customers.

Include unboxing instructions or setup guides if relevant. A customer who successfully unboxes and sets up their product is a satisfied customer. Offer post-purchase upsells strategically, suggesting complementary products only if the suggestion feels helpful, not pushy.


Optimizing WooCommerce product pages for sales is a continuous process, not a one-time project. Each element you improve compounds with others, creating a page that feels intuitive, trustworthy, and conversion-focused. Web Maniacs specializes in building custom WooCommerce solutions that combine strategic optimization with personalized digital marketing, helping you strengthen your brand identity and increase online visibility. Get started with Web Maniacs today and transform your product pages into reliable revenue generators.

Optimization Area Key Action Expected Impact
Product Images Optimize to next-gen formats, enable lazy loading 40-60% faster load time
Product Description Structure for benefits, use second-person language Higher engagement, clearer intent
Mobile Design Responsive layout, touch-friendly CTAs Reduced bounce rate on mobile
Page Speed Implement caching, minification, image optimization Improved rankings, higher conversion
Schema Markup Add Product and AggregateRating schemas Rich snippets in search results
A/B Testing Test CTA buttons, descriptions, layouts Data-driven optimization
Trust Signals Place badges near CTA, use specific guarantees Reduced purchase anxiety

Frequently Asked Questions

How can I improve my WooCommerce product page conversion rate?

Focus on three core areas: optimize page speed to reduce bounce rates, craft compelling product descriptions that address customer pain points, and add trust signals like reviews and security badges. A/B test your call-to-action buttons, product images, and pricing displays. Ensure your mobile-responsive design works flawlessly, as most traffic comes from mobile devices. Implement schema markup for rich snippets to improve click-through rates from search results.

What are the most important elements of a high-converting WooCommerce product page?

Essential elements include: a clear, keyword-optimized product title; high-quality product images with multiple angles and zoom capability; a detailed yet scannable product description with benefits-focused copy; visible pricing and inventory levels; prominent add-to-cart button; customer reviews and ratings; trust badges (SSL, payment icons, guarantees); and fast page load speed. Mobile-responsive design is non-negotiable. Each element should guide users toward the purchase decision without friction.

How does site speed affect WooCommerce product page sales?

Page speed directly impacts bounce rate and conversion rate. Studies consistently show that slower pages lose customers, even 1-2 second delays reduce conversions. Fast-loading product pages improve user experience, reduce friction in the sales funnel, and signal quality to search engines. Implement lazy loading for images, enable caching, minify CSS and JavaScript, and use a lightweight theme. Optimizing page weight and leveraging next-gen image formats (WebP) are proven tactics to boost speed and sales simultaneously.

Do I need WooCommerce product schema markup for better sales?

Yes. Schema markup (structured data) enables rich snippets in search results, displaying ratings, prices, and availability directly on Google. This increases click-through rates from search and builds trust before users even visit your page. Schema also helps search engines understand your product details, improving SEO ranking potential. Implementing WooCommerce product schema markup is straightforward and yields measurable improvements in organic traffic and conversions without requiring additional design changes.

This article was written using GrandRanker

Why Your Website Isn’t Converting: 7 Critical Issues

Table of Contents

Last Updated: July 10, 2026

Why Your Business Website Isn’t Converting: A Diagnostic Framework

Many business owners watch traffic flow through their site only to see minimal conversions, leads, or sales. At Web Maniacs, we’ve analyzed hundreds of websites and identified the core conversion killers: slow load times, weak value propositions, missing trust signals, poor mobile experiences, and ineffective calls to action. The difference between high-performing sites and those stuck in neutral comes down to specific, fixable problems.

Below, we’ll walk you through a diagnostic framework that helps you identify exactly where your conversion funnel is breaking down. A website that doesn’t convert is essentially a billboard that costs you money every month without returning value. But conversion issues are rarely mysterious once you know where to look.

The Conversion Funnel: Where Visitors Drop Off

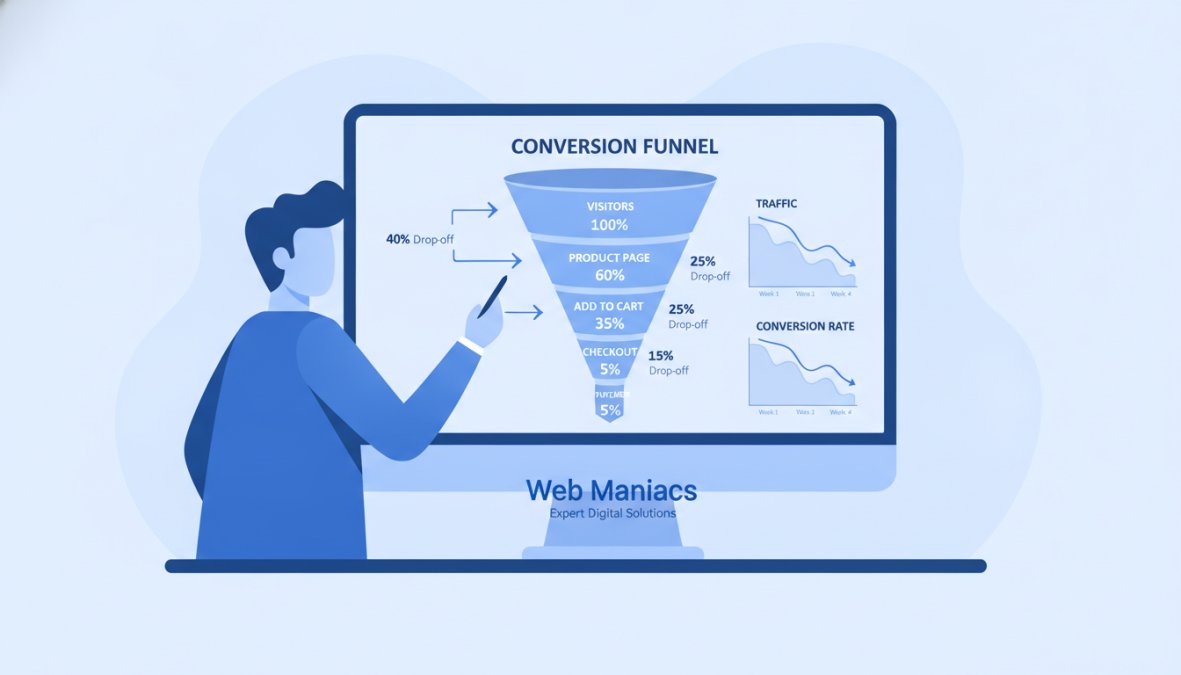
Understanding your conversion funnel is the foundation of any fix. Your funnel starts when someone lands on your site and ends when they complete a desired action: purchase, sign up, request a demo, or fill out a form. The problem is that visitors drop off at predictable points, and most business owners never measure where.

A typical funnel might look like this: 100 visitors land on your homepage, 40 click through to a product page, 12 add something to a cart, and 3 complete a purchase. That 3% conversion rate is low. But which stage is the real problem? Without data, you’re guessing.

The most common drop-off points are:

  • Landing page to product page: Visitors don’t see why they should explore further. Your value proposition isn’t clear.
  • Product page to add-to-cart: Features are listed, but benefits aren’t. Visitors don’t understand what problem your product solves.
  • Cart to checkout: Shipping costs surprise them, trust signals are missing, or the checkout process feels clunky.
  • Post-click behavior: Visitors spend 3 seconds on a page and leave without reading or scrolling.

To diagnose your specific problem, you need traffic data (how many people reach each stage) and behavioral data (what they’re doing on the page, where they click, how far they scroll).

Business analyst reviewing website conversion funnel metrics on a computer screen with line graphs and drop-off percentages visible on the monitor

1. Poor Website Speed and Performance Kills Conversions

Your website’s load time is one of the most underestimated conversion killers. Every additional second of load time costs you money. Research from Google’s Web Vitals research shows that pages taking longer than 3 seconds to load see significantly higher bounce rates. Your visitors are comparing you to Amazon and Netflix. If your site feels sluggish, they’ll leave before seeing your value proposition.

The speed problem compounds on mobile. A page that loads in 2 seconds on desktop might take 6 seconds on mobile, and mobile is where most of your traffic comes from.

Common speed culprits include unoptimized images, too many third-party scripts, poor server response time, render-blocking resources, and lack of caching.

To fix this, start with a speed audit using Google PageSpeed Insights. Prioritize image optimization first, it’s often the fastest win. Then address server response time and caching.

Pro Tip
Use a Content Delivery Network (CDN) to serve images and static files from servers closer to your visitors. This single change can cut load times by 30-50% for geographically distributed audiences.

2. Weak Value Proposition and Unclear Messaging

Your value proposition is the answer to a visitor’s first question: "Why should I care?" If your homepage doesn’t answer this clearly within 3 seconds, you’ve lost them.

A weak value proposition sounds generic. Phrases like "innovative solutions" or "we deliver results" tell visitors nothing specific. The best value propositions are specific and benefit-focused. Instead of "We provide digital marketing services," try "We increase qualified leads by 40% in 90 days for B2B SaaS companies." The second version names a specific outcome, timeframe, and audience.

Unclear messaging also happens when you try to appeal to everyone. Your homepage should focus on your primary audience and their main problem, not pitch ten different products or services.

Common messaging mistakes include feature-focused instead of benefit-focused copy, jargon and technical language, no clear target audience, weak headlines, and too much text above the fold.

To fix this, audit your homepage messaging. Ask someone unfamiliar with your business to read your headline and first paragraph, then explain what you do. If they can’t articulate it back to you, your messaging is too vague.

Key Takeaway
Your value proposition should answer three questions in under 50 words: What do you do? Who is it for? What outcome do they get?

3. Missing or Ineffective Calls to Action

A call to action (CTA) is the bridge between interest and conversion. Without a clear CTA, visitors don’t know what to do next, so they leave.

Many websites have weak or buried CTAs. They’re small buttons at the bottom of pages, use vague text like "Click here," or appear only once. Effective CTAs are prominent, specific, and repeated strategically throughout the page.

Your CTA should tell visitors exactly what happens next. Instead of "Submit," use "Get your free quote," "Start your 14-day trial," or "Schedule a demo." Specific CTAs convert 30-50% better than generic ones because they set clear expectations.

Visitors should encounter your primary CTA above the fold, visible without scrolling. But they should also see secondary CTAs throughout the page as they scroll, giving multiple opportunities to convert.

Test different CTA text, colors, and placements. Even small changes, button color from gray to green, or text from "Learn more" to "See how it works", can lift conversion rates by 10-20%.

Watch Out
A missing or weak CTA is often the easiest problem to fix and the highest-impact. Many websites see 15-25% conversion improvements just by adding a clear, prominent CTA above the fold.

4. Poor Mobile Responsiveness and User Experience

Mobile traffic dominates. If your site doesn’t work well on phones and tablets, you’re losing the majority of your potential conversions.

Poor mobile responsiveness means buttons are too small to tap, text is unreadable without zooming, forms require excessive scrolling, or images don’t display properly. Mobile users are on the go and have less patience. Your mobile experience should be simplified and fast.

Common mobile UX problems include non-responsive design, slow mobile load times, tiny tap targets, unreadable text, sticky headers and pop-ups, horizontal scrolling, and desktop-optimized forms.

Test your site on actual mobile devices, not just browser emulation. Use Google Mobile-Friendly Test to identify issues. Prioritize the most common problems: speed, button size, and form simplification.

5. Lack of Trust Signals and Social Proof

Visitors don’t know you. They’re evaluating whether to trust you with their email, money, or time. Without trust signals, they assume the worst and leave.

Trust signals include customer testimonials, case studies, security badges, certifications, media mentions, and user reviews. The most effective trust signals are specific and recent. "We helped Acme Corp increase revenue by 23% in 6 months" is specific and credible. A testimonial from "Sarah Chen, VP of Marketing at TechCorp" with a photo and specific result is powerful.

Add 2-3 customer testimonials with photos and attribution above the fold. Include a case study with specific metrics. Display any relevant certifications or security badges. Update these regularly to keep them fresh.

Pro Tip
Video testimonials convert 20-30% better than text testimonials because they feel more authentic. A 60-90 second customer video costs little to produce and dramatically increases credibility.

6. Attracting the Wrong Target Audience

High traffic with low conversions often means you’re attracting the wrong visitors. Your marketing is bringing in people who aren’t a good fit for your product or service.

This happens when your ad copy, keywords, or messaging appeal to a broad audience instead of your ideal customer. If you sell enterprise software at $10,000/month, attracting freelancers and small businesses through cheap ads is wasteful.

The fix starts with understanding your ideal customer profile. Who has the most to gain from your product? What problem do they have? What keywords do they search for? Once you have this clear picture, you can adjust your marketing to attract these people specifically.

Audit your traffic sources. Use Google Analytics to understand visitor behavior by source. Which sources bring visitors who convert? Double down on the former, reduce or eliminate the latter.

Website Conversion Rate Optimization Best Practices

Conversion rate optimization (CRO) is the discipline of systematically improving your website’s conversion rate through testing, measuring, and iterating based on data.

The CRO process starts with understanding your baseline. What’s your current conversion rate? Where are visitors dropping off? Once you have this diagnostic data, you can prioritize the highest-impact changes.

The best CRO teams focus on one thing at a time. They identify a hypothesis, test it, measure the results, and implement the winner. This disciplined approach beats random redesigns.

Common CRO best practices include testing one variable at a time, running tests long enough for statistical significance (at least 100-200 conversions per variation), prioritizing high-traffic pages, focusing on friction points, testing big changes first, and documenting everything.

A/B Testing and Post-Click Behavior Analysis

A/B testing is the most reliable way to improve conversions. You show version A to some visitors and version B to others, then measure which converts better. The winner becomes your new baseline, and you test again.

The key to successful A/B testing is understanding post-click behavior. Where do visitors click? How far do they scroll? How long do they stay? This behavioral data reveals what’s working and what isn’t.

Post-click behavior analysis uses tools like heatmaps and session recordings to visualize what visitors do. You can see exactly where they click, which sections they read, where they get stuck, and where they exit.

Start with high-impact tests. Test your headline, main CTA, form fields, and page layout. These changes typically move conversion rates more than color tweaks.

Key Takeaway
A/B testing reveals what actually works instead of what you think works. Even small improvements, 2-3% per test, compound over time into 20-30% conversion rate increases.

Using Heatmaps and User Behavior Data

Heatmaps show you exactly where visitors click, scroll, and spend time on your pages. A red area means lots of clicks or attention. A blue area means visitors ignore it. This visual data is invaluable for understanding user behavior.

Session recordings take heatmaps further by showing you actual visitor sessions. You watch as real people navigate your site, click buttons, fill out forms, and decide whether to convert. This qualitative data reveals pain points that numbers alone can’t.

For example, a heatmap might show that visitors click on a product image, expecting it to be a link. A session recording would show them getting frustrated when nothing happens. That’s a fixable problem.

CRO Tool Primary Function Best For
A/B Testing Compare two page variations Testing headlines, CTAs, layouts
Heatmaps Visualize clicks and scrolling Understanding where visitors engage
Session Recordings Watch actual visitor sessions Identifying friction and confusion
Form Analytics Track form field abandonment Simplifying multi-step forms
Analytics Measure traffic and conversions Understanding drop-off points

Use heatmaps to identify your biggest UX problems. Are visitors clicking on elements that aren’t clickable? Are they ignoring your main CTA? Are they not scrolling far enough to see important content?


The reason your website isn’t converting visitors likely isn’t mysterious. It’s one or more of these fixable problems: slow load times, unclear messaging, weak CTAs, poor mobile experience, missing trust signals, or attracting the wrong audience. The path forward is diagnostic, not guesswork. Measure where visitors drop off, test solutions, and iterate based on data.

Web Maniacs specializes in exactly this kind of conversion optimization. Our team combines custom website design, strategic messaging, and data-driven testing to help businesses increase conversions. We’ll audit your current site, identify the real bottlenecks, and implement fixes that move the needle. Get started today and transform your website from a traffic sink into a conversion engine.

Frequently Asked Questions

What is a good conversion rate for a business website?

Conversion rates vary significantly by industry, but a general benchmark is 2-5% for most websites. However, the real metric that matters is YOUR conversion rate trend. If your rate is declining or flat despite traffic growth, you have a conversion problem. Use analytics tools to track your specific conversion rate, then focus on improving it through CRO testing and user experience optimization rather than comparing to industry averages.

How do I identify why my website has high traffic but no sales?

High traffic with low conversions indicates a mismatch between visitor intent and your landing page experience. Use analytics to track post-click behavior: which pages do visitors land on, how long do they stay, where do they drop off? Analyze your sales funnel to pinpoint the exact friction point. Common causes include poor value proposition clarity, weak calls to action, slow page load speed, or attracting the wrong target audience through your marketing strategy.

How can conversion rate optimization tools help diagnose my website's problems?

CRO tools like heatmaps show exactly where users click and scroll, revealing friction points. Analytics platforms track bounce rate and conversion funnel abandonment. Session recording tools reveal user behavior patterns. Together, these tools provide data-driven insights into whether your problem is technical (speed, mobile responsiveness), messaging (value proposition), trust-related (social proof), or UX-related (navigation, CTA placement). This diagnostic approach beats guessing.

What are the most common reasons for low website conversion?

The top conversion killers are: poor page load speed (users abandon slow sites), unclear messaging that doesn't match visitor intent, missing or weak calls to action, poor mobile optimization, lack of trust signals, and complicated navigation that increases friction. Additionally, attracting the wrong target audience through misaligned marketing means visitors never intended to convert. A proper conversion funnel analysis using analytics and heatmaps reveals which of these is YOUR specific bottleneck.

This article was written using GrandRanker
Best WooCommerce Plugins for Conversion Tracking 2026

Table of Contents

Last Updated: July 9, 2026

Best WooCommerce Plugins for Conversion Tracking: Quick Comparison

Tracking conversions is foundational to e-commerce success. Without proper tracking, you can’t optimize campaigns or prove ROI. The best WooCommerce plugins for conversion tracking bridge the gap between your store and advertising platforms, ensuring accurate conversion recording and proper attribution.

Feature Comparison Table

Plugin Starting Price Free Tier Best For Key Differentiator
PixelYourSite $150/year Limited Multi-platform tracking Server-side CAPI support
MonsterInsights $99.50/year Yes GA4 integration In-dashboard analytics
Conversios $89/year Yes High-volume stores Server-side tracking focus
GTM4WP Free Full free version Custom tracking Google Tag Manager flexibility
WPCode $49/year Yes Lightweight setup Code snippet management
Google Analytics for WooCommerce Free Full Beginners Official WooCommerce support
Enhanced Ecommerce GA Free Full Funnel analysis Detailed product tracking
Conversion Tracking Pro $99/year Yes Multi-ad platform Cross-platform pixel management
GTM Kit $49/year Yes Server-side setup Modern GTM alternative

What Is WooCommerce Conversion Tracking and Why You Need It

WooCommerce conversion tracking monitors customer actions from cart additions through purchase completion, reporting data to advertising platforms and analytics tools. It reveals which marketing channels drive sales, which products customers buy together, and where your funnel loses visitors.

The core problem: spending money on ads without knowing which ones convert. If you run five Facebook campaigns but pixels aren’t firing correctly, you can’t identify which generated revenue, leading to budget waste and missed optimization.

WooCommerce conversion tracking typically includes purchase events, add-to-cart events for remarketing, checkout initiation events to identify abandonment, product view events, and custom event tracking.

Pro Tip
Most stores implement basic tracking and stop. Advanced tracking includes server-side conversion APIs, which record data even when browsers block pixels, critical as third-party cookies phase out.

How to Set Up Conversion Tracking in WooCommerce: Step-by-Step

Setting up conversion tracking connects your store to advertising and analytics platforms through a tracking plugin.

Digital marketer at desk reviewing WooCommerce settings and analytics dashboards on multiple monitors in a modern office environment with natural lighting

Step 1: Choose Your Tracking Plugin (15 minutes)

Select a plugin supporting your primary advertising platforms. PixelYourSite and Conversios handle multiple platforms in a single dashboard.

Step 2: Install and Activate (5 minutes)

Download from WordPress.org, upload to /plugins/, and activate. Most plugins offer setup wizards.

Step 3: Connect Your Ad Accounts (20 minutes)

Link Facebook Business Manager, Google Ads, and other platforms through OAuth authentication.

Step 4: Configure Event Tracking (30 minutes)

Map store events to platform structures. Standard events include Purchase, AddToCart, ViewContent, and Checkout. Pre-built mappings save time.

Step 5: Test Your Tracking (15 minutes)

Make a test purchase and verify pixels fire using browser developer tools. Check your ad platform’s conversion dashboard to confirm data flow.

Step 6: Deploy to Production (5 minutes)

Enable on your live store and monitor the first 48 hours for expected conversion volume.

Client-Side vs. Server-Side Tracking: Which Approach Wins

Client-side tracking fires pixels from the customer’s browser; server-side sends conversion data from your WooCommerce server to advertising platforms’ servers, bypassing browser restrictions.

Client-side tracking fails when customers use ad blockers or browsers block scripts. Server-side tracking solves this by sending data server-to-server, persisting even when client-side pixels fail.

Client-Side: Easy implementation, immediate results, no server-side coding required. Weaknesses include lost conversions from ad blockers and incomplete data as cookies disappear.

Server-Side: Captures missed conversions, future-proof as cookies phase out, includes backend data, better attribution accuracy. Requires technical setup and ongoing maintenance.

For growing stores, implement both. Start with client-side for immediate results, layer in server-side as you scale. Conversios and GTM Kit offer hybrid approaches capturing maximum conversion data.

Watch Out
High-volume campaigns (1,000+ conversions daily) undercount by 15-25% with client-side tracking alone. Server-side tracking becomes essential at this scale.

Top 10 WooCommerce Conversion Tracking Plugins Reviewed

1. PixelYourSite: Multi-Platform Pixel Management with CAPI

PixelYourSite is the most comprehensive multi-platform solution for stores running ads across Meta, Google, Pinterest, and TikTok. It implements both client-side pixels and Conversions API server-side tracking, recording conversions even when browser pixels fail.

The visual event builder lets you map WooCommerce events to each platform’s structure without custom code. You can track custom events beyond purchases, wishlist additions, subscription renewals, through the interface.

Pros: Extensive platform support, two-click pixel installation, server-side tracking included, GDPR-compliant consent integration, custom event tracking without coding.

Cons: Advanced features require annual subscription ($150/year minimum), setup complexity increases with multiple platforms.

Best for: Store owners running paid ads on multiple platforms needing centralized pixel management and server-side tracking.

2. MonsterInsights: GA4 Integration Built for Beginners

MonsterInsights specializes in getting WooCommerce data into Google Analytics 4 properly. The dedicated WooCommerce addon tracks enhanced eCommerce events, product impressions, checkout behavior, and purchase details.

Install MonsterInsights, connect your Google Analytics account, enable the WooCommerce addon, and data flows into GA4 with minimal configuration. For Google Ads users, MonsterInsights creates a closed loop: track conversions in GA4, import data back into Google Ads for optimization.

Pros: User-friendly interface, no developer involvement, in-dashboard reporting, enhanced eCommerce tracking.

Cons: eCommerce features locked behind premium tiers, limited to Google ecosystem, no server-side tracking.

Best for: Beginners and solo entrepreneurs using Google Analytics and Google Ads, prioritizing simplicity.

3. Conversios: Server-Side Tracking for High-Volume Stores

Conversios unifies tracking across GA4, Google Ads, Meta, TikTok, and Snapchat with server-side tracking as its differentiator. As stores scale, client-side pixels fail more frequently; Conversios implements server-side conversion APIs for every platform, recording data server-to-server.

The order recovery engine identifies and fixes reporting gaps where orders completed but pixels didn’t fire, critical for high-volume stores where small percentages mean significant revenue loss. Product feed management keeps catalogs synchronized across Google Merchant Center, Facebook Catalog, and TikTok Shop automatically.

Pros: Strong server-side focus, reduces need for multiple plugins, order recovery catches missed conversions, real-time product feed synchronization, unified dashboard.

Cons: Can be overkill for simple shops, requires more technical configuration, higher price point.

Best for: High-volume stores running multi-platform campaigns needing maximum conversion accuracy and automated feed management.

4. GTM4WP: Maximum Control with Google Tag Manager

GTM4WP integrates Google Tag Manager, handling all tracking logic through GTM rather than the plugin itself. This separates store from tracking logic: change tracking by updating GTM, not your plugin.

The plugin implements the WooCommerce dataLayer containing all store event data. Google Tag Manager reads this and fires pixels based on your configured rules. Advanced WooCommerce dataLayer events include add_to_cart, purchase, refund, and subscription changes.

Pros: Highly flexible and customizable, excellent documentation, free version available, separates tracking from store, works with any GTM-supported platform.

Cons: Requires Google Tag Manager understanding, steeper learning curve, setup takes longer.

Best for: Marketing teams and agencies wanting maximum control over tracking logic managing multiple stores.

5. WPCode: Lightweight Pixel Management Without Plugin Bloat

WPCode is a code snippet manager with a Conversion Pixels addon. Instead of heavy plugins with unused features, WPCode manages snippets efficiently with smart conditional logic: fire pixels only on checkout success pages or only for US customers.

The library includes pre-built WooCommerce tracking snippets and a custom event builder for actions beyond standard conversions.

Pros: Reduces plugin bloat, lightweight and performance-focused, smart conditional logic, ready-made snippets, integrates with popular platforms.

Cons: Requires code snippet comfort, not ideal for multi-platform pixel management.

Best for: Performance-conscious owners managing tracking alongside other customizations without heavy plugins.

6. Google Analytics for WooCommerce (Official): Free and Reliable

This official WooCommerce extension for GA4 integration provides straightforward connection with standard eCommerce event tracking. It handles page views, user behavior, and purchase events while integrating with the WP Consent API for privacy compliance.

The main appeal is simplicity and official support. You know it remains compatible with WooCommerce updates because the WooCommerce team maintains it.

Pros: Official plugin with guaranteed compatibility, completely free, simple setup, privacy-compliant, minimal configuration.

Cons: Limited to Google Analytics ecosystem, lacks advanced features, no server-side tracking, no multi-platform support.

Best for: Stores prioritizing simplicity and free solutions using Google Analytics as their primary platform.

7. Enhanced Ecommerce Google Analytics: Deep Funnel Analysis

This plugin specializes in Enhanced eCommerce tracking for Google Analytics, showing detailed product impressions, clicks, checkout behavior, and purchase details. Setup is user-friendly; most store owners get running in under 30 minutes.

Pros: Strong eCommerce-specific metrics, highly rated for ease of setup, free and lightweight, excellent funnel analysis, detailed product tracking.

Cons: Limited to Google Analytics, no multi-platform ad tracking, no server-side tracking.

Best for: Store owners focused on understanding sales funnels and optimizing checkout experiences.

8. Conversion Tracking Pro: Unified Ad Platform Management

Conversion Tracking Pro connects WooCommerce to Facebook, Google Ads, Twitter, Microsoft Ads, and other networks. Trigger-based event tracking lets you define which user actions constitute conversions. Multiple pixel management supports agencies handling multiple client accounts.

Pros: Simplifies cross-platform tracking, no custom coding, multiple pixel support, easy product synchronization, centralized management.

Cons: Focuses on ad platforms rather than general analytics, lacks server-side tracking.

Best for: Businesses running paid ads on multiple social and search networks needing centralized pixel management.

9. GTM Kit: Modern Server-Side Tracking Made Simple

GTM Kit simplifies Google Tag Manager and server-side tracking without requiring deep GTM expertise. It implements standard GA4 dataLayer events and includes server-side conversion webhooks, sending data from your server to advertising platforms’ servers.

Advanced WooCommerce tracking includes refunds, subscriptions, and wishlists. Consent Mode v2 integration ensures privacy compliance.

Pros: Advanced WooCommerce event tracking, modern interface, server-side tracking built in, Consent Mode v2 integration, good middle ground between simple and complex.

Cons: Smaller community than GTM4WP, requires annual subscription, still more complex than point-and-click alternatives.

Best for: Users wanting modern GTM integration with built-in server-side support without deep technical expertise.

WooCommerce Google Analytics 4 Integration: Best Practices

Proper GA4 setup generates insights, not noise. Ensure eCommerce events map correctly to GA4’s structure with parameters like item_id, item_name, value, currency, and quantity.

Create custom events for business-specific actions: subscription_initiated, subscription_renewed for subscriptions; loyalty_signup for loyalty programs. Set up conversion goals aligning with business objectives. Implement audience segmentation: first-time purchasers, repeat customers, high-value customers (top 10% by revenue), cart abandoners.

Key Takeaway
The most powerful GA4 setup tracks revenue by traffic source, device type, and geographic location, revealing which marketing channels drive profitable sales.

Use GA4’s attribution modeling to understand how touchpoints contribute to conversions. Multi-touch attribution shows customers interact with your brand multiple times before purchasing.

Best Practices for Ecommerce Conversion Tracking: Privacy and Performance

As conversion tracking becomes sophisticated, privacy compliance and site performance require attention. Ignoring either creates liability or customer friction.

GDPR and CCPA Compliance in Conversion Tracking

Privacy regulations require disclosing collected data and getting explicit consent before tracking. Implement a cookie consent banner distinguishing necessary cookies (checkout) from marketing cookies (tracking and retargeting). GDPR requires explicit opt-in; CCPA requires opt-out capability.

Most plugins integrate with consent management platforms like Cookiebot or OneTrust, ensuring pixels fire only after consent. Document your data processing practices in a privacy policy explaining what data you collect, retention periods, and which third parties receive it.

Avoiding Common Tracking Mistakes and Debugging Issues

Test every tracking setup before going live. Make a test purchase, verify the pixel fires, and confirm data appears in your dashboard within 24 hours using browser developer tools.

Avoid mismatching event values and currency. Eliminate duplicate pixels, if both official Meta pixel and custom pixels fire the same event, Meta counts conversions twice. Track refunds and cancellations, not just purchases. Monitor tracking data weekly; sudden conversion drops without traffic changes usually indicate tracking issues.

Watch Out
If conversion data suddenly drops 30% without corresponding traffic changes, it’s almost always a tracking issue. Check your pixels immediately; most issues fix in minutes once identified.

How to Choose the Right Plugin for Your Store

Selection depends on three factors: which platforms you advertise on, your technical comfort level, and budget.

Multi-platform advertising (Meta, Google, Pinterest, TikTok) requires PixelYourSite or Conversios. Google Ads only? MonsterInsights or the official Google Analytics plugin suffices.

Uncomfortable with configuration? Choose simplicity: Google Analytics for WooCommerce, MonsterInsights, or Enhanced Ecommerce GA. Comfortable with complexity? GTM4WP or GTM Kit offer greater control.

Budget-conscious? Free options exist: GTM4WP (free version), Google Analytics for WooCommerce, Enhanced Ecommerce GA. Server-side tracking or multi-platform support costs $50-150 annually.

Consider growth trajectory. A plugin working for $5K/month might not scale to $50K/month. Conversios and PixelYourSite scale well. Starting out? Simpler solutions work now with upgrade plans later.

Decision Factor Best Choice Why
Multi-platform ads (Meta + Google + TikTok) PixelYourSite or Conversios Only plugins supporting 4+ platforms
Google Ads only, beginner-friendly MonsterInsights Simplest GA4 setup with in-dashboard reporting
High-volume store (10K+ monthly conversions) Conversios Server-side tracking essential at scale
Technical team available GTM4WP Maximum flexibility and control
Budget-conscious, basic tracking Google Analytics for WooCommerce Free, official, reliable
Performance-focused WPCode Lightest plugin footprint

Conclusion

Conversion tracking is the difference between guessing marketing effectiveness and knowing it. The best WooCommerce plugins for conversion tracking capture every conversion accurately and report it to your advertising platforms.

Web Maniacs helps e-commerce teams implement conversion tracking systems that work, properly configured, privacy-compliant, and integrated across all advertising platforms. Our team handles technical setup, testing, and ongoing optimization so your store captures every conversion. Get started with Web Maniacs and eliminate conversion tracking guesswork.

Frequently Asked Questions

How do I track conversions in WooCommerce?

Install a conversion tracking plugin like PixelYourSite, MonsterInsights, or the official Google Analytics for WooCommerce extension. These plugins automatically capture purchase events, add-to-cart actions, and checkout data. Connect your store to Google Analytics 4, Meta Ads, or Google Ads through the plugin's dashboard. Most plugins use pixel-based tracking or server-side conversion APIs to send event data to your ad platforms in real time.

What is the best way to set up conversion tracking in WooCommerce for Google Ads?

Use a plugin that supports Google Ads conversion API integration, such as Conversios or PixelYourSite. These plugins automatically map WooCommerce purchase events to Google Ads conversion actions without manual tagging. Server-side tracking via Conversios or GTM Kit provides more accurate data by sending conversion data directly from your server, bypassing browser limitations and ad blockers. This approach improves ROAS reporting and reduces attribution gaps.

Do I need a paid plugin for WooCommerce conversion tracking?

No. The official Google Analytics for WooCommerce extension and Enhanced Ecommerce Google Analytics are both free and reliable for basic tracking. However, paid plugins like MonsterInsights ($99.50/year), PixelYourSite ($150/year), and Conversios ($89/year) offer advanced features like multi-platform support, server-side tracking, and real-time product feed management. Choose based on your store's complexity and ad spend.

What is server-side tracking and why does it matter for WooCommerce?

Server-side tracking sends conversion data directly from your WooCommerce server to ad platforms, bypassing the browser. This approach avoids data loss from ad blockers, privacy tools, and browser restrictions. Plugins like Conversios and GTM Kit support server-side tracking via Conversion APIs. It's especially valuable for stores running high-volume Google Ads or Meta Ads campaigns, as it provides more accurate ROAS reporting and improves retargeting data quality.

How does WooCommerce Google Analytics 4 integration track customer behavior?

GA4 integration plugins capture key ecommerce events: page views, add-to-cart, checkout progress, and purchases. They populate the data layer with product details, prices, and user IDs, allowing GA4 to build complete customer journeys. MonsterInsights and the official Google Analytics extension provide in-dashboard reporting on conversion rates, revenue, and user behavior. This data helps you optimize your sales funnel and understand how customers navigate your store before purchasing.

This article was written using GrandRanker
Why Your WooCommerce Site Is Slow: 7 Hidden Performance Killers

Table of Contents

Last Updated: July 8, 2026

Why Your WooCommerce Site Is Slow: Common Culprits

If your WooCommerce site is slow, performance issues compound over time. A poorly optimized database query, uncompressed product images, and high-latency payment gateways each seem minor in isolation, but together they create a checkout experience that frustrates customers and tanks conversion rates.

According to Google’s Web Vitals documentation, a one-second delay in page load time reduces conversion rates by approximately 7%. For a store doing $50,000 in monthly sales, that translates to $3,500 in lost revenue per month from a single-second slowdown.

Most store owners treat performance as a one-time fix: install a caching plugin, compress a few images, and move on. But WooCommerce performance is a system. Hosting quality, database structure, plugin bloat, image optimization, caching strategy, and payment gateway integration all affect your TTFB (Time to First Byte) and Core Web Vitals scores.

Below are seven hidden performance killers most guides miss, specific, actionable fixes targeting the actual bottlenecks slowing real WooCommerce stores.

How Performance Bottlenecks Impact Your Bottom Line

When your WooCommerce site is slow, three outcomes follow: abandoned carts increase, mobile traffic drops, and search rankings suffer. Checkout latency is the most expensive type of slowness. A 4-second checkout page instead of 2 seconds converts ready-to-buy customers into abandoned orders.

Mobile-first performance matters because 65% of e-commerce traffic comes from mobile devices. A page loading in 2 seconds on desktop might take 5 seconds on 4G. That’s the difference between a completed purchase and a closed browser tab.

Watch Out
A 2-second checkout delay can increase cart abandonment by 40% or more when payment gateway latency combines with unoptimized JavaScript execution.

Poor Hosting Quality and Shared Server Limitations

Most WooCommerce stores run on shared hosting. The problem isn’t capacity, it’s isolation. Your site shares server resources with potentially hundreds of other websites. When one site gets traffic spikes, your TTFB suffers.

Shared hosting creates a performance ceiling no optimization can overcome. The hosting stack matters more than most realize. WooCommerce runs on PHP, and performance varies dramatically by version. PHP 8.1 or 8.2 is 20-30% faster than PHP 7.4. If your host still runs older versions, you’re leaving significant performance on the table.

TTFB and Server Response Time

TTFB (Time to First Byte) is the time between when a browser requests a page and when the server sends the first byte of response. A TTFB under 600ms is good; above 1,000ms indicates a slow site.

On shared hosting, TTFB is often 1,200-2,000ms because the server handles multiple sites simultaneously. Dedicated or managed WordPress hosting reduces TTFB to 200-400ms with guaranteed resources. This cascades through every other metric: Largest Contentful Paint improves, Cumulative Layout Shift decreases, and overall page load time drops 30-50%.

Best WooCommerce Hosting: What to Look For

When evaluating WooCommerce hosting, focus on three specifications: PHP version (8.1 or higher), server-level caching (Redis or Memcached), and guaranteed resource allocation.

Managed WooCommerce hosts like Kinsta, WP Engine, and Cloudways offer server-level caching out of the box. This intercepts requests at the server level before they hit your PHP application, faster and more reliable than plugin-level caching.

Pro Tip
Request a TTFB benchmark from potential hosts before signing up. A $50/month host with 400ms TTFB outperforms a $15/month host with 1,500ms TTFB in real revenue gains.

WooCommerce Database Optimization: Transients and Bloat

Your WooCommerce database is probably bloated with expired transients, autoloaded options, and orphaned metadata. Each query your site runs must sift through this waste, making database queries one of the top three performance bottlenecks.

After six months of normal operation, a typical WooCommerce store accumulates 5,000-15,000 expired transients. WordPress doesn’t automatically delete expired transients, they accumulate invisibly until page load times creep up and CPU usage spikes.

Cleaning Up Expired Transients and Autoloaded Options

Transients are temporary cached data with expiration times, but WordPress doesn’t delete expired ones automatically. Autoloaded options are even worse, WordPress loads them into memory every single page load. Most store owners never clean them up.

Use Query Monitor (a free WordPress plugin) to audit your database. It shows exactly which queries run, how long they take, and which ones are autoloaded. Most stores discover 30-50% of their database is autoloaded options that could be deleted or marked non-autoloaded.

Delete expired transients, audit autoloaded options, and remove non-essentials. This alone reduces database query time by 15-25%.

Query Monitor and Database Query Analysis

Query Monitor logs every database query, PHP error, and HTTP request. Most store owners are shocked to discover a product page running 200+ database queries or a checkout page with 50+ queries that could be cached or eliminated.

Unoptimized Product Images and Missing WebP Formats

Product images are usually the largest files on a WooCommerce page. A single unoptimized photo can be 2-4MB; a gallery of 6 images can be 12-24MB. Most stores don’t optimize images at all, serving high-resolution files from cameras directly to every visitor.

WebP format reduces file size by 25-35% compared to JPEG while maintaining visual quality, yet most WooCommerce stores still serve JPEG exclusively.

Image Compression and Lazy Loading Strategies

Image optimization has two components: compression and lazy loading. Use tools like Imagify or ShortPixel to automatically compress product images and convert them to WebP format.

Lazy loading delays image loading until users scroll to them. When enabled, images below the fold don’t load until needed, dramatically reducing initial page load time.

The combination of WebP conversion and lazy loading typically reduces product page load time by 20-30%.

Key Takeaway
Serve images in WebP format with lazy loading enabled. This single change reduces image file sizes by 25-35% and improves page load time by 15-25% on average.

How to Speed Up WooCommerce With Caching Plugins

Caching is the most effective performance optimization available. There are three types: page caching (static HTML copies), object caching (database query results in memory), and browser caching.

WooCommerce Caching Plugins: Object and Server-Level Caching

Page caching stores static HTML copies. When visitors request a page, the server delivers cached HTML instead of running PHP and querying the database.

Object caching stores database query results in memory using Redis or Memcached. Memory access is thousands of times faster than database queries.

Server-level caching (Redis or Memcached) is superior to plugin-level caching because it operates at the infrastructure level, though it requires hosting support. Managed WooCommerce hosts include this by default.

Popular caching plugins include WP-Rocket, LiteSpeed Cache, and Cloudflare. WP-Rocket is easiest to configure and works on any hosting. The challenge is invalidation, when inventory changes, cached pages become stale. Good caching plugins automatically invalidate the cache when WooCommerce data changes.

Critical CSS and Render-Blocking Resources

Render-blocking resources (JavaScript and CSS) prevent the browser from displaying the page until fully loaded. If your page has 200KB of render-blocking CSS, the browser waits 400ms just to start rendering.

Critical CSS is the CSS required for above-the-fold content. By inlining critical CSS and deferring the rest, you dramatically improve Largest Contentful Paint (LCP).

Tools like Autoptimize and WP-Rocket can extract and inline critical CSS automatically, improving LCP by 20-40%.

Plugin Bloat and JavaScript Execution Overhead

Every plugin adds code to your site. A typical WooCommerce store runs 15-25 plugins, each adding JavaScript files the browser must download, parse, and execute. By the time all JavaScript finishes, 2-3 seconds have passed, your entire performance budget.

Auditing and Removing Unnecessary Plugins

List every active plugin and ask: "Do I actually need this?" Deactivating unused plugins immediately improves performance.

Next, identify plugins loading on every page. Some are necessary; others only need to load on specific pages. Deferring plugin loading reduces initial page load time.

Audit which plugins load JavaScript using browser DevTools Network tab. Consider replacing multiple plugins with single, more efficient alternatives.

Watch Out
Each plugin you remove reduces JavaScript execution time by 5-15% on average. Removing just 5 unnecessary plugins can improve page load time by 0.5-1 second.

Payment Gateway Latency and Checkout Performance

Payment gateway latency is the time your site takes to communicate with the payment processor (Stripe, PayPal, etc.). This happens on the checkout page and is outside your control.

When customers click "Place Order," your site sends payment information to the gateway. If the gateway is slow, the checkout page hangs. Stripe typically responds in 200-400ms; PayPal can take 600-1,200ms. Add network latency on 4G connections, and delays compound.

Professional illustration showing why your woocommerce site is slow

Monitoring Checkout Page Load Times

The checkout page is your most important page for performance and the hardest to optimize, you can’t cache it since every customer has different cart contents and pricing.

Use DebugBear or similar tools to monitor checkout page load time continuously. Set alerts for when it exceeds 3 seconds. Most checkout slowdowns fall into three categories: database queries (inventory checks, pricing), JavaScript execution (form validation), or payment gateway latency.

Use Query Monitor to check database query count and time, then use browser DevTools to check JavaScript execution time. If both are reasonable but checkout is still slow, the problem is likely gateway latency.

Mobile-First Performance and Core Web Vitals

Google’s Core Web Vitals are now a ranking factor, measuring Largest Contentful Paint (LCP), First Input Delay (FID), and Cumulative Layout Shift (CLS). Mobile users are more sensitive to performance issues than desktop users. A page feeling fast on desktop might feel sluggish on 4G.

Mobile devices have less CPU power, less memory, and slower connections than desktops. A 2MB JavaScript bundle snappy on desktop can take 5+ seconds to execute on mobile.

Testing Beyond PageSpeed Insights

PageSpeed Insights tests under ideal conditions. Use WebPageTest or Lighthouse to test under throttled network conditions (3G, 4G) to see real-world performance.

Real User Monitoring (RUM) tools like Sentry or New Relic show actual performance data from real visitors, often 30-50% different from synthetic testing data.

The most important metric for WooCommerce stores is "Time to Interactive" (TTI) on mobile. If TTI exceeds 5 seconds, you’re losing mobile customers.

Performance Metric Good Acceptable Poor
TTFB Under 600ms 600-1000ms Over 1000ms
LCP Under 2.5s 2.5-4s Over 4s
FID Under 100ms 100-300ms Over 300ms
CLS Under 0.1 0.1-0.25 Over 0.25
Mobile TTI Under 3.5s 3.5-5s Over 5s

Slow WooCommerce performance isn’t inevitable, it results from specific, fixable problems. The best-performing stores understand their bottlenecks and address them systematically.

At Web Maniacs, we help e-commerce teams identify and fix performance killers slowing their sites. Our team analyzes hosting stack, database structure, caching configuration, and payment gateway integration to find where you’re losing milliseconds, then implements targeted fixes that improve TTFB, reduce JavaScript execution time, and optimize checkout experience. If your WooCommerce store is losing customers to slow performance, Web Maniacs performance optimization services can help you recover that lost revenue.

Frequently Asked Questions

What is a good page load time for WooCommerce?

Most e-commerce sites should aim for a TTFB under 600ms and a full page load under 3 seconds. However, why your WooCommerce site is slow often depends on your specific hosting and configuration. Core Web Vitals, including Largest Contentful Paint (LCP) under 2.5 seconds, are critical for both user experience and search rankings. Use DebugBear or similar tools to monitor actual performance metrics beyond basic PageSpeed Insights scores.

How can I optimize WooCommerce for better speed using caching plugins?

WooCommerce caching plugins like WP-Rocket enable object caching, server-level caching, and minification of CSS and JavaScript. Start by enabling page caching for static content, then implement object caching to reduce database queries. Use critical CSS to defer non-essential stylesheets, and enable Gzip compression. Most caching plugins integrate with CDN services to further reduce latency. Test with Query Monitor to see how many database queries each page generates before and after optimization.

Does WooCommerce database optimization really impact site speed?

Yes, significantly. WooCommerce database optimization removes expired transients, cleans up autoloaded options, and deletes unnecessary log entries. Over time, these accumulate and slow down every database query. Use Query Monitor to identify slow queries, then audit your WooCommerce logs and transients table. Many stores see 20-40% speed improvements after removing bloat. Regular cleanup prevents performance degradation from recurring.

Why is my WooCommerce checkout page so slow?

Checkout slowness often stems from payment gateway latency, excessive plugins running on the checkout page, or render-blocking JavaScript. Disable non-essential plugins on checkout pages, enable lazy loading for images, and test payment gateway response times separately. Minify JavaScript and CSS to reduce execution time. Use DebugBear or similar tools to identify whether the delay is client-side (your site) or external (payment processor). Mobile-first testing is critical, as checkout latency disproportionately affects mobile conversions.

This article was written using GrandRanker

Why Local SEO Results Take 3 Months: A Technical Breakdown

Table of Contents

Why Local SEO Results Take 3 Months: A Technical Breakdown

Last Updated: July 7, 2026

Understanding why local SEO results take 3 months requires looking at how Google’s systems actually work. At Web Maniacs, we’ve tracked hundreds of local optimization campaigns, and the pattern is consistent: meaningful ranking improvements almost never appear before the 90-day mark. This timeline is driven by technical constraints in how search engines index, trust, and rank local business information.

Why Local SEO Results Take 3 Months: The Core Reasons

The 3-month timeline exists because Google needs time to accomplish three critical tasks: discover your optimized content, build trust in your business signals, and observe user behavior patterns that confirm your relevance.

Google’s Indexation and Crawl Budget Constraints

Google doesn’t crawl every page daily. Your website receives a finite crawl budget, the number of pages Google’s bots will visit in a given timeframe. When you make changes to your Google Business Profile or on-page content, Google must first discover those changes through crawling, then process them through its indexation pipeline.

Initial crawls might happen within days, but indexation, actually adding your updated content to Google’s searchable index, takes 2-4 weeks. During this period, your changes exist on your website but haven’t been processed into the ranking algorithm. Google prioritizes crawl budget for established, high-authority domains, so newer businesses receive less frequent crawls.

Pro Tip
Submit your Google Business Profile and website sitemap directly to Google Search Console to signal that you have updates worth crawling immediately, rather than waiting for the next scheduled crawl cycle.

Trust Signals and Domain Authority Development

Trust signals accumulate slowly. Google evaluates your business through NAP consistency (Name, Address, Phone), backlinks from authoritative local sources, review volume, and user behavior patterns. A single review or handful of backlinks won’t move rankings, but dozens of reviews, consistent citations across directories, and positive engagement create a meaningful pattern.

Domain authority grows incrementally as trust signals accumulate. According to Moz’s domain authority research, sites that see the fastest authority growth maintain consistent optimization efforts over 60-90 days. The algorithm updates that process these trust signals run periodically, not in real-time, which means newly accumulated signals might not affect rankings until the next algorithm update cycle.

User Behavior Signals and Click-Through Rate Data

Google increasingly relies on user behavior to validate rankings. If users click your result and spend time on your site without returning to search results, Google interprets that as a successful match. Collecting enough user behavior data to influence rankings takes time, you need dozens of clicks and interactions before the pattern becomes statistically significant.

In the first month, most local businesses don’t generate enough search visibility to collect meaningful click-through data. By month three, you have enough user signals for the algorithm to adjust your rankings based on actual user satisfaction.

Factors Affecting Local SEO Ranking Speed

Not every local business waits the full three months. Some see results in 6-8 weeks, while others take 4-5 months. Several variables affect this timeline.

Local Competition and Market Saturation

In markets with minimal local competition, you might see ranking improvements in 6-8 weeks. In highly competitive markets like major metropolitan areas with dozens of established competitors, you’re more likely to wait the full 3-4 months or longer.

Established competitors have accumulated years of authority, citations, and user signals. Breaking through requires either outperforming them significantly on new signals or finding underserved keyword opportunities where competition is weaker.

Watch Out
Highly competitive markets (dentists, plumbers, lawyers in major cities) frequently take 4-6 months to show meaningful results. Plan for extended timelines and don’t panic if month three shows only modest improvements.

NAP Consistency and Local Citations

Your NAP information must be identical everywhere it appears online. If your business name is listed as "Smith Plumbing" on your website but "Smith’s Plumbing" on Google Business Profile, Google struggles to connect these as the same business.

Building local citations, mentions on directories like Yelp, Apple Maps, and chamber of commerce sites, takes time. Each citation is a trust signal. A comprehensive citation-building campaign typically takes 4-8 weeks to complete, with citations continuing to trickle in beyond that timeframe.

Keyword Difficulty and Search Intent Alignment

Long-tail keywords with lower search volume rank faster than short, competitive keywords. "Emergency plumber in Portland, Oregon" is easier to rank for than "plumber." Targeting keywords that match your actual business and location accelerates results. If your content clearly matches what people are searching for, you’ll rank faster than if there’s ambiguity.

Google Business Profile Optimization Tips for Faster Results

Your Google Business Profile is the single most important asset for local SEO. It appears directly in Google Maps and local search results.

Complete Profile Setup and Review Velocity

A complete Google Business Profile includes all available fields: business name, address, phone, website, categories, hours, service areas, photos, description, and attributes. Incomplete profiles rank lower because Google interprets missing information as a sign of inactivity.

Start collecting reviews immediately. Review velocity, the rate at which new reviews arrive, is a ranking signal. A business that gets five reviews in the first month signals activity and legitimacy. Encourage your first customers to leave reviews during the initial optimization period.

Posts, Photos, and Local Search Visibility

Google Business Profile posts signal activity. Posting twice per month shows Google that your profile is actively maintained. Photos are equally important: a business with dozens of high-quality photos ranks higher than one with few or none.

Treat your Google Business Profile like an active marketing channel. Update it weekly with new photos and posts about seasonal offers or staff highlights. This consistent activity accelerates the trust-building process.

Business owner reviewing analytics dashboard on computer screen showing local search performance metrics and ranking improvements over time

The 3-Month Timeline: What Happens in Each Phase

The three-month window is when three distinct phases of optimization reach completion.

Month 1: Initial Indexation and Baseline Establishment

In the first 30 days, Google discovers and processes your optimizations. Your website changes get crawled and indexed. Your Google Business Profile updates are recorded. Initial reviews and citations start accumulating.

During this phase, you typically see no ranking improvement. What matters most is execution: complete your profile fully, optimize your on-page content for local keywords, build initial citations, and encourage the first wave of reviews.

Month 2: Algorithm Updates and Ranking Fluctuations

By the second month, Google has enough new data to begin adjusting rankings. You might see movement, sometimes up, sometimes down. Ranking fluctuations are normal as the algorithm processes accumulated signals and recalibrates your position relative to competitors.

You’ll likely see increased search impressions by month two. Some businesses see their first meaningful ranking improvements in month two, particularly if they’re targeting less competitive keywords.

Month 3: Stabilization and Long-Term Results

By month three, sufficient trust signals have accumulated for Google to make confident ranking decisions. Most businesses see their most significant ranking improvements between weeks 8-12. Rankings tend to stabilize around this timeframe as the algorithm settles on your position.

This is the inflection point where local SEO transitions from investment phase to maintenance phase. Your rankings are now established, though continued optimization in months four and beyond will push you higher.

Measuring Local SEO Success Beyond Rankings

Rankings are a lagging indicator. More useful metrics to track during the 3-month window include organic traffic, conversion rate, and visibility in Google Maps pack results.

Organic Traffic, Conversion Rate, and ROI Metrics

Organic traffic from local search might increase before rankings improve significantly. Tracking organic traffic in Google Analytics gives you earlier visibility into whether your optimization is working.

Conversion rate, the percentage of visitors who take a desired action like calling or submitting a contact form, matters more than raw traffic. ROI is the ultimate metric: are the leads you’re generating from local search worth more than the cost of optimization?

Google Maps Pack Visibility and SERP Features

The Google Maps pack, the three local business results at the top of local search results, is the most valuable real estate in local search. Appearing in the pack is worth significantly more than a position 5-10 in organic results below it.

Tracking your visibility in the Maps pack is more important than tracking organic ranking position. Many businesses achieve Maps pack visibility in month two or three, even if organic rankings haven’t moved dramatically.

Common Mistakes That Delay Local SEO Results

Inconsistent NAP information across your website, Google Business Profile, and citations creates confusion that delays trust accumulation. Standardize your business information everywhere before you start optimizing.

Neglecting reviews and citations during the first month wastes the window when these signals have the most impact. Targeting overly competitive keywords without geographic specificity also delays results. "Family law attorney in Portland" is more realistic than "lawyer."

Over-optimizing or keyword stuffing your content backfires. Content that reads naturally for humans ranks better than content optimized to the point of being awkward.

Accelerating Local SEO: Technical Optimization and On-Page Strategy

While you can’t eliminate the three-month timeline, you can optimize within it to maximize results.

Technical SEO, ensuring your website loads quickly, works on mobile devices, and is properly structured, removes friction from Google’s crawling and indexing process. On-page optimization for local keywords ensures Google understands what your business does and where it operates.

Building backlinks from local sources like local news sites and chamber of commerce directories accelerates authority development. These links carry more weight for local search because they signal local relevance.

Key Takeaway
The three-month timeline is driven by Google’s need to index your content, accumulate trust signals, and observe user behavior patterns. Aggressive optimization in month one maximizes the signals available by month three, potentially pushing you into the top rankings by the end of the quarter.

Conclusion: Setting Realistic Expectations for Local SEO Growth

The three-month timeline reflects how search engines actually work, not arbitrary delays. Understanding the technical reasons behind the wait helps you stay committed during the quiet first month when results aren’t visible.

The businesses that succeed with local SEO treat the first 90 days as a concentrated optimization sprint. They complete their Google Business Profile fully, optimize their website for local keywords, build citations aggressively, and encourage reviews consistently. By month three, this concentrated effort pays off with visible ranking improvements and increased local search traffic.

Google’s Local Search Guide provides official documentation on how local search works and what factors Google considers. The difference between a business that ranks in month three and one that waits until month six often comes down to execution quality during month one.

Timeline Phase Key Activities Expected Outcomes Metrics to Track
Month 1: Indexation Profile completion, on-page optimization, initial citations Content indexing, baseline establishment Indexation rate, citation submissions
Month 2: Processing Review collection, continued citations, content updates Algorithm processing, ranking fluctuations Impressions, ranking movement
Month 3: Stabilization Momentum maintenance, user signal optimization Ranking stabilization, traffic increases Rankings, organic traffic, conversions

Frequently Asked Questions

Why does local SEO take 3 months to show results?

Local SEO takes approximately 3 months because Google needs time to crawl, index, and evaluate your website's credibility through trust signals. During this period, search engine algorithms assess your Google Business Profile optimization, backlink profile quality, NAP consistency, and user behavior signals like click-through rate and bounce rate. Additionally, Google must observe sufficient data to determine your relevance for local search queries before positioning you prominently in local search rankings or the Google Maps pack.

What factors affect how fast local SEO results appear?

Key factors affecting local SEO ranking speed include local competition levels in your market, domain authority of your existing site, NAP consistency across citations, keyword difficulty of your target terms, and the completeness of your Google Business Profile. Technical SEO elements like crawl budget efficiency, proper geographic targeting, and on-page optimization also influence speed. Additionally, review velocity, backlink profile strength, and algorithm updates can accelerate or delay initial visibility in local search results.

How can I speed up local SEO results in the first 3 months?

Accelerate local SEO by fully optimizing your Google Business Profile with complete information, high-quality photos, and regular posts. Ensure NAP consistency across all local citations and build a strong backlink profile through relevant local partnerships. Focus on technical SEO by improving crawl budget efficiency and site speed. Encourage customer reviews to boost review velocity and trust signals. Create locally-relevant, keyword-optimized content addressing search intent. Monitor ranking fluctuations and adjust your strategy based on algorithm updates and competitor activity.

What KPIs should I track beyond rankings during the 3-month local SEO timeline?

Beyond rankings, measure organic traffic growth, conversion rate improvements, and ROI from local search efforts. Track Google Maps pack visibility and SERP features appearance. Monitor click-through rate from search results, bounce rate, and user engagement metrics. Assess local citation quality and review velocity. Measure business growth indicators like phone calls, form submissions, and in-store visits attributed to local search. These KPIs provide a complete picture of local SEO success and business impact beyond simple ranking position changes.

This article was written using GrandRanker

Rank on Google Maps Without a Website: 2026 Guide

Table of Contents

Last Updated: July 6, 2026

Why You Can Rank on Google Maps Without a Website

Learning how to rank on Google Maps without a website is entirely possible. Google Maps operates on its own ranking algorithm that prioritizes business information completeness, customer engagement, and local relevance over website presence. Your Google Business Profile is the storefront Google uses to rank you. When someone searches for your service in your area, Google evaluates your profile’s optimization level, review quality, and consistency across local directories before considering whether you have a website. Many successful plumbers, electricians, cleaners, and contractors rank in the top three map results with nothing but a solid Google Business Profile and strategic review generation.

Below, we’ll walk through the exact steps to build authority in your local market, convert customers through direct messaging and click-to-call features, and maintain long-term visibility without website management overhead.

Step 1: Create and Verify Your Google Business Profile

Your Google Business Profile is non-negotiable. Start by visiting Google Business Profile signup and entering your business name, service area, and contact information. Choose your primary business category carefully, specificity matters. If you’re a plumber, select "Plumber" not "Home Services."

Understanding the Verification Process

Google requires verification to prevent fake listings. The most common method is postal mail verification, where Google sends a postcard with a verification code to your business address within 5-10 business days. For service area businesses without a physical storefront, Google may require phone verification instead, where you receive a call with a verification code.

The verification process signals trust to Google’s local search algorithm. Verified profiles receive a trust boost that unverified ones never achieve, regardless of review count or optimization level.

Technical Verification Workarounds for Service Area Businesses

If you operate a service area business without a fixed location, use your actual home address or principal place of business. Google will not display your home address publicly; customers see only your service area. Alternatively, register a legitimate commercial mailbox service and use that address.

Watch Out
Using a fake address or virtual office is the fastest way to lose your [Google Maps ranking](/how-to-improve-local-google-maps-ranking/) permanently. Google’s spam detection catches these within weeks, and your profile will be suspended.

Complete every section of your profile. Add a 250-word business description summarizing what you do, who you serve, and what makes you different. Include your service areas explicitly, if you serve five neighborhoods, name them. Add business hours and holiday hours, and mark whether you’re open now.

NAP Consistency Across All Local Citations

NAP stands for Name, Address, Phone. Consistency across your Google Business Profile, local directories, and any website is a major ranking factor. Google uses NAP consistency to verify your business legitimacy.

Audit every directory where you appear: Yelp, Apple Maps, Facebook, and industry-specific directories. Ensure your business name, address, and phone number match exactly. Even minor variations like "John’s Plumbing" vs. "Johns Plumbing" create ranking penalties.

Create a spreadsheet listing every directory where you appear and update inconsistencies immediately. According to Google’s local search best practices guide, NAP consistency is one of the top three local SEO ranking factors for businesses without websites.

Directory Business Name Address Phone Status
Google Business Profile Your Business Full Address (555) 123-4567 ✓ Verified
Yelp Your Business Full Address (555) 123-4567 Needs Update
Facebook Your Business Full Address (555) 123-4567 ✓ Current
Industry Directory Your Business Full Address (555) 123-4567 ✓ Current

Selecting the Right Business Categories and Attributes

Choose your primary category first, this is your main business type. Then add secondary categories that describe additional services. If you’re a contractor offering both plumbing and electrical work, list "Plumber" as primary and "Electrician" as secondary.

Attributes refine your definition: "Wheelchair accessible," "Accepts credit cards," "Offers virtual consultations," "Same-day service available." Select attributes that apply to your business. Each attribute increases your visibility in searches where users filter by that criterion.

Pro Tip
Add the “Online appointments” attribute even if you don’t yet offer them. This signals to Google that you’re modern and customer-focused.

Step 3: Build Authority Through Reviews and Local Citations

Reviews are the currency of local search ranking. Ask customers for reviews immediately after service completion via text message with a direct link to your Google review page. Respond to every review within 48 hours.

Responding to Customer Feedback Strategically

Positive reviews deserve gratitude: "Thank you for the kind words. We loved working with you and hope to serve you again soon."

Negative reviews require acknowledgment without defensiveness: "We’re sorry your experience didn’t meet expectations. Please contact us directly at [phone number] so we can make this right."

Research from BrightLocal’s local search ranking factors study shows that businesses responding to all reviews see 25% higher click-through rates from Google Maps than those who ignore feedback.

Encourage satisfied customers to leave reviews on secondary platforms: Yelp, Facebook, and industry-specific directories. Google weighs reviews from authoritative third-party sites more heavily than reviews from your own website.

Step 4: Use High-Quality Photos and Google Posts

Photos are visual proof of your work. Upload 10+ photos of your work, team, facility, and business in action. For service businesses, before-and-after photos are especially valuable. Update your photos monthly, Google’s algorithm boosts profiles with recent activity.

Google Posts are short-form content updates that appear in your profile for seven days. Use them to announce promotions, new services, or seasonal offers: "Spring plumbing maintenance special: 20% off inspections this month. Call today." Include a call-to-action button.

Close-up of a smartphone screen displaying a fully optimized Google Business Profile with all sections filled in, business name, address, phone number, high-quality photos of completed work, customer reviews with ratings, and recent Google Posts visible

Local SEO Ranking Factors for 2026 and Beyond

Google’s local search algorithm prioritizes five core factors: proximity, relevance, prominence, review signals, and consistency. Proximity is fixed, but relevance is controllable. Use location-specific keywords in your business description and Google Posts. If you serve downtown and the suburbs, mention both areas by name.

Prominence comes from reviews, citations, and local mentions. Review velocity matters more than total review count, a business that gained five reviews this month ranks higher than one with 50 reviews from two years ago. Consistency across all platforms tells Google your business is legitimate and well-managed.

Conversion Optimization for Businesses Without Websites

Ranking is worthless if customers can’t convert. Your profile must make it effortless for customers to contact you. Include your phone number prominently and enable the "Call" button so customers can tap and dial directly.

Click-to-Call and Direct Messaging Strategies

Click-to-call is your highest-converting feature. When a mobile user taps your phone number, their phone immediately dials you. Monitor your call volume, Google reports the number of calls your profile generates each month.

Enable messaging on your Google Business Profile if your business type supports it. Respond to messages within one hour during business hours. Fast response times increase conversion rates.

Key Takeaway
Direct messaging converts better than phone calls for customers who want to ask questions first. Enable it, respond quickly, and treat it as your primary customer acquisition channel.

Competitor Analysis for Site-Less Entities

Search for your primary service keywords in your service area and examine the top three Google Maps results. Check their profile completeness, photo count, business description, and review responses. Look for gaps you can exploit.

Monitor your competitors’ review velocity. If a competitor suddenly receives five reviews per week, they’re running a review generation campaign. Increase your own review requests to keep pace.

Common Mistakes That Hurt Your Google Maps Ranking

Incomplete profile information ranks poorly, Google interprets incompleteness as a signal that the business is inactive. Inconsistent NAP information across directories creates ranking penalties. Ignoring reviews appears unengaged. Fake addresses violate Google’s policies and result in profile suspension. Neglecting photo updates signals inactivity. Not requesting reviews from customers is a missed opportunity.


Ranking on Google Maps without a website requires discipline around profile optimization, review management, and NAP consistency. The businesses dominating local search in 2026 aren’t the ones with flashy websites. They’re the ones with complete, well-maintained Google Business Profiles and consistent customer engagement.

Web Maniacs specializes in comprehensive Google Local Optimization services that strengthen your local search visibility and increase online customer acquisition. Our team handles Google Business Profile optimization, review generation strategies, local citation management, and conversion optimization. Get started with Web Maniacs and transform your Google Maps ranking into a consistent source of qualified customer leads.

Frequently Asked Questions

Is a website necessary to rank on Google Maps?

No. A robust Google Business Profile can rank on Google Maps and in the local pack without a website. However, a website enhances credibility and allows deeper conversion optimization. Focus on NAP consistency, customer reviews, and complete profile information. Many service area businesses rank highly using only Google Business Profile optimization and local citations.

How can I improve my Google Maps ranking without a website?

Optimize your Google Business Profile with accurate NAP information, high-quality photos, and detailed business descriptions. Build customer reviews and respond to feedback. Maintain NAP consistency across local directories and citations. Use Google Posts to share updates. Add business attributes and select relevant categories. Ensure your service area is clearly defined if you're a service area business. These ranking factors directly impact local search visibility.

What are the most important Google Maps ranking factors for businesses without websites?

Key local SEO ranking factors include NAP consistency, customer reviews and ratings, Google Business Profile completeness, proximity to search location, business categories and attributes, local citations, user engagement (clicks and calls), and review recency. For service area businesses, clearly defining your service area is critical. Google Maps ranking factors in 2026 continue to prioritize trust signals like verified information and customer feedback over website presence.

How do I get my business on Google Maps without a domain?

Create a Google Business Profile through Google Search or Google Maps. Verify your business using the postcard verification method or phone verification if available. Provide complete information: business name, address, phone number, business description, and photos. If you're a service area business, you may use a service area instead of a physical address. Complete verification is essential for ranking on Google Maps.

This article was written using GrandRanker
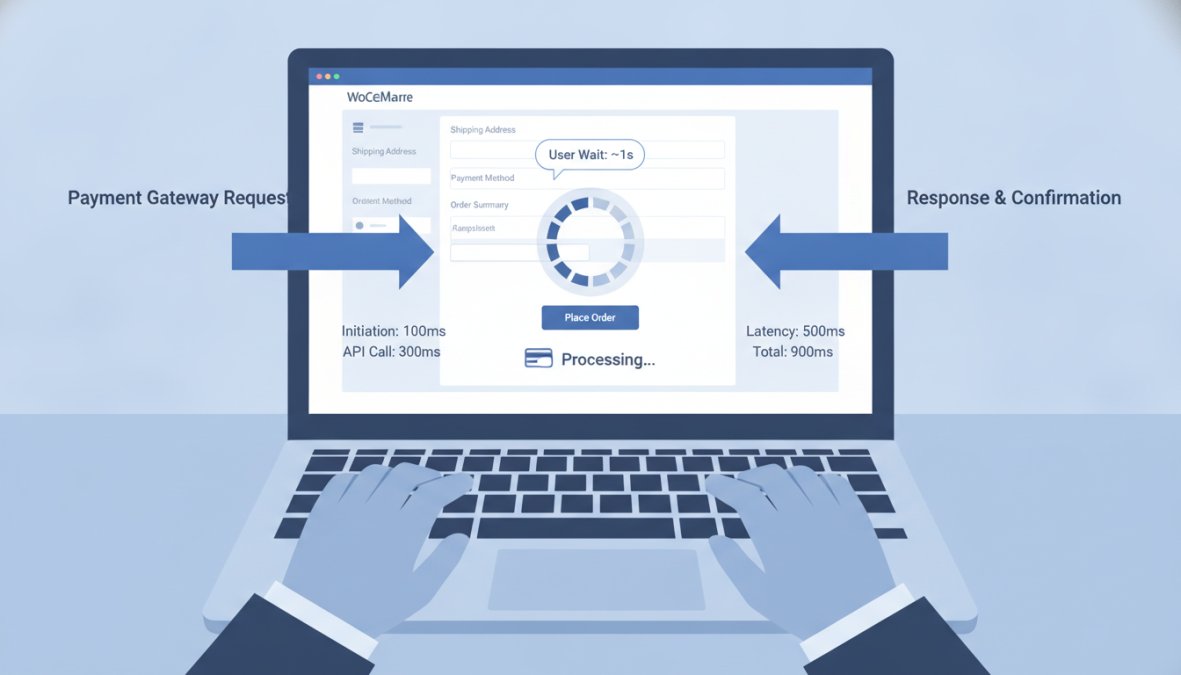
Local SEO vs National SEO for Startups: A 2026 Guide

Table of Contents

Last Updated: July 5, 2026

Local SEO vs National SEO for Startups: Key Differences Explained

Understanding the distinction between local SEO vs national SEO for startups is critical for allocating your limited marketing budget effectively. Local SEO targets customers within a specific geographic area, while national SEO targets keywords and audiences across the entire country. For a startup with limited resources, this distinction determines whether you win or lose in your market.

What Is Local SEO?

Local SEO optimizes your online presence to attract customers searching for your products or services within a specific geographic location. When someone searches "plumber near me," they’re triggering local search results. Your goal is to appear in the Google Local Pack, the three map listings at the top of search results.

Local SEO relies on four pillars: your Google Business Profile, citation consistency across business directories, local backlinks, and customer reviews. Unlike national SEO, which focuses on domain authority and broad keyword rankings, local SEO emphasizes geographic relevance and trust signals from your immediate market.

What Is National SEO?

National SEO targets search queries without geographic modifiers. When someone searches "best project management software," they’re not specifying a location. National SEO requires building domain authority, creating comprehensive content that outranks competitors nationwide, and earning backlinks from high-authority websites.

National SEO is more competitive, takes longer to show results, and demands significantly more content and technical SEO work. However, ranking nationally for high-volume keywords can drive thousands of qualified leads monthly.

Local SEO Ranking Factors That Drive Startup Growth

Local search rankings depend on specific factors that differ from national SEO: Google Business Profile optimization, NAP consistency, review volume and quality, and local citation authority.

Google Business Profile Optimization

Your Google Business Profile (GBP) is the single most important asset for local SEO. A complete, optimized profile can drive 30% more clicks than an incomplete one.

Optimization involves: use your actual business name (not keywords), select the most relevant primary category, add all service areas if location-independent, upload high-quality photos and videos regularly, respond to all reviews within 48 hours, and keep hours and contact information current. Post weekly updates about promotions, new products, or events to signal activity to Google.

Pro Tip
Add a direct call-to-action link in your GBP description. Instead of just describing your business, include “Book now” or “Get a free quote” with a direct link. This reduces friction and increases conversion rates from local searches.

NAP Consistency and Citation Building

NAP stands for Name, Address, Phone number. Google uses NAP consistency to verify your business legitimacy. If your business name appears as "Acme Plumbing" on your website but "Acme Plumbing Services" on Yelp, Google gets confused about whether these are the same business.

Citation building means getting your business listed on relevant directories: Yelp, Apple Maps, Facebook Business, industry-specific directories, local chambers of commerce, and local review sites. Each citation acts as a vote of confidence. Start with the top 20 high-authority directories in your industry, including Google Business Profile, Yelp, Facebook, Apple Maps, Better Business Bureau, and your local chamber of commerce. Tools like BrightLocal can automate citation building and monitor consistency.

Local Pack Visibility and Review Management

The Local Pack is where most local clicks happen. To rank in the Pack, you need a complete GBP, consistent citations, and a strong review profile. Reviews serve as social proof and ranking signals simultaneously.

Encourage customers to leave reviews immediately after purchase or service completion. Respond to every review, positive and negative. Negative reviews that receive thoughtful, professional responses actually increase trust more than businesses with no negative reviews.

How to Scale SEO From Local to National: A Startup Roadmap

Smart startups follow a three-phase approach that builds on early wins and accumulates domain authority before attempting national competition.

Phase 1: Dominate Your Local Market First

In the first 3-6 months, focus exclusively on becoming the dominant local result in your area. Optimize your GBP, build 15-20 consistent citations, and accumulate 20+ reviews with an average rating above 4.5 stars. Target local long-tail keywords like "best [service] in [city]."

Step-by-step visual guide for local seo vs national seo for startups

This phase builds momentum and early revenue. Local customers are easier to convert because proximity builds trust. You also generate case studies and testimonials that become social proof for your national expansion later.

Once you’re dominating locally (typically 6-12 months in), expand your content strategy to build domain authority. Create comprehensive guides, case studies, and resource pages that attract backlinks from high-authority websites.

Develop 5-10 pillar content pieces that address core problems your customers face. Reach out to industry publications, relevant blogs, and local news outlets for backlink opportunities. A single backlink from a domain authority 50+ site is worth more than 50 links from low-authority sites.

Watch Out
Many startups spend 6 months building local authority, then immediately try to rank for competitive national keywords. This fails because you lack the domain authority to compete. Expect 12-18 months of content and backlink building before you see meaningful national rankings.

Phase 3: Expand to Multi-Region and National Keywords

After 12-18 months of building authority, you’re ready to target broader geographic areas and national keywords. Create content targeting multiple regions, expand your service areas, and pursue higher-volume keywords with more national intent.

This phase is where SEO budget typically increases significantly. You may hire an SEO specialist or partner with an agency.

SEO Budget for Startups: Local vs National Investment

Budget allocation depends on your chosen strategy. Local SEO requires less investment upfront but demands consistency. National SEO requires more capital but scales better as you grow.

Local SEO Budget Allocation

A lean local SEO budget for a startup allocates: 40% tools and software, 30% content creation, 20% local link building and citations, 10% review management and GBP optimization.

For a $2,000 monthly budget, allocate approximately $800 to tools (BrightLocal, Semrush’s local features), $600 to content creation (1-2 blog posts monthly), $400 to local citation building, and $200 to review management. Local SEO generates positive ROI within 3-4 months because competition is lower and customer intent is higher.

National SEO Budget Allocation

National SEO demands a larger investment: 25% tools, 40% content creation, 20% link building, 10% technical SEO, 5% analytics and reporting.

A $5,000 monthly national SEO budget allocates $1,250 to tools, $2,000 to content creation (4-6 comprehensive pieces monthly), $1,000 to link building and PR outreach, $500 to technical SEO, and $250 to analytics. National SEO ROI takes 6-12 months to materialize because you’re competing against established sites with higher domain authority.

Hybrid SEO Strategy for Resource-Constrained Startups

The hybrid approach combines local and national efforts on a modest budget. This strategy works best for startups with geographic expansion plans or service-based businesses that can scale regionally.

Phase Timeline Focus Monthly Budget Primary Goal
Local dominance Months 1-6 Local pack, reviews, GBP $1,500-2,500 Establish local authority
Regional expansion Months 7-12 Multi-location pages, regional keywords $2,500-4,000 Expand to 2-3 regions
National scaling Months 13+ Content authority, national keywords $4,000-6,000+ Compete nationally

The hybrid approach lets you test market demand locally before investing heavily in national expansion.

National SEO Tools and Platforms for Startup Growth

Choosing the right tools determines what data you can access and what optimizations you can make.

Semrush: Best for Hybrid Local-to-National Scaling

Semrush is an all-in-one platform that handles both local and national SEO equally well. It offers position tracking across geographic regions, keyword research with search volume and difficulty metrics, site audit functionality, and local business listing management.

The platform starts at $139.95 per month for the Standard plan, which includes tracking up to 5,000 keywords and 10 projects. Semrush excels at showing you exactly which keywords your competitors rank for and how their rankings have changed over time. This competitive intelligence is invaluable when planning your national expansion strategy.

Screenshot of semrush.com interface
Semrush: Your Unfair Advantage for Growing Brand Visibility
Best For
Startups planning to scale from local to national within 12-18 months who want a single platform for all SEO activities.

Ahrefs: Industry-Leading for Content and Authority Building

Ahrefs is known for the most comprehensive backlink database in the industry. For startups focused on content-driven growth and building domain authority, Ahrefs provides unmatched data on competitor backlinks, organic traffic analysis, and keyword difficulty metrics.

Starting at $99 per month, Ahrefs excels at helping you understand what content your competitors rank for and which backlinks drive their authority. The Keywords Explorer tool shows accurate search volume and keyword difficulty metrics, critical for identifying high-opportunity keywords where you can realistically compete.

Screenshot of ahrefs.com interface
Ahrefs—AI Marketing Platform Powered by Big Data

The trade-off is that Ahrefs has minimal local SEO tools. If your strategy is 80% national and 20% local, Ahrefs is the better choice.

BrightLocal: Specialized for Local Pack Dominance

BrightLocal is purpose-built for local SEO. It handles local rank tracking across multiple locations, citation building and monitoring, review management across platforms, and Google Business Profile audits.

Starting at $35 per month, BrightLocal is the most affordable option and the most specialized for local-focused startups. The Local Search Grid shows exactly where you rank in the Local Pack for your target keywords across multiple locations. The citation builder automates submission to 100+ directories, and the reputation manager consolidates reviews from Google, Yelp, Facebook, and other platforms into one dashboard.

Screenshot of brightlocal.com interface
BrightLocal – Local SEO Platform, Citations, Services, and APIs
Best For
Startups with 1-3 physical locations focused exclusively on local SEO for the next 12+ months.

When to Choose Local SEO vs National SEO for Your Startup

The decision between local and national SEO depends on your business model, market size, and growth timeline.

Choose Local SEO If…

You have a physical location or service area. Service-based businesses should prioritize local SEO because customer intent is geographic.

Your market is geographically constrained. If you operate in a single city or region, national rankings don’t drive customers.

You have limited budget. Local SEO delivers faster ROI and requires less investment. You can achieve meaningful results with $1,500-2,500 monthly.

You’re testing a new market. Before expanding nationally, dominate locally first to validate your business model and build domain authority.

Choose National SEO If…

You operate online without geographic constraints. SaaS products, digital services, and e-commerce businesses should target national keywords.

Your market is highly competitive and saturated locally. National expansion offers more opportunity.

You have sufficient budget and timeline. National SEO requires 12-18 months and $4,000+ monthly.

You have a scalable business model. National SEO makes sense for businesses that can handle increased volume.

Choose Both: The Hybrid Approach

Most smart startups begin with local SEO, then add national SEO as they grow. The timeline looks like: months 1-6 (local dominance), months 7-12 (regional expansion), months 13+ (national scaling). This phased approach reduces risk because you validate demand locally before investing heavily in national competition.

Common Startup SEO Mistakes to Avoid

Ignoring local SEO entirely. Many startups obsess over national rankings while ignoring their local market. Dominate locally first, then expand.

Inconsistent NAP information. If your business name, address, or phone number varies across websites and directories, Google can’t verify you’re legitimate. Audit your NAP across all directories and fix inconsistencies immediately.

Neglecting reviews. Reviews are ranking factors and conversion factors. A business with 10 reviews and a 4.8 rating outranks competitors with zero reviews.

Targeting the wrong keywords. A new startup can’t rank for "project management software" nationally. Start with long-tail keywords where you can win.

Underestimating timeline. Local SEO takes 3-6 months to show meaningful results. National SEO takes 12-18 months. Commit to at least 6 months before evaluating effectiveness.

Inconsistent content publishing. Consistency matters more than volume. Better to publish one post monthly consistently than three posts one month and nothing for six months.

Forgetting technical SEO. You can have perfect content and optimization, but if your site is slow, mobile-unfriendly, or has crawl errors, you won’t rank. Audit your site’s technical health monthly using tools like Semrush or Ahrefs.


Choosing between local SEO vs national SEO for startups is one of the most consequential decisions you’ll make. Most startups should begin with local SEO to build authority and prove their concept, then expand nationally as they grow.

If you’re building a startup that needs both a strong digital foundation and a clear SEO strategy, Web Maniacs combines custom website design with results-driven digital marketing to help you strengthen your brand identity and increase online visibility. Their team specializes in Google Local Optimization and can guide your transition from local to national as you scale.

Frequently Asked Questions

How do I know if my startup needs local or national SEO?

Assess your business model: local SEO suits service-based businesses (plumbers, dentists, salons) serving specific geographic areas. National SEO works for e-commerce, SaaS, or content-driven businesses targeting customers nationwide. Consider your target audience location, market saturation, and growth plans. Many startups benefit from a hybrid approach, dominating locally first, then scaling nationally as resources allow.

What are the main differences between local and national SEO for startups?

Local SEO focuses on geographic modifiers, Google Business Profile optimization, and local pack rankings within specific regions. National SEO emphasizes broad-match keywords, domain authority, backlink profiles, and content marketing at scale. Local SEO typically requires lower budgets and shows faster conversion rates. National SEO demands longer timelines but offers greater scalability and brand visibility across markets.

Can a startup do both local and national SEO at the same time?

Yes, through a hybrid SEO strategy. Start by optimizing for high-intent local keywords and building local pack visibility. Simultaneously, create long-tail keyword content and build backlinks targeting national search intent. This approach maximizes ROI by capturing immediate local leads while establishing domain authority for future national expansion. Tools like Semrush support both strategies within one platform.

How long does it take to see SEO results: local vs national?

Local SEO typically shows measurable results (improved local pack rankings, increased leads) within 3-6 months with consistent Google Business Profile optimization and citation building. National SEO requires 6-12 months to see significant organic search improvements due to higher competition and domain authority requirements. Startup success depends on keyword difficulty, market saturation, and technical SEO implementation quality.

Is national SEO more expensive than local SEO for startups?

Yes, generally. Local SEO budgets for startups range from $500-2,000/month for basic optimization. National SEO typically requires $2,000-5,000+/month for competitive keyword targeting, content creation, and link building. However, startup-specific budget allocation through hybrid strategies can balance costs. Platforms like Ahrefs ($99/month) and Semrush ($139.95/month) provide affordable entry points for scaling from local to national.

This article was written using GrandRanker

Local SEO for Service Area Businesses: Complete Guide

Table of Contents

Last Updated: July 4, 2026

What Is Local SEO for Service Area Businesses?

Local SEO for service area businesses focuses on optimizing your online presence to rank in Google Maps and local search results across multiple geographic areas you serve, without a fixed business address. Unlike a pizza shop with one location, service area businesses must prove relevance across multiple neighborhoods, cities, or regions simultaneously.

The core challenge is straightforward: Google’s algorithm wants to know where your business is located and where your customers are. Service area businesses break that expectation. You don’t have a single address to anchor your rankings. Instead, you need to build authority and relevance signals that convince Google you serve specific geographic areas legitimately. According to Google’s local search documentation, service area businesses must verify their legitimacy differently than storefront locations.

How SABs Differ From Storefront Businesses

Service area businesses operate under fundamentally different ranking rules than storefront locations. A dental office with a physical location has one geographic anchor point. Service area businesses don’t have that luxury. Your HVAC company might service a 50-mile radius, but Google needs proof that you actually operate in each area you claim.

This distinction shapes every decision in your local SEO strategy. A homeowner searching "emergency plumber near me" wants someone who serves their specific neighborhood. Your local SEO strategy must focus on building trust signals in each service area rather than competing on proximity alone. Citations, reviews, and location-specific content matter more than they do for storefronts.

Why Local SEO Matters for Service Area Businesses

Local search drives the highest-intent traffic available. According to BrightLocal’s local search consumer behavior report, 76% of people who search for local services on their mobile phone visit a business within 24 hours. That’s immediate purchase intent.

For service area businesses, this matters even more than retail. Your customers aren’t comparing you to five competitors in a shopping center. They’re searching "contractor near me" at 10 PM because their roof is leaking. Ranking in that moment means revenue.

Local SEO also costs far less than paid search for service area businesses. A well-optimized Google Business Profile and citation network generate qualified leads at a fraction of what you’d pay per click in Google Ads.

Pro Tip
Focus your initial local SEO effort on 3-5 geographic areas where you have the most existing customers. Build authority there first, then expand.

Google Business Profile Service Area Settings Explained

Your Google Business Profile is the central hub for local search visibility. For service area businesses, you don’t enter a service address. Instead, you hide your business address and define service areas, the specific regions where you operate.

The service areas setting allows you to specify cities, postal codes, or custom radius areas where you serve customers. A plumber in Denver might define service areas including Denver, Boulder, Littleton, and Aurora. This signals to Google that you’re relevant across those geographies without claiming you have offices in each location.

Setting Up Service Areas vs. Service Radius

Service areas let you manually select specific cities or regions where you operate. This approach works best when your service territory is irregular or covers multiple non-contiguous areas.

Service radius draws a circle around a central location. You specify a center point and a radius in miles. For most service area businesses, manually defined service areas outperform radius-based approaches. They give Google clearer signals about where you actually operate.

Watch Out
If you set a 50-mile service radius from your office but only actually service 30 miles in one direction, you’re telling Google you serve areas where you don’t operate. This erodes trust and can hurt your rankings.

Verification Without a Physical Location

When you set up a service area business profile, you can hide your address from public view. You still need a physical address for verification purposes, typically your office or home address. Google sends a postcard to this address to confirm you operate from there. Once verified, you hide the address so customers don’t see it in search results.

Many service area businesses skip the verification step entirely because they think they can’t verify without a public address. This is a critical mistake. Unverified profiles get suppressed in search results. Verification is non-negotiable.

Close-up of a smartphone screen displaying Google Business Profile with service area coverage map highlighted in blue, showing multiple city selections and hidden address setting

How to Rank a Service Area Business Without an Address

Ranking without a storefront address requires a different tactical approach. Your first priority is building citation consistency across your service areas. Citations are online mentions of your business name, address, and phone number (NAP). For service area businesses, this means listing your business in directories across each service area, even though your address is hidden.

Your second priority is location-specific content. Create landing pages for each major service area you serve. A plumber serving Denver and Boulder would create separate landing pages optimized for "plumber in Denver" and "plumber in Boulder."

Understanding Hidden Address Verification

When you create a Google Business Profile for a service area business, Google requires a real address for verification. This address doesn’t appear in search results or on your profile. It’s used only for the verification postcard process. Once verified, you mark the address as "hidden" and define your service areas instead.

The verification postcard arrives at your hidden address within 5-10 business days. You enter the verification code from the postcard into your Google Business Profile, and your profile becomes fully active.

Key Takeaway
The hidden address verification process is non-negotiable for service area businesses. Without it, your profile will remain unverified and suppressed in search results.

Building Authority Without a Storefront

Authority signals for service area businesses come from three sources: citations, reviews, and content. Citations are your primary authority builder. List your business in industry-specific directories, local business directories, and service-area-specific directories.

Reviews are your second authority builder. Encourage customers in each service area to leave reviews on your Google Business Profile. Reviews build trust with potential customers and signal to Google that you actually operate in that area.

Content is your third authority builder. Create location-specific landing pages and blog posts that target service-area keywords. A pest control company serving multiple counties would create content like "Termite treatment in Maricopa County" and "Bed bug removal in Pinal County."

Local SEO Checklist for Contractors and Service Providers

Task Priority Impact Timeline
Complete Google Business Profile with hidden address Critical Enables all other rankings Day 1
Verify profile with postcard Critical Activates profile in search Days 1-15
Define service areas in GBP Critical Targets correct geographies Day 2
Create location-specific landing pages High Builds geo-specific relevance Weeks 1-4
Build citations in 20+ directories High Establishes NAP consistency Weeks 2-6
Implement local schema markup High Helps Google understand service areas Week 1
Generate first 50 reviews High Builds trust and relevance signals Ongoing
Optimize Google Business Profile photos and posts Medium Improves click-through rate Week 2
Create location-specific blog content Medium Targets long-tail geo keywords Weeks 3-8
Set up review monitoring system Medium Manages reputation across areas Ongoing

On-Page and Technical Optimization Steps

On-page optimization for service area businesses focuses on location-specific relevance. Your homepage targets your primary service area. Your location pages target secondary and tertiary service areas.

Each location page should include the service area name in the title tag, a clear statement of the service area in the first paragraph, local keywords throughout the content, and a call-to-action specific to that area.

Technical optimization includes implementing local schema markup on your location pages. Schema markup tells Google explicitly what your business is, where you serve, and what services you offer. For service area businesses, the LocalBusiness schema with areaServed property is essential.

Your location pages should also include your NAP (name, address, phone number) consistently. Use the same formatting everywhere, consistency matters more than perfection.

Citation Building and NAP Consistency

Citations are online mentions of your business that don’t necessarily include a link. Building citations across your service areas is one of the highest-impact local SEO activities for service businesses.

Start with major directories: Google Business Profile, Apple Maps, Bing Places, and Facebook Business. Then move to industry-specific directories relevant to your service. Next, target local business directories in each service area.

NAP consistency is critical. Your business name, address, and phone number must be identical across all citations. If your business is listed as "ABC Plumbing" on one site and "ABC Plumbing Inc." on another, Google sees these as different businesses.

Pro Tip
Use a spreadsheet to track your citations as you build them. Record the directory name, URL, your NAP as listed, and the date you submitted. This prevents duplicate listings and helps you update information consistently.

Local SEO Strategy for Service Area Businesses: Key Tactics

Start with your existing customer base. Analyze where most of your current customers are located. These are your strongest service areas because you have real customer relationships and can generate reviews easily.

Next, identify underserved geographic areas where you want to grow. These are areas where you have capacity to take more business but currently lack visibility. Finally, identify areas you don’t serve and exclude them from your service area settings.

Geo-Targeted Keywords and Local Intent

Geo-targeted keywords combine your service type with a geographic modifier: "plumber in Denver," "emergency electrician Boulder," "roof repair near Littleton."

Identify the primary keywords for your service, then add geographic modifiers for each service area you target. Local intent keywords are your highest-priority targets. These keywords include geographic modifiers and indicate immediate need. Someone searching "emergency plumber" is ready to hire.

Create content targeting these high-intent geo-keywords. Your location pages should target keywords like "plumber in [City]" and "emergency plumber in [City]."

Location-Specific Landing Pages and Schema Markup

Location-specific landing pages are your primary tool for ranking across multiple geographies. Each page targets a specific service area and builds relevance signals for that location.

Your location pages should follow a consistent template but with unique content for each area. A template might include: service area introduction, services offered in that area, customer testimonials from that area, FAQ specific to that area, and a call-to-action.

The key is making each page genuinely unique. Include local landmarks, local challenges specific to that area, and customer stories from that location. Schema markup on location pages tells Google explicitly what you offer in each area. The LocalBusiness schema with areaServed property is essential.

Review Management and Reputation Building

Reviews are your most powerful local SEO tool for service area businesses. Each review builds trust with potential customers and signals to Google that you actually operate in that area.

Implement a systematic review generation process. After completing a job, send customers a follow-up email requesting a review. Make the process as easy as possible by including a direct link to your Google Business Profile review page.

Respond to all reviews, positive and negative. Positive reviews deserve a thank-you response. Negative reviews deserve a professional, helpful response that addresses the concern. Encourage reviews specifically from customers in each service area to build area-specific review signals.

Common Mistakes Service Area Businesses Make in Local SEO

The first mistake is not verifying their Google Business Profile. Unverified profiles get suppressed in search results. Verify your profile using your hidden address, then hide the address.

The second mistake is defining service areas too broadly. A contractor claiming to serve a 100-mile radius is less credible than one claiming to serve 10 specific cities. Define your service areas precisely based on where you actually operate.

The third mistake is inconsistent NAP data. Your business name, address, and phone number must be identical across all citations and your website. Use a spreadsheet to track your NAP and ensure consistency.

The fourth mistake is neglecting location-specific content. Create dedicated landing pages for each major service area.

The fifth mistake is not generating reviews systematically. Without a review generation process, you’ll lack critical authority signals.

The sixth mistake is ignoring local schema markup. Service area businesses especially need explicit schema markup to help Google understand their service areas and service offerings.

Conclusion

Local SEO for service area businesses requires a fundamentally different approach than storefront optimization. You’re building authority across multiple geographies without a single physical location anchor. This means your strategy must emphasize citations, location-specific content, and systematic review generation.

Businesses that implement this strategy see measurable results within 90 days. They rank for high-intent geo-keywords, attract qualified leads, and build sustainable competitive advantages in their service areas.


Service area businesses that want to dominate local search need a comprehensive strategy addressing Google Business Profile optimization, location-specific content, and citation consistency. Web Maniacs provides custom local SEO strategies that combine technical implementation with ongoing optimization. Our team handles Google Business Profile setup, location page creation, schema markup implementation, and citation building. Get started with Web Maniacs and build the local search foundation that generates qualified leads across your entire service territory.

Frequently Asked Questions

How do I set up service areas in Google Business Profile for local SEO?

In Google Business Profile, navigate to the 'Service Area' section and define the geographic regions where you operate. You can add multiple service areas by entering city names, postal codes, or drawing custom boundaries on the map. This helps local search engines understand your coverage area and improves your visibility in the local pack for searches within those regions. Ensure your service areas align with where you actually provide services to maintain credibility.

Does a service area business need a physical address for local SEO ranking?

No, service area businesses can rank without displaying a physical address. Google allows you to hide your address on Google Business Profile while still serving customers in defined service areas. However, you must provide a verified address during the verification process, it simply won't be public. This approach is ideal for contractors, plumbers, and mobile service providers who operate from home or don't maintain a customer-facing storefront.

What's the difference between local SEO for service area businesses vs. brick-and-mortar stores?

Service area businesses focus on geo-targeted keywords for multiple locations and rely heavily on service radius optimization, while brick-and-mortar stores emphasize proximity to their single address. SABs need location-specific landing pages for each service area, stronger review management across regions, and careful NAP consistency across directories. Both require Google Business Profile optimization, but SABs must manage multiple service areas and often use hidden address verification strategies.

What local SEO checklist should contractors follow to improve rankings?

Contractors should: (1) optimize Google Business Profile with complete service area coverage and high-quality photos; (2) ensure NAP consistency across all business directories and citations; (3) create location-specific landing pages for each service area; (4) implement local schema markup for service areas and business type; (5) build backlinks from local directories and industry sites; (6) actively manage and respond to customer reviews; (7) use geo-targeted keywords in on-page content; (8) track local search rankings using tools like BrightLocal or Local Falcon. This systematic approach strengthens your local search ecosystem visibility.

This article was written using GrandRanker

How to Manage Duplicate Google Business Listings

Table of Contents

Last Updated: July 3, 2026

Managing duplicate Google Business listings fragments your search presence. Instead of all your reviews, ratings, and customer interactions flowing into one verified profile, they scatter across multiple profiles, lowering visibility in local search and confusing customers. This guide covers how to identify hidden duplicates, merge profiles, and prevent them from returning.

Understanding Duplicate Google Business Profiles

Duplicate listings happen when multiple people at your organization create profiles without realizing one exists, when you’ve moved locations and the old address remains live, or when customers create profiles on your behalf. According to Google’s Business Profile Help Center, improper management of business locations is one of the top reasons for duplicate profiles appearing in search results.

NAP consistency, when your Name, Address, and Phone number don’t match across profiles, compounds the problem. Google’s algorithm uses NAP consistency to verify which listings belong to the same business. When your information varies between profiles, Google treats them as separate entities.

Watch Out
Each duplicate listing you leave unmanaged actively harms your local SEO. Search results become fragmented, customer reviews split across multiple profiles, and your overall visibility drops.

Step 1: Access Your Business Profile Dashboard

Start by going to Google Business Profile directly or by searching your business name in Google Maps. If you own the business, click "Own this business?" and complete verification, usually via postcard, phone, or email. Once verified, you’ll access your account summary, your control center for managing all aspects of your listing.

Log in using the Google account associated with your business. The account summary page displays your key metrics and any alerts about duplicate or inactive profiles. If you have multiple locations, the dashboard lets you manage each one separately from a single account, preventing accidental duplication.

Business owner viewing Google Business Profile dashboard on laptop screen showing account summary and duplicate locations tool
Pro Tip
Set up a single Google account for managing all your business profiles, even if you have multiple locations. Assign appropriate access levels to staff to prevent team members from accidentally creating duplicates.

Step 2: Identify Duplicate Locations in Google Maps

Finding duplicates requires both automated detection and manual searching. Start with Google’s built-in duplicate locations tool in your Business Profile dashboard. Navigate to the "Locations" section and look for alerts about duplicate profiles. Google’s system uses address matching and phone number verification to identify likely duplicates.

However, Google’s automated detection isn’t foolproof. Manually search for your business in Google Maps and Google Search using your business name, your business name plus your city, and variations of your business name. Look through the results carefully for multiple listings you don’t recognize.

Audit all your listings to ensure perfect NAP consistency. Your Name, Address, and Phone number should be identical across all verified profiles. Even a missing suite number or different phone extension can create problems and cause Google to treat listings as separate businesses.

Key Takeaway
The most effective duplicate detection combines Google’s automated flagging with manual searches. Don’t rely on Google’s system alone; actively search for your business name and look for profiles you don’t recognize or control.

Step 3: Merge or Remove Duplicate Business Profiles

Once you’ve identified duplicates, you have two main options: merge them into one verified listing or remove the duplicate profile entirely.

Merging duplicate profiles is the preferred approach when you own both profiles or have access to both. When you merge, Google combines all information, reviews, photos, posts, and customer interactions into a single primary listing. To merge profiles, go to your Business Profile dashboard, find the duplicate location, and select the merge option. Choose the profile with the most complete information and highest review count as your primary listing. The merge process typically takes a few days, and reviews from the merged profile appear on your primary listing.

Removing a duplicate profile entirely is necessary when you don’t own or control the duplicate. You can suggest edits to flag incorrect information, or file a redressal complaint form with Google if the profile violates their policies. The removal process takes 2-4 weeks because Google manually reviews your request. Document everything: take screenshots of both profiles showing they’re duplicates, note the address and phone number, and provide this evidence to Google’s support team.

Watch Out
Don’t attempt to “claim” a duplicate profile you don’t own by changing its information. This violates Google’s policies and can result in your own profile being suspended. Always use official channels: the merge tool or the redressal complaint form.

How to Report a Duplicate Business on Google

Start by finding the duplicate profile in Google Maps or Google Search. Click on the profile and look for a "Suggest an edit" option. Select the option to report the listing as a duplicate, explain clearly that this is a duplicate of another profile, and provide the URL or business name of your primary profile.

If suggesting an edit doesn’t work within 2-3 weeks, escalate using Google’s redressal complaint form. Access it through your Business Profile dashboard or Google’s help center. Select "Duplicate or fraudulent business profile" as the issue type and provide detailed information: your business name, address, phone number, the URL of the duplicate profile, and a clear explanation of why it’s a duplicate.

Include supporting documentation in your complaint. Screenshots showing both profiles and side-by-side comparisons make your case stronger. Google’s support team typically responds within a week with a decision.

Pro Tip
When filing a complaint, be specific: “This profile shows my business name and phone number but at an address where I’ve never operated. My verified profile is [URL]. This duplicate has false reviews.”

Impact of Duplicate Listings on Local SEO

Duplicate listings directly harm your local search rankings. When your business information scatters across multiple profiles, Google’s algorithm can’t consolidate your signals. Your reviews, ratings, and customer interactions split between profiles instead of accumulating in one place. Research from Search Engine Journal’s local SEO guide demonstrates that consolidated, verified business profiles rank significantly higher than fragmented duplicates.

Your review aggregation suffers when duplicates exist. If you have 50 reviews on your primary profile and 20 on a duplicate, potential customers seeing the duplicate think you’re less established. Consolidating those 70 reviews into one profile dramatically improves your perceived credibility.

After merging or removing duplicates, monitor your Business Profile dashboard for changes in visibility metrics. You should see an increase in customer actions, clicks to call, directions requests, and website visits within 2-4 weeks. Your local search rankings typically improve within 30-60 days as the algorithm recalculates your local relevance score with consolidated data.

Handling Duplicates When You Don’t Own the Listing

Your first step is attempting to claim the duplicate profile. Go to the profile in Google Maps, click "Own this business?" and follow the verification process. If you can verify ownership via postcard, phone, or email, you’ll gain access and can merge or delete the profile.

If you can’t claim the profile because someone else already owns it, contact Google Business Support through the Business Profile help center. Explain that you’re the legitimate business owner, someone else created a duplicate profile, and you need Google to remove it or transfer ownership. Provide business documentation like articles of incorporation, business licenses, or tax ID numbers to prove ownership. Google reaches out to the profile owner to verify they have the right to manage that listing. If they don’t respond or can’t prove ownership, Google removes the profile within 1-2 weeks.

If a competitor has created a fake profile using your business name to post false reviews or misleading information, file a complaint immediately through the redressal form with evidence of fraudulent activity. Google prioritizes fraud cases and typically removes them within days.

Watch Out
If a competitor has created a fake profile using your business name to post false reviews, this is fraud. File a complaint immediately through the redressal form and include evidence. Google prioritizes fraud cases and typically removes them within days.

Common Mistakes to Avoid When Managing Duplicates

The biggest mistake is ignoring duplicates and hoping they’ll disappear. They won’t. Take action the moment you discover a duplicate.

Don’t attempt to claim multiple profiles as your primary listing. Google only allows one primary profile per business address. Trying to claim multiple profiles at the same address will flag them as duplicates and may suspend your account.

Inconsistent NAP information across profiles prevents proper merging. Before addressing duplicates, audit all listings and ensure your Name, Address, and Phone number match exactly.

Don’t delete duplicate profiles without considering whether they contain valuable reviews. If a duplicate has customer reviews, merging is better than deletion. When you merge, those reviews transfer to your primary profile.

Finally, don’t stop monitoring after cleanup. Set a reminder to search for your business in Google Maps monthly. New duplicates can appear if employees or customers create profiles without realizing one exists.

Key Takeaway
The three most critical actions: (1) Verify ownership of your primary profile immediately, (2) Audit NAP consistency across all existing profiles, (3) Merge duplicates rather than delete them to preserve reviews and ratings.

Duplicate Google Business listings are manageable with the right approach. The process, from identifying duplicates to merging or removing them, takes a few hours of focused work. Web Maniacs helps businesses simplify this process through comprehensive Google Local Optimization services that include duplicate profile audits, NAP consistency verification, and ongoing profile management. Get started with Web Maniacs and reclaim your complete local search presence.

Frequently Asked Questions

Why do I have duplicate Google Business listings?

Duplicate listings occur when multiple profiles are created for the same business location. Common causes include team members creating separate profiles, automatic imports from directories, location management errors, or changes to your business name or address. Each duplicate profile competes for visibility in search results and Google Maps, diluting your online presence and confusing potential customers about which listing is authentic.

How do I merge two Google Business profiles?

To merge duplicate profiles, access your Business Profile dashboard and use the duplicate locations tool. Identify the primary profile you want to keep, then select the duplicate. Google will guide you through merging the verified listings, consolidating reviews, and updating business settings. The merged profile retains the history of both locations. If you cannot merge directly, contact Google Business Support for assistance with ownership verification.

What is the impact of duplicate listings on local SEO?

Duplicate listings fragment your search visibility across multiple profiles, causing Google to distribute your reviews, ratings, and ranking signals unevenly. This weakens your overall local SEO performance and reduces the likelihood of ranking prominently in Google Maps and local search results. Removing duplicates consolidates your authority, improves NAP consistency, and helps you rank higher. Post-removal, verify your listing status and monitor search results for ranking recovery over 1-2 weeks.

How long does it take to remove a duplicate Google Business listing?

Removing a duplicate listing through the suggest an edit option typically takes 1-3 business days for Google to process. If you own both profiles, merging them is faster, usually completed within 24 hours. For unverified duplicates or those you don't own, filing a redressal complaint form may take 5-7 business days. Always verify the removal by checking Google Maps and search results after the processing period to confirm the duplicate is gone.

This article was written using GrandRanker

How to Add Service Areas to Google Maps: Step-by-Step

Table of Contents

What You’ll Need Before Adding Service Areas

A Service Area Business (SAB) is a Google Business Profile for companies that serve customers at their locations rather than operating from a fixed storefront. Plumbers, electricians, cleaning services, and contractors are classic examples. This distinction changes how you configure your profile and how customers discover you on Google Maps.

The setup process takes approximately 15-20 minutes if you’re organized. Most delays happen because business owners don’t know what information they need upfront or misunderstand the difference between service-area and storefront profiles.

Access to Your Google Business Profile

You need owner or manager access to your Google Business Profile. Sign in at business.google.com and verify that your business is verified, unverified profiles cannot add service areas. Check your user role to confirm you have the appropriate permissions to edit location settings.

Pro Tip
If you manage multiple business locations, you can add different service areas to each location profile. This is crucial for multi-location service area strategies.

Understanding Service Area Businesses (SABs)

A Service Area Business differs fundamentally from a storefront business. With a storefront, your address appears on Google Maps and customers can visit your physical location. With a Service Area Business, your address is hidden and you define geographic areas where you serve customers.

Service Area Businesses can add up to 20 service areas maximum. You can define these areas by zip codes, cities, or custom geographic boundaries using polygons. Most businesses use a combination of these methods to cover their service territory precisely.

Some businesses operate both a storefront location and serve customers in surrounding areas. Google allows you to toggle between "service area only" and "storefront with service areas," but you cannot have both active simultaneously for the same profile.

Step 1: Access Your Business Profile Dashboard

Log into your Google Business Profile at business.google.com using the email address associated with your business account. If you manage multiple locations, select the specific location where you want to add service areas.

Look for the "Info" tab on the left sidebar. This section contains all your business information, including address, phone number, website, and business category. This is also where you’ll find the location settings that control whether your profile is configured as a storefront or service area business.

Watch Out
Do not confuse the “Info” tab with the “Posts” or “Reviews” tabs. The Info tab is the only place where you can configure service areas.

Step 2: Navigate to Location Settings and Edit Profile

In the Info tab, scroll down until you see "Location" or "Business Type" settings. Click "Edit Profile" or the pencil icon next to your business address.

A panel will open showing your current business configuration. Near the bottom, you’ll find the critical setting: "This is a storefront" or "This is a service area business." If your profile currently shows "This is a storefront," select "This is a service area business" depending on your business model.

After making this selection, save your changes. Google may take a few minutes to process the change. Refresh the page after saving to confirm the change has been applied.

Step 3: How to Add Service Areas to Google Maps

Close-up of a desktop screen showing the Google Business Profile dashboard with the service area settings panel open, displaying zip code input fields and radius options with a map preview

Once your profile is configured as a Service Area Business, the service area section becomes available. Return to the Info tab and look for "Service Areas." Click "Add Service Areas" or the plus icon next to Service Areas. Google will present three methods to define your coverage area.

Adding Service Areas by Zip Code or City

The zip code method is the fastest way to add service areas. Click "Add by Zip Code" and enter the postal codes where you serve customers. You can add multiple zip codes at once by entering them separated by commas.

The city method works similarly. Click "Add by City" and type the city names where you operate. This is useful for regional service providers who cover entire cities or counties.

One limitation: zip codes and cities don’t always align perfectly with your actual service area. If you serve part of a zip code but not all of it, the zip code method shows the entire postal code as your service area. For precise coverage, use the polygon method.

Setting a Service Radius Around Your Location

The radius method creates a circle around your business address. Enter a distance in miles or kilometers, and Google will display a circular service area on the map centered at your business location.

This method works best for businesses with consistent service distances. A plumbing company that travels up to 15 miles from their office can set a 15-mile radius. Google displays the radius visually on a map preview as you adjust it.

The radius method has one drawback: it doesn’t account for geographic obstacles or service boundaries. A 10-mile radius might extend into areas you don’t actually serve. For more control, use polygons.

Defining Custom Geographic Boundaries with Polygons

Polygons allow you to draw custom boundaries around your exact service area. Click "Add Service Area" and select the polygon option. Google Maps will open, and you can click points on the map to create a boundary. Each click adds a vertex to your polygon.

This method gives you complete control over your service area visualization. You can exclude neighborhoods you don’t serve and include specific regions. Drawing polygons requires 5-10 minutes per polygon depending on complexity, but the precision is worth it for businesses with irregular service territories.

Key Takeaway
Most successful businesses use a combination of all three methods. They might set a base radius of 10 miles, add 3-4 specific zip codes for high-priority areas, and use a polygon to exclude neighborhoods they don’t serve.

Google Business Profile Service Area Limits

Google enforces strict limits on service areas to prevent abuse and maintain the quality of local search results.

The 20 Service Area Maximum

You can add up to 20 service areas per Google Business Profile, regardless of whether you’re using zip codes, cities, radius, or polygon methods. If you manage multiple locations, each location has its own 20-area limit.

This limit protects your profile from suspension. Google’s systems flag profiles with excessive or overlapping service areas as potentially fraudulent. Staying within the limit and ensuring clean, non-overlapping boundaries keeps your profile in good standing.

Storefront vs. Service-Area Businesses: Key Differences

A storefront business displays a physical address on Google Maps. Customers can see your location, get directions, and visit your business in person. Local SEO rankings consider proximity to the searcher.

A Service Area Business hides your address from public view. Instead of proximity, Google’s algorithm considers your service area coverage and customer reviews. A service area business with strong reviews covering a 20-mile radius may rank higher than a storefront 5 miles away with fewer reviews.

If your business operates from a storefront but also serves customers at their locations, you must decide which model to emphasize. Most hybrid businesses choose the service area model because customers searching for services in their own neighborhood are more likely to hire you if you serve their area.

Watch Out
Switching between storefront and service area models after your profile is established can temporarily impact your local SEO rankings. Plan this change during a slower business period and monitor your rankings for 2-3 weeks after the switch.

How to Hide Business Address on Google Maps

If you’ve configured your profile as a Service Area Business, your address is already hidden from public view on Google Maps. Customers searching for your services won’t see your street address in the search results or on your listing.

If you operate a storefront and want to hide your address, the only way is to convert to a Service Area Business model. This requires removing your business address from the profile and defining service areas instead. You’ll lose some local SEO benefits associated with storefront proximity, but your address will be hidden.

Protecting your business address makes sense for security reasons. If you operate from home or manage a small office, hiding your address prevents unwanted visitors and protects your team.

Google Business Profile Local SEO Best Practices

Adding service areas to Google Maps is just the beginning. Your local SEO success depends on how well you optimize your entire profile and maintain consistency across your online presence.

Impact of Service Areas on Local SEO Rankings

Service area configuration directly influences your local search rankings. Geographic coverage is a significant ranking factor for service-area businesses. A wider, well-defined service area improves your visibility for searches across your coverage region.

However, broader isn’t always better. Overstating your service area by adding zip codes where you rarely serve customers can hurt your rankings. Google’s algorithm detects patterns in customer locations and reviews. If you claim to serve a zip code but have no customers there, Google recognizes the inconsistency and may penalize your rankings.

The optimal strategy is to define service areas that match your actual customer base. If 80% of your customers come from 10 specific zip codes, focus your service areas there. Add adjacent zip codes where you’re willing to serve, but avoid claiming territory you don’t actually cover.

Visualizing Service Areas for Better Customer Discovery

Customers see your service area on Google Maps when they search for your services. A clearly defined, visually accurate service area increases customer confidence that you serve their location.

Use the polygon method for high-visibility areas. If you serve a major city or region, a custom polygon shows customers exactly where you operate. Keep your service area map updated as your business expands or contracts.

Managing Multi-Location Service Area Strategies

Businesses with multiple locations need a coordinated service area strategy. Each location should have a defined territory that doesn’t overlap with other branches.

Create a service area map for your entire company. Identify which location serves which geographic area. This prevents customer confusion when multiple locations claim to serve the same neighborhood. Update service areas consistently across all locations.

Common Mistakes That Lead to Profile Suspension

Google suspends profiles that violate its policies. The most frequent mistake is overstating service areas. Adding zip codes where you rarely or never serve customers triggers Google’s fraud detection.

Another common error is using a fake or inaccurate address. If you operate from home, convert to a Service Area Business and hide your address legitimately.

Inconsistent business information causes suspensions. Your business name, phone number, and address must match across Google Business Profile, your website, and other directories.

Fake reviews and ratings manipulations are automatic suspension triggers. Never pay for positive reviews or ask customers to leave reviews in exchange for discounts.

Key Takeaway
The safest approach is honesty. Define service areas that match your actual customer base. Use accurate business information. Encourage genuine customer reviews. Maintain consistency across all online platforms.

Managing service areas on Google Maps requires precision and ongoing attention. Treat your Google Business Profile as a living document and review your service areas quarterly. Monitor your customer locations to ensure your coverage matches reality. Start with a free audit of your current profile configuration to discover where you’re losing potential customers.

Frequently Asked Questions

Can I add multiple service areas to my Google Business Profile?

Yes. Google Business Profile allows you to add up to 20 service areas. You can define these as specific zip codes, cities, or custom geographic boundaries using polygons. This is especially useful for service-area businesses that don't have a physical storefront. Multiple service areas help you reach customers across different regions and improve your visibility in local search results.

What is the difference between a storefront business and a service-area business?

A storefront business has a physical location where customers visit in person, and the business address appears on Google Maps. A service-area business (SAB) serves customers at their locations rather than at a fixed storefront. Service-area businesses can hide their business address and instead define geographic service areas. You can also run a hybrid business profile that combines both a storefront location and service areas for expanded reach.

How does adding service areas impact my local SEO rankings?

Adding service areas to your Google Business Profile can significantly improve your local SEO rankings. By clearly defining your service boundaries, you signal to Google where you actively serve customers, which helps your profile appear in local search results and Google Maps within those areas. Proper service area configuration, combined with NAP consistency and relevant business categories, strengthens your search visibility and helps you attract qualified customers in your target regions.

What happens if I exceed the service area limit or add incorrect boundaries?

Google Business Profile limits you to 20 service areas. If you add inaccurate or misleading service areas, your profile may be suspended or have reduced visibility. Always ensure your service areas match your actual service delivery capabilities and maintain consistency across your business listings. Verify your coordinates and geographic boundaries are accurate before publishing, and regularly audit your profile to prevent suspension issues.

This article was written using GrandRanker