November 2026 - Web Maniacs

5 Email Automation Alternatives Without a CRM in 2026

Last Updated: November 5, 2026

Quick Summary

Email automation alternatives without a CRM exist, and many small businesses can use a standalone email platform for welcome emails, abandoned-cart reminders and newsletters. The right choice depends on the automations you need, how contacts are managed, which integrations you require, and total cost as your list grows.

  • Start by listing the three to five automations you will run in the first six months.
  • Check each tool’s trigger types, branching and delays, contact store and exit rules.
  • Model subscription cost at double your current list size, plus add-ons and migration time.
  • Build three core flows first: welcome series, abandoned-cart reminder and post-purchase follow-up.
  • Keep a plain export of your list and a record of consent sources so you can switch platforms later.

Table of Contents

Many small New Zealand businesses want email automation without the cost and complexity of a full CRM. For a sole trader or a small shop, the question is practical: can a standalone email tool do the job? In many cases it can. This guide compares email automation alternatives and shows how to choose among them.

The short answer is that a CRM is useful but not always necessary. Email platforms now include their own contact lists, tags, and automated sequences. A business that only needs welcome emails, abandoned-cart reminders, or a simple newsletter flow may never use a CRM’s pipeline features. Paying for one can add cost and setup time without adding much value.

The trade-off is real, though. Once customer data needs to be shared across sales, support, and invoicing, a standalone tool can become a bottleneck. The rest of this article shows where that line tends to fall.

Criteria for Choosing an Email Automation Tool Without a CRM

Start with the job you need done. List the three to five automations you will run in the first six months, such as a welcome series, a re-engagement flow, or a post-purchase follow-up. Then check each candidate against that list rather than against a feature grid.

Four criteria matter most when comparing email automation alternatives:

  • Automation depth: Can you build multi-step workflows with branching, delays, and tag-based triggers?
  • Contact management: Can you segment subscribers without exporting data to another system?
  • Integrations: Does it connect to your website platform or e-commerce store, such as WooCommerce?
  • Total cost as you grow: Check how pricing changes when your contact list doubles.

A common mistake is choosing on the free tier alone. Free plans often cap contacts, limit automation steps, or add vendor branding to emails. Test the workflow you actually need before committing.

Email Marketing Automation Tools That Work Without a CRM

A standalone email platform has to do three jobs on its own: hold the contact record, store consent and tags, and run the automation engine. The options below are the ones most often compared in current round-ups, grouped by the job they do best. For a side-by-side look at which platform fits small business needs, see Email Automation Tools vs Each Other for SME Needs. Pricing and plan limits change often, so confirm the figures on each vendor’s site before you buy, and treat any NZD figure here as an indicative conversion rather than a quote.

Free-tier options: Brevo and MailerLite

Brevo and MailerLite are two email marketing services that offer free tiers, and both can be a starting point for a small list. The difference is in what the free tier actually lets you automate.

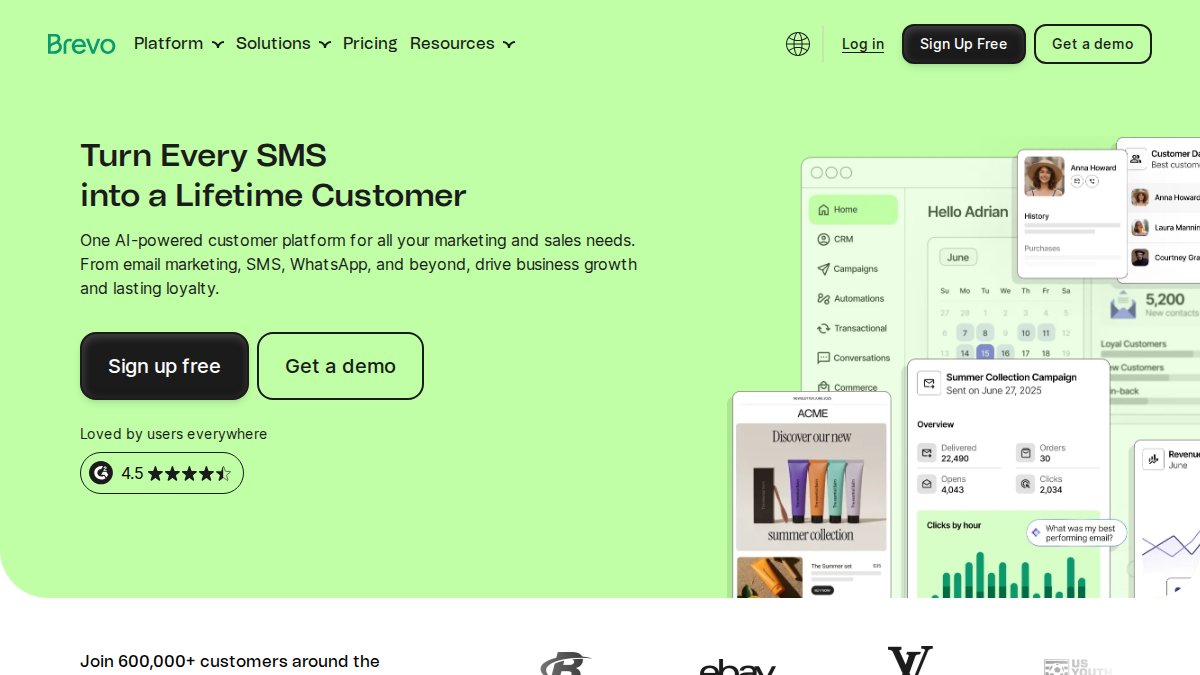
  • Brevo bundles email with SMS and a shared contact store, which suits a business that wants one place for consent and tags. Check its current plan limits on the vendor’s site before relying on the free tier for automation.
  • MailerLite is a option to consider for pure email automation; confirm on the vendor’s site which workflow features each plan includes.

Watch out: free plans may add vendor branding to emails or limit automation features. Test the exact workflow you need before you commit.

Broader automation stacks: ActiveCampaign and Mailchimp

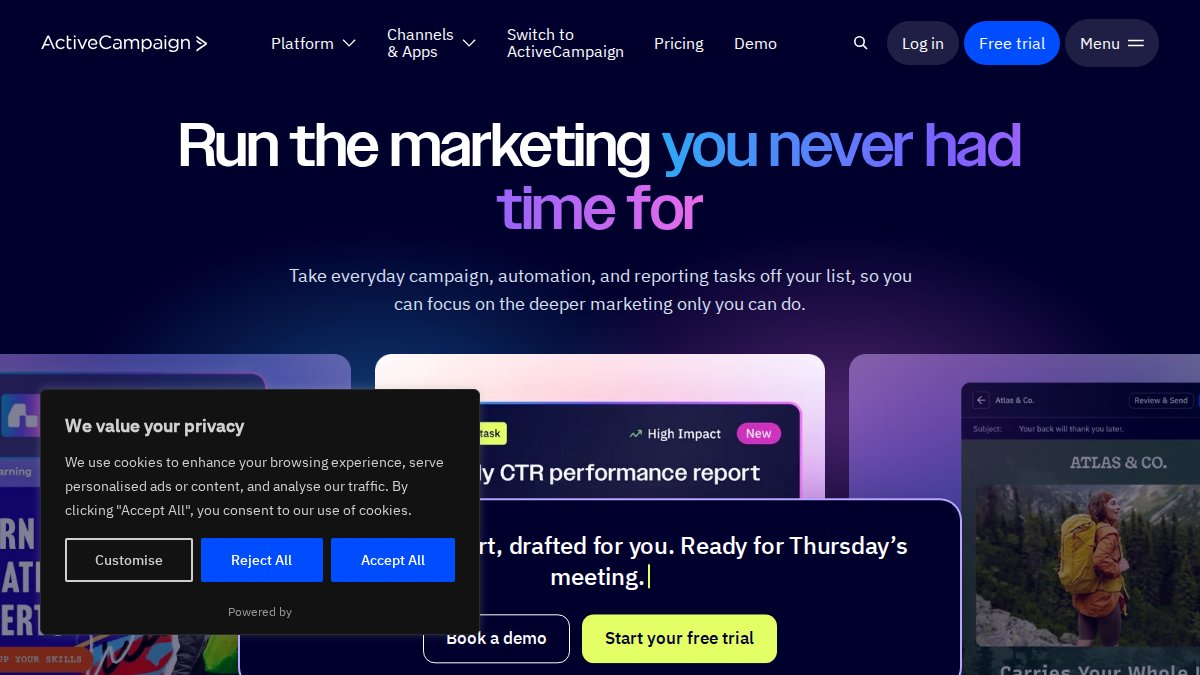
ActiveCampaign is a platform to evaluate if you need a deeper workflow builder; check its current features on the vendor’s site.

Mailchimp is another option to evaluate; compare its current features and plan costs against your needs on the vendor’s site.

The comparison that matters

Rather than a feature grid, check each candidate against four mechanisms:

  1. Trigger types, can it fire on a tag change, a link click, a purchase, or only on a list join?
  2. Branching and delays, can a workflow wait three days, check a condition, and split?
  3. Contact store, does it hold custom fields and consent history, or does it only hold an email address?
  4. Exit rules, can a contact leave a sequence the moment they buy, or do they keep receiving reminders?

A tool that fails on exit rules will annoy customers no matter how good its templates are. Build one real workflow in a trial before you compare prices.

Brevo pricing and plan limits
MailerLite automation features
ActiveCampaign workflow builder
Mailchimp pricing

Email Campaign Automation Examples You Can Build Without a CRM

Most small businesses do not need many automations. Three cover most of the value:

Get Started →

Business owner reviewing email automation alternatives on a laptop in a modern office with coffee and a notepad.
  1. Welcome series: Send two or three emails over the first week after someone joins your list.
  2. Abandoned-cart reminder: Trigger a message when a shopper leaves items in their basket.
  3. Post-purchase follow-up: Send care instructions or a request for a review a set number of days after delivery.

Build these first and measure them. To see how Zapier and Make connect email workflows to other apps for ecommerce, read Zapier vs Make for ecommerce automation NZ.

Email Marketing Software Pricing and Total Cost Beyond the Subscription

Most guides stop at the monthly subscription. That is the smallest part of the bill for a growing list. The total cost of ownership of a standalone email tool has four layers, and only the first appears on the pricing page.

Layer 1: the subscription and its contact tiers

Many email platforms price on contact count, so model your cost at double your current list size and at the size you expect in 18 months.

Layer 2: add-on modules

SMS credits, landing pages, advanced reporting, additional user seats, and dedicated IP addresses are commonly sold as add-ons or locked to higher tiers. SMS is often priced separately from the email subscription, so price it on its own if your flow includes an SMS step.

Layer 3: migration and setup labour

Migrating contacts and rebuilding forms takes hours, and that time has a value. A realistic migration involves exporting contacts with their tags and consent status, rebuilding sign-up forms, recreating every automation, re-authenticating your sending domain, and warming the new sending reputation. The time this takes depends on the number of automations and forms involved. Budget for it whether you do it yourself or pay someone.

Layer 4: switching cost later

The cheapest platform today may be the most expensive to leave. Moving a list and its automations to another platform means repeating the migration labour, and any workflow logic that does not export cleanly has to be rebuilt by hand. Choose with a three-year view, and keep a plain export of your list and a record of consent sources so a future move is possible.

A practical way to compare

Price each option for the list size you expect in 18 months, add the add-ons you will actually use, and add a one-off migration allowance. That total, not the headline monthly price, is the number to compare. Pricing depends on quantity and features, so request current figures directly from each provider.

Watch out: a low headline price can cost more over a year once add-ons are included. Compare the annual total, not the monthly price.

The subscription is only part of the bill. The article breaks total cost into four layers.

Layer What to check Why it matters
Subscription Price at double your list size Contact-tier pricing grows with the list
Add-ons SMS, landing pages, extra seats Often sold separately or locked to higher tiers
Migration labour Hours to rebuild forms and automations Time has a real cost, DIY or paid
Switching cost Export list and consent records Moving later repeats the migration work

Email Marketing Automation Best Practices for Standalone Platforms

Set up the basics before adding complexity:

  • Use double opt-in or clear consent at sign-up.
  • Tag subscribers by source and interest, so you can segment without a CRM.
  • Keep each automation to one goal and review its results every month.
  • Clean inactive contacts regularly to protect deliverability and keep costs down.

Watch out: a standalone tool holds contact data in one place. Keep an export of your list and a record of your consent sources so you can move platforms if you need to.

Planning Your Migration and Next Step With Web Maniacs

If your automation needs grow beyond a standalone email tool, the next step may be a custom build. Web Maniacs provides custom software development, website design, and digital marketing services. Get started with Web Maniacs to talk through your current setup and the migration path that suits your business. Mastering the underlying logic of these workflows often requires a deeper understanding of technical strategy, which is why many developers sharpen their skills through email automation courses.

Frequently Asked Questions

Can you automate email marketing without a CRM?

Yes. Several standalone email platforms offer automated welcome series, drip campaigns and behavioural triggers without a separate CRM. Whether you can run your workflow depends on how many subscriber fields and segments you need, and whether the platform supports the integrations you already use. Check those two points against each tool’s current feature list before committing, and confirm pricing directly with the vendor, as the supplied research does not state plan prices.

What is the best email marketing automation software without a CRM?

There is no single best option, because the right tool depends on your list size, budget and the automation depth you need. Several platforms offer free or paid automation tiers, so compare their current features against your needs. Shortlist two or three, trial them with a real welcome sequence, and compare how easily each one handles your segmentation needs.

Which email marketing tools work without a sales pipeline?

Most email marketing platforms do not require a sales pipeline, since they are built around sending campaigns and managing subscribers rather than tracking deals. If you only need to nurture subscribers and send automated sequences, a standalone email tool usually covers the job. If you need to track leads through stages and assign follow-ups to sales staff, you will likely need pipeline functionality, either from a CRM or a platform that includes one.

What features should I look for in email automation software?

Prioritise the features that match your workflow: visual workflow builders for drip campaigns, behavioural triggers based on opens and clicks, list segmentation, dynamic content, conversion tracking and A/B testing. Also check deliverability controls and whether the platform offers API integration with your website or e-commerce store. Test the workflow builder in a free trial, because a tool that looks capable on a features page can still be awkward to use day to day.


GoogleAdd webmaniacs.co.nz as a preferred source on Google →

How to Measure Digital Marketing ROI: A Step-by-Step Guide

Table of Contents

Last Updated: November 4, 2026

Why Marketing ROI Matters for Small Business Budgets

Most New Zealand small businesses spend money on digital marketing without knowing whether it pays off. Determining the true value of these investments requires a shift toward ROI-focused marketing strategies, a necessary evolution for firms navigating the complexities of the modern technology sector.

Learning how to measure digital marketing ROI for small businesses in New Zealand is simpler than most guides suggest. A 2026 New Zealand digital marketing report recommending 5-12% of gross revenue for total marketing, with digital channels taking the majority gives a useful starting point for how much to budget.

Here is the core idea behind how to measure digital marketing ROI for small businesses in New Zealand. A Lucid Media 2026 marketing budget guide for New Zealand frames measurement around three numbers: what you spent, what customers bought and what it cost to fulfil those orders.

Why does this matter for a small budget? Because every dollar with no measured return is a dollar you cannot justify next quarter. Tracking ROI lets you:

  • Stop spending on channels that do not pay back
  • Move money to the campaigns that do
  • Explain your marketing spend to a bank, partner or accountant
  • Make decisions based on numbers rather than guesses

Step 1: Set Clear Objectives and KPIs Before You Spend

Before you spend a cent, decide what success looks like. A goal without a number cannot be measured.

Start with one main objective for each campaign, such as:

  • Sales: more online orders in a set period
  • Leads: more enquiries from potential customers
  • Awareness: more people finding your business

Then pick the key performance indicators (KPIs) that show progress. Common ones include:

  • Cost per lead (CPL): what you pay for each enquiry
  • Customer acquisition cost (CAC): what you pay to win one paying customer
  • Revenue by channel: what each platform brings in

Write the target down. For example: “Get 40 enquiries from Google Ads at under $25 each in March.” A target like that tells you immediately whether the campaign is working.

Step 2: Track Spend, Sales and Fulfilment Costs Accurately

Accurate ROI depends on accurate records. Most small businesses skip this step and then wonder why their numbers do not add up.

New Zealand small business owner reviewing sales data on a laptop to measure digital marketing ROI accurately.

Keep three records:

  • Marketing spend: every ad, tool and agency invoice, by date and channel
  • Sales: every order or booking, linked to where the customer came from
  • Fulfilment costs: the cost of delivering the product or service, such as packaging, shipping and staff time

Use a simple spreadsheet if you have no software. Add a “source” column to every sale so you know which campaign brought it in.

Watch out: if you leave out fulfilment costs, your ROI will look higher than it really is.

Step 3: Calculate ROI Using the Standard Formula

The standard formula is simple, but the inputs are where most small businesses go wrong.

ROI = (Revenue from Marketing – Cost of Marketing) ÷ Cost of Marketing

Multiply the result by 100 to get a percentage. A Thrive Media NZ guide to measuring digital marketing ROI for Kiwi small business owners uses this same formula for New Zealand small businesses.

What counts as cost

Cost is not just ad spend. Include everything that would not have been spent if the campaign had not run:

  • Ad spend and platform fees
  • Agency or freelancer invoices tied to the campaign
  • Software and tools used to run or measure it
  • Staff time directly spent on the campaign, at a realistic hourly rate

If you leave fulfilment costs out, ROI looks better than it is. If you leave staff time out, small campaigns look cheaper than they are.

Worked example: a $100 spend that returns $300

You spend $100 on a Facebook campaign. It brings in $300 in sales, and those sales cost $120 to deliver.

  • Revenue from marketing: $300
  • Cost of marketing: $100
  • Fulfilment cost: $120
  • Profit from marketing: $300 – $100 – $120 = $80
  • ROI: $80 ÷ $100 = 0.8, or 80%

For every dollar you spent, you earned back 80 cents in profit. The campaign still made money, but far less than the headline revenue suggested. Run the same numbers without fulfilment costs and you would report 200%, a figure that would lead you to overspend on a channel that is only marginally profitable.

Choosing the right time window

ROI depends on the period you measure. A campaign that runs for two weeks may convert over six. If you calculate too early, you undercount revenue; if you leave the window open indefinitely, you credit the campaign for sales it did not cause.

Get Started →

A practical approach is to set the window before the campaign starts, based on your normal sales cycle. If most customers buy within 30 days, measure at 30 days and again at 60 to see whether the picture changes.

Comparing channels on the same basis

To decide where the next dollar goes, calculate ROI for each channel over the same period and with the same cost rules. A channel with a lower revenue figure may still have a higher ROI if its costs are lower.

Watch out: comparing a channel measured over 90 days with one measured over 14 days will make the shorter window look worse, regardless of actual performance. If your campaigns still aren’t producing results, a diagnostic guide can help you find out why your website gets no leads.

Step 4: Compare Cost per Acquisition and Return on Ad Spend

ROI tells you whether a campaign made money overall. Two related measures help you compare channels more closely.

  • Cost per acquisition (CPA): total spend divided by the number of customers won. If you spent $500 and won 20 customers, your CPA is $25.
  • Return on ad spend (ROAS): revenue divided by ad spend. A $500 spend that brings $2,000 in revenue gives a ROAS of 4:1.

These are different from ROI. ROAS ignores costs beyond advertising, while ROI includes everything.

A Margo Digitech overview of ROI benchmarks in digital marketing notes that a 5:1 revenue-to-cost ratio is widely seen as healthy in digital marketing.

Watch out: a channel with a low CPA can still lose money if its customers buy only once and cost you more to serve.

The table below summarises the two comparison measures the article describes alongside ROI.

Measure Formula Example
Cost per acquisition (CPA) Total spend ÷ customers won $500 ÷ 20 customers = $25
Return on ad spend (ROAS) Revenue ÷ ad spend $2,000 ÷ $500 = 4:1
Healthy benchmark Revenue-to-cost ratio 5:1, a guide not a rule
ROAS vs ROI ROAS ignores costs beyond advertising ROI includes all costs

Step 5: Attribute Offline Sales and Protect Privacy in Your Tracking

Most small businesses have more than one way for a customer to buy. Someone sees a social ad on their phone, walks into the shop on Saturday, and pays at the counter. If your tracking only counts website checkouts, that sale looks like it came from nowhere, and the campaign that prompted it looks worse than it is. Two things make this harder than it used to be: privacy changes are reducing how much click-level data you can see, and offline sales rarely carry a source tag.

Bridging offline sales to digital spend

You do not need enterprise software to connect the two. You need a consistent way to ask, record and match.

  • Ask at the point of sale. Add a required “How did you hear about us?” field to your till, booking form or enquiry form, with options that match your actual channels (Google search, Facebook, Instagram, word of mouth, repeat customer). Record the answer against the sale, not just the enquiry.
  • Use channel-specific identifiers. A unique phone number for each campaign, a discount code printed only on a flyer, or a booking link that only appears in one ad lets you match a later in-store sale back to the campaign that started it. Keep the list of codes in the same spreadsheet as your spend so the two can be joined.
  • Match on time and value, not identity. If a spike in in-store sales follows a campaign by a few days, note it. You are looking for patterns, not proof of each individual sale. A simple weekly log of campaign dates against till totals is enough to spot a relationship.
  • Close the loop in your CRM. If you use a CRM or booking system, add a source field to every customer record and make it mandatory. When you export revenue by source, you can compare it directly with spend by channel.

Measuring when cookies are less reliable

Browser restrictions and privacy settings mean you will see fewer cross-site clicks than you did a few years ago. That does not make measurement impossible; it changes what you rely on.

  • Trust first-party data. Data you collect yourself, form fills, bookings, email sign-ups, loyalty records, is more reliable than third-party tracking. Make sure every campaign has a clear action that captures a contact or a sale in your own system.
  • Use modelled and aggregated reporting where available. Platforms increasingly report conversions using modelling rather than individual tracking. Treat those numbers as estimates and compare them with your own sales records rather than relying on either alone.
  • Keep consent records. Under the Privacy Act 2020, you must tell people what you collect and why, and store it securely. A simple consent checkbox on forms, with a record of when and how consent was given, protects you and makes your data more trustworthy.
  • Prefer channel-level comparisons over click-level attribution. If you cannot see every touchpoint, compare total spend by channel with total revenue by source over the same period. It is less precise per customer but far more robust when tracking is incomplete.

Watch out: if you rely only on platform-reported conversions, you will double-count sales that are claimed by more than one channel, and you will miss offline sales entirely, both errors distort your ROI in opposite directions.

Common Mistakes to Avoid When Measuring Marketing ROI

Several errors appear again and again in small business tracking:

  • Counting revenue, not profit: ROI should subtract the cost of goods and fulfilment
  • Using too short a window: some campaigns take weeks to convert, so measure over a full sales cycle
  • Giving one channel all the credit: a customer may see a Google ad, then a social post, then buy from an email
  • Changing too many things at once: test one variable at a time so you know what worked
  • Ignoring the data you already have: check your numbers monthly rather than once a year

Book a Marketing Measurement Review with Web Maniacs

Measuring ROI takes time, and the setup is where most businesses stall. Web Maniacs can review your current tracking, identify the gaps and show you which campaigns are paying back.

If you want to see what your digital marketing is really returning, book a marketing measurement review with our team. Get started with Web Maniacs and turn your marketing budget into numbers you can trust.

Frequently Asked Questions

What is a good ROI for digital marketing in New Zealand?

Industry guidance commonly treats a return of around 3:1 to 5:1 (revenue to marketing cost) as healthy, while a 5:1 ratio is often described as a strong benchmark and 10:1 as exceptional. What counts as good depends on your margins, sales cycle and goals, so use these figures as a starting point and compare against your own historical results rather than a universal target.

How do I calculate marketing ROI without complex software?

Use the formula (revenue from marketing minus cost of marketing) divided by cost of marketing, then multiply by 100 for a percentage. Record what you spent each month, match it to the sales that came from each channel using order notes or a simple enquiry form, and subtract the cost of fulfilling those orders. A spreadsheet is enough to start.

Which digital marketing metrics matter most for small businesses?

Focus on cost per lead, customer acquisition cost and revenue attributed to each digital channel. These show whether a channel brings in paying customers at a cost you can sustain. Vanity metrics such as impressions or follower counts are useful only if they connect to one of these outcomes.

How can I track offline sales resulting from online marketing?

Use unique phone numbers or tracking codes on each online campaign, ask customers how they heard about you at the point of sale, and use vouchers that exist only in a specific ad. Combining these methods gives a reasonable estimate of offline conversions even when the sale happens in store or over the phone.

GoogleAdd webmaniacs.co.nz as a preferred source on Google →

Email Automation Tools vs Each Other for SME Needs

Last Updated: November 4, 2026

Screenshot of activecampaign.com interface
Marketing automation for any business | ActiveCampaign

Quick Summary

For SMEs, the best email automation tool is the one that supports your priority customer journeys, connects to your existing CRM and data, and fits your team’s time and budget. Brevo suits businesses seeking email, SMS and transactional messaging; ActiveCampaign offers deeper workflows, HubSpot unifies sales and marketing in one CRM, and Zoho Campaigns fits businesses already using Zoho.

Screenshot of zoho.com interface
Zoho | Cloud Software Suite for Businesses
  • Brevo, HubSpot and Zoho Campaigns offer free tiers; ActiveCampaign does not.
  • Test shortlisted platforms against the same customer journey, including its trigger, audience rules, sequence and measurement.
  • Compare total operating costs, including migration, training, integrations and extra features.
  • Before switching, document essential workflows, preserve suppression records and test messages before launch.
  • In New Zealand, commercial emails must meet requirements for consent, sender identification and unsubscribe facilities.

Table of Contents

Email Marketing Automation Tools Comparison for SMEs: Quick View

According to HubSpot’s 2026 marketing statistics, email marketing conversion rates are 2.8% for B2C and 2.4% for B2B.

Email automation is software that sends targeted messages in response to customer data or actions. The best fit depends on the complexity of your workflows, your existing CRM and the time your team can spend managing the system.

Platform Best fit Free tier Pricing basis
Brevo Email, SMS and transactional messages Yes Email volume
ActiveCampaign Advanced CRM-linked workflows No Contacts and features
HubSpot Unified sales and marketing CRM Yes Tiered features
Zoho Campaigns Zoho users and budget-conscious teams Yes Subscriber count

The supplied product research lists approximate starting prices in US dollars, not verified NZD prices. We’ve left them out rather than imply a local price. For a broader look at the trade-offs between automated and manual campaigns, read the email software trade-offs.

Brevo vs ActiveCampaign: Simple Campaigns or Advanced Workflows?

Screenshot of brevo.com interface
Brevo: Email & SMS Marketing, CRM & Automation Platform

Brevo’s free tier lowers the barrier to starting, but advanced automation is restricted to higher plans. ActiveCampaign has a steeper learning curve and no free tier, so its extra control only pays off when your team will use it.

The research guide comparing eight platforms argues that effective automation should respond to CRM data and form submissions, rather than rely on simple checklists. That’s the useful distinction: choose workflows that react to customer behaviour, not a larger feature menu. ActiveCampaign’s 2026 Email Marketing Software Comparison Guide

HubSpot vs Zoho Campaigns: CRM Depth, Usability and Cost

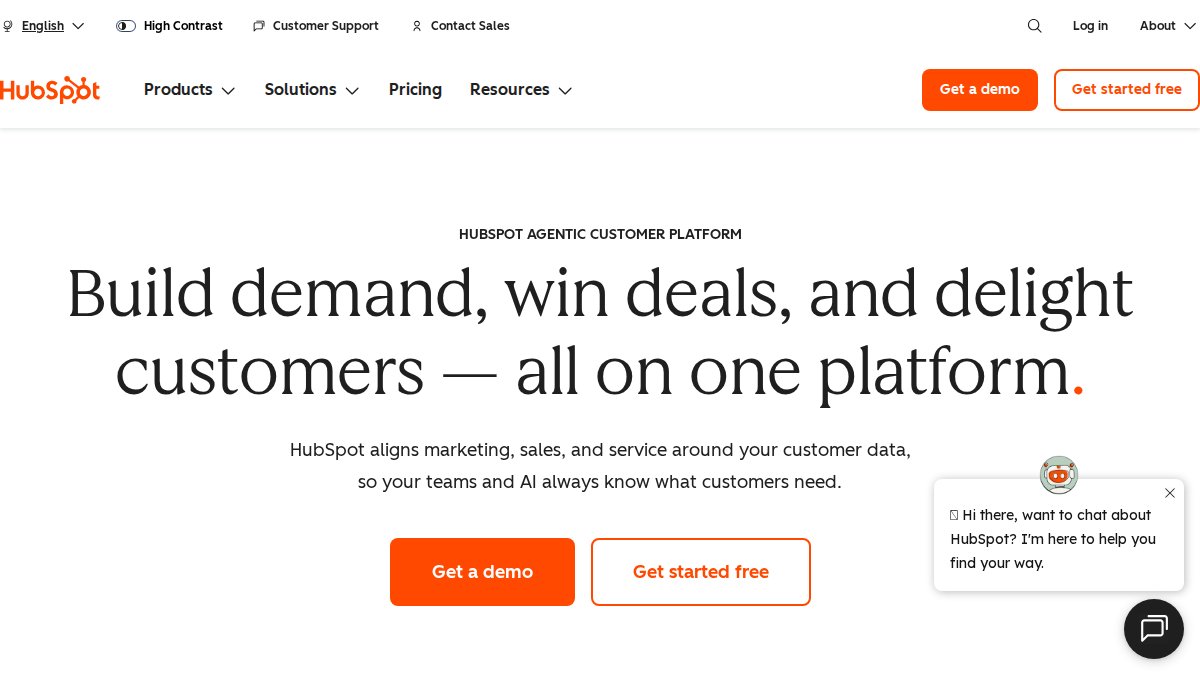
HubSpot is the stronger choice for SMEs that want sales and marketing activity in one CRM; Zoho Campaigns is a more focused fit for businesses already using Zoho. HubSpot combines a shared customer database, smart email content and lead-nurturing sequences.

Screenshot of hubspot.com interface
HubSpot | Software & Tools for your Business – Homepage

HubSpot’s intuitive interface is an advantage, but costs can rise as contact lists and feature needs grow.

The choice is not simply cheap versus expensive. Emailmonday identifies tool selection as the leading marketing automation challenge in 2026, a reminder that fit matters more than feature count. Emailmonday’s 2026 marketing automation statistics

How to Choose Email Marketing Automation Tools for SMEs

Choose a platform by testing whether it can run your priority customer journeys with the data and staff time you actually have. A feature list is only useful when you can connect each feature to a workflow, a data source and an outcome you intend to measure.

Score the fit before comparing plans

Write down the two or three journeys you need first, such as welcoming a new subscriber, following up after a purchase or notifying a sales team when a lead takes a high-intent action. For each journey, record:

  • Trigger: What event starts the workflow, and where is that event recorded?
  • Audience rule: Which contacts qualify, and which should be excluded?
  • Message sequence: What should be sent, and what should stop or change the sequence?
  • Measurement: Which clicks, conversions or sales will show whether it is working?
  • Owner: Who will build, check and maintain the workflow?

Then test each shortlisted tool against the same journey. Check whether it can use the required fields and events, apply exclusions, pause or branch a sequence, and report the result without manual workarounds. A platform that supports a complex workflow is not automatically the better choice if your team only needs a reliable welcome series.

Check the operating fit

Assess the interface with the person who will manage campaigns, not only the person choosing the software. Ask them to build a basic automation, edit a template, create a segment and find the campaign report.

Review integrations in both directions. A connection to a CRM or ecommerce platform is more useful when it can pass the fields and events your workflows need, keep records in sync and handle changes such as an unsubscribe.

Compare the full operating cost, not just the entry plan. Check how billing changes as contacts or sending needs grow, and whether SMS, landing pages, additional users, premium support or essential integrations cost extra.

Use a migration checklist before switching

Migration is a useful differentiator that many comparison guides leave out. Before moving platforms:

  1. Inventory what exists: List active audiences, signup forms, templates, automations, integrations, suppression records and reports you still need.
  2. Clean and classify contacts: Separate active subscribers, unsubscribed contacts, bounced addresses and records with unclear permission. Do not treat an imported list as permission to send.
  3. Map fields and events: Match old fields to the new platform, identify missing data and decide how ecommerce or CRM events will be transferred.
  4. Rebuild the essential journeys: Document each trigger, delay, branch, exclusion and exit condition. Recreate only workflows that are still needed.
  5. Test before launch: Send test messages, check links and personalisation, verify mobile rendering, confirm suppression and unsubscribe behaviour, and test that events enter the correct workflow.
  6. Switch in stages: Start with a controlled audience and monitor delivery, bounces, complaints and conversions before moving the remaining eligible contacts.
  7. Keep a rollback plan: Retain access to the old system and its records until the new setup has been checked and the team knows how to resolve problems.

Watch out: Importing contacts without their consent status or suppression history can lead to messages being sent to people who should not receive them.

Get Started →

Two marketing colleagues reviewing a laptop at a tidy office desk to plan email automation migration.

Automated Email Workflow Examples for Small Business

Automated email workflows send messages after a defined customer action, such as signing up, placing an order or becoming inactive. For an SME, start with a small number of useful drip campaigns, then expand only when reporting shows a clear gap.

  • Welcome series: Send a confirmation, explain what subscribers can expect, then share a relevant product or service.
  • Abandoned basket: Remind shoppers about items left behind, using the store’s available customer data.
  • Post-purchase follow-up: Share useful product guidance and invite feedback.
  • Re-engagement: Contact inactive subscribers with a clear choice to stay subscribed or leave the list.

Set behavioural triggers around actions you can reliably track. Review open rates, click-through rates and conversions together; an open alone does not show whether a campaign led to a sale. For practical ideas focused on ecommerce performance, see the guide to improving ecommerce open rates.

Email Marketing Automation Best Practices and Compliance NZ

Compliance should be built into the contact data and workflow rules, not left as a final check before sending. In New Zealand, the Unsolicited Electronic Messages Act 2007 applies to commercial electronic messages, including email, and sets requirements around consent, sender identification and unsubscribe facilities. The Privacy Act 2020 is also relevant when a business collects, stores, uses or shares personal information. Check the current official guidance for your circumstances rather than assuming a platform setting alone makes a campaign compliant. Modern AI tools for business can help automate these complex regulatory requirements by flagging potential data handling risks before they manifest in your outreach strategy.

For each signup source, record what the person agreed to receive, when they agreed and how the consent was collected. Keep the source attached to the contact record where possible, such as a website form, checkout or event registration.

When importing a list, review its origin and permission before adding it to an automation. A vendor’s ability to upload contacts does not establish that those contacts can lawfully be sent marketing messages. Keep unsubscribed and otherwise suppressed addresses out of campaign audiences, including when records are merged or synchronised from a CRM.

Build unsubscribe and sender checks into every workflow

Before activating an automation, verify that each commercial message identifies the sender and includes a working unsubscribe facility. Test the unsubscribe link in a real test message, then confirm that the request updates the suppression status used by every connected audience and workflow. Review automated sequences as well as one-off campaigns: a contact who unsubscribes should not continue receiving later messages in a series through a separate list or integration.

Use a pre-launch checklist:

  • Confirm the audience has a documented, appropriate basis for receiving the message.
  • Check the sender name and contact details are recognisable and accurate.
  • Test the unsubscribe link and the platform’s suppression behaviour.
  • Check that personalisation fields have a safe fallback if data is missing.
  • Confirm that the trigger and exclusions prevent irrelevant or repeated messages.
  • Review the connected CRM, ecommerce service and other tools that receive contact data.

Watch out: A workflow can keep sending after an unsubscribe if a separate audience, integration or manually uploaded list does not share the suppression record.

Treat privacy as part of platform selection

Before connecting a marketing platform to your website, CRM or store, identify what personal information will be transferred, why it is needed and who can access it.

This is a practical selection criterion, not just a policy exercise: a tool is harder to manage if consent history, suppression status and customer data are scattered across systems. Ask providers how integrations synchronise these records and test the behaviour before launch.

Plan Your Email Automation Setup with Web Maniacs

The best platform cannot fix a workflow that does not match your website, customer data or marketing goals. Choose the simplest tool that supports the customer journey you actually plan to run, then improve it as your needs grow.

Web Maniacs provides personalised web and app development, custom software development and results-driven digital marketing solutions. If your website and email setup need to work together, Web Maniacs provides personalised web and app development, custom software development and results-driven digital marketing solutions.

Frequently Asked Questions

What features should SMEs look for in email automation software?

Prioritise the features your team will use: workflow automation, list segmentation, reporting, and integrations with your CRM or e-commerce platform. The research identifies analytics and reporting as the most valued feature, followed by campaign management and lead nurturing. Check whether the plan includes the triggers and contact limits you need, and test how easily staff can build and edit workflows.

How does the Unsolicited Electronic Messages Act 2007 affect email marketing?

The Unsolicited Electronic Messages Act 2007 governs commercial electronic messages, including email. Marketing messages require consent, accurate sender identification and a functional unsubscribe facility. Keep records of how subscribers opted in, honour unsubscribe requests, and check that your platform supports suppression lists. Also review the Privacy Act 2020 when collecting and using personal information for segmentation or personalisation.

Which email marketing tools integrate with CRM and e-commerce systems?

Verify that the specific connection supports the data and triggers you need, such as purchase activity or form submissions, before migrating.

Is automated email marketing cost-effective for small businesses?

It can be, when automation saves staff time or supports relevant follow-up without adding more complexity than the team can manage. Compare subscription tiers alongside contact limits, included features, integration and migration work, and the time needed to maintain workflows. The research reports 2026 conversion rates of 2.8% for B2C and 2.4% for B2B email marketing, but those figures are not a guarantee for an individual business.

How can a business keep email marketing compliant with privacy rules?

Use clear opt-in forms, record consent, identify the sender accurately and include an easy unsubscribe option in commercial emails. Keep subscriber data secure and collect only what your campaigns need. For email marketing compliance NZ, check obligations under the Unsolicited Electronic Messages Act 2007 and the Privacy Act 2020. Review imported contacts before sending, since an existing address alone does not establish consent.


Email automation can become difficult when customer data sits across disconnected systems. Get started with Web Maniacs to discuss a digital setup shaped around your business, including custom software development, website design and digital marketing.

GoogleAdd webmaniacs.co.nz as a preferred source on Google →

Core Web Vitals vs Traditional Speed Metrics Compared

Last Updated: November 3, 2026

Quick Summary

Core Web Vitals measure how real visitors experience a page, covering loading, responsiveness and visual stability. Traditional speed metrics measure when loading events happen, such as Time to First Byte and DOM Ready. Use core web vitals to decide whether a page needs attention, and traditional timings to find the stage that needs fixing.

  • The current Core Web Vitals set is Largest Contentful Paint, Interaction to Next Paint and Cumulative Layout Shift.
  • Core Web Vitals are assessed from real Chrome users, while traditional metrics are often tested in a lab.
  • Google uses Core Web Vitals as a ranking signal, but traditional metrics are not a direct ranking factor.
  • Field data is assessed at the 75th percentile of page loads, so averages can hide a poor experience.
  • Stable Core Web Vitals metrics change no more than once a year, which helps with planning.

Table of Contents

Core Web Vitals and traditional speed metrics both describe how fast a website feels, but they answer different questions. Traditional metrics measure when things happen during loading. Core Web Vitals measure how real visitors experience the page. Core Web Vitals are a set of metrics that Google describes as measuring real-world experience in loading performance, interactivity and visual stability. Google Search Central guidance on Core Web Vitals

What Core Web Vitals Measure and Why They Exist

Core Web Vitals exist because load time alone did not explain how pages felt to use. A page can finish loading quickly and still jump around or ignore taps for a second.

Core Web Vitals are user-experience measures rather than purely technical timings, and they are assessed from real Chrome users.

The metric set is managed carefully. web.dev guidance on the Core Web Vitals lifecycle explains that metrics move through experimental, pending and stable phases, and that stable metrics change no more than once a year.

Traditional Speed Metrics and Their Limitations

Traditional speed metrics include page-load time, DOM Ready, and Time to First Byte (TTFB). Akamai notes that these measures still work well in general cases, though they can miss the user experience in single-page applications. Akamai guide to measuring Core Web Vitals

The main limitation is that a timing event is not the same as a usable page. Focusing solely on these technical milestones ignores how traditional SEO limitations obscure the reality of user experience in an era where search engines prioritize intent over raw delivery speed.

Core Web Vitals scores have the opposite weakness. StatusCake characterises the scores as outcome metrics that do not explain why a page performed as it did. StatusCake explainer on LCP, FID and CLS In practice, you often need both: Core Web Vitals to see the problem as users feel it, and traditional timings to find where it starts.

Side-by-Side: Core Web Vitals and Traditional Metrics Compared

The table below sets the two approaches against each other on the questions that usually decide which one to use.

Question Core Web Vitals Traditional speed metrics
What does it measure? How visitors experience loading, responsiveness and stability Timing of loading events, such as TTFB and DOM Ready
Who sees the data? Real Chrome users, in field data Often a test run in a lab or on a developer machine
Does it affect rankings? Yes, Google uses these metrics as a ranking signal Not directly, but they often explain the scores
What it tells you That a page feels slow or unstable Where in the loading sequence time is lost
Main weakness Does not show the cause Can report “done” when the page is not usable

Use Core Web Vitals to decide whether a page needs attention. Use traditional metrics to find the stage that needs fixing.

Mapping each traditional metric to a Core Web Vital

The comparison becomes useful when you map one measure to another. The table below shows how the common traditional timings relate to LCP, INP and CLS, and where the measures can disagree.

Traditional metric What it times Closest Core Web Vital Where they disagree
Time to First Byte (TTFB) Server response to the first byte LCP (as a floor, not a substitute) A fast TTFB can still produce a slow LCP if the hero image is large or render-blocking scripts delay paint
DOMContentLoaded HTML parsed and DOM built INP (indirectly) A page can fire DOMContentLoaded quickly and still block the main thread for seconds afterwards, hurting INP
Load event All resources finished LCP (loosely) The load event can fire after LCP, so a fast load time does not guarantee a fast LCP
Speed Index How quickly visible content is painted LCP (partially) Speed Index averages the whole viewport, so it can look good while the largest element is slow
First Contentful Paint (FCP) First text or image painted LCP (as an early signal) FCP measures the first paint, not the largest one, so a fast FCP can sit above a slow LCP

A common pattern is for a site to report a healthy TTFB and a poor LCP. That usually points to the hero image or to render-blocking CSS and JavaScript above the fold, not to the server.

When the measures disagree

Disagreement is normal, and it is diagnostic rather than contradictory. Three patterns are worth knowing:

  • Fast load event, slow LCP. The page finishes loading but the largest element arrives late. Look for lazy-loaded hero images, client-side rendering, or fonts that block text paint.
  • Fast FCP, slow INP. The page paints quickly but ignores taps. Look for long tasks on the main thread, heavy third-party scripts, or event handlers that do synchronous work.
  • Good lab CLS, poor field CLS. Layout shift often depends on late-loading ads, embeds or web fonts that a lab run does not trigger. Field data catches what the lab misses.

Use Core Web Vitals to decide whether a page needs attention. Use traditional metrics to find the stage that needs fixing. When the two disagree, treat the disagreement itself as the clue.

Field Data Versus Lab Data: Reconciling Conflicting Results

It is common to see a good lab score next to a poor field score. Lab tests run one controlled page load on a fixed device and network. Field data comes from many real visitors on varied phones, connections and locations. When they disagree, the field data usually reflects what customers actually experience.

Get Started →

Developer analyzing core web vitals data on a laptop and site speed dashboard in a bright office environment

How field data is actually assessed

Core Web Vitals are assessed at the 75th percentile of page loads, segmented by mobile and desktop. That means a page passes only when three-quarters of real visits meet the threshold.

Sample size matters too. A low-traffic page may not have enough field data to report reliably, in which case the lab result is the only signal available. Treat sparse field data as inconclusive rather than as a pass.

A decision guide for conflicting results

Work through the conflict in this order:

  1. Check the field data first. If real users see a poor LCP, INP or CLS, treat it as the priority regardless of the lab score.
  2. Segment by device. Compare mobile and desktop field data separately. A site that is popular on older mobiles will look worse in the field than in a lab run on a fast desktop.
  3. Compare the lab timings with the field result. A gap often points to scripts, images or third-party embeds that load only for some visitors, or to content that varies by session.
  4. Reproduce the field condition in the lab. Throttle the network and CPU in DevTools to approximate a mid-range mobile device, then retest.
  5. Retest after each fix, and allow time for field data to update. Field data lags changes, so do not judge a fix on the same day.

Watch out: treating a single Lighthouse run as proof that a fix worked. Lab scores vary between runs, so confirm with field data before declaring success.

Statistical caveats worth knowing

  • Percentiles, not averages. Averages hide the slow tail. The 75th percentile is the assessment point because it reflects the experience of the slower quarter of visits.
  • Device and network variation. Field data mixes high-end and low-end devices. A site can pass on desktop and fail on mobile for the same code.
  • Sample size. Low-traffic pages may lack enough data to report, and small samples fluctuate.

Real-user monitoring and synthetic (lab) testing answer different questions. Keep both, and do not treat either one as the full picture. The field tells you whether there is a problem; the lab tells you where it lives.

Core Web Vitals Tools for Developers

Several tools report both kinds of data, so you do not have to choose one.

  • Google PageSpeed Insights is free. It shows field data from the Chrome User Experience Report next to Lighthouse lab results, which makes it a good baseline for comparing the two approaches.
  • Lighthouse in Chrome DevTools is free and gives detailed diagnostics. It only provides lab data, so it can miss what real visitors see. It is best for finding the code-level cause of a problem.
  • Cloudflare Web Analytics is free to start and tracks LCP, INP and CLS from real visitors without cookies. It needs DNS configuration or proxying through Cloudflare, and it is useful for monitoring over time.
  • WP Rocket is a paid WordPress plugin that automates several optimisations aimed at Core Web Vitals. It suits WordPress sites where the owner does not want to write code. Confirm the current price on the vendor’s site before you budget.

Start with PageSpeed Insights for a baseline, then use DevTools to diagnose and a real-user tool to confirm the fix worked.

How to Improve LCP for SEO

Largest Contentful Paint measures how long the main content takes to appear. For practical, business-specific steps to speed up your own site, see practical steps for your site.

Work in this order. First, check TTFB, since a slow server delays everything after it. Second, preload the hero image and give it explicit dimensions. Third, defer scripts that the first screen does not need.

Done well, LCP work also improves the traditional timings that feed it, which is why the two approaches support each other.

Website Performance Best Practices and Your Next Step

Good performance work follows a simple routine. Slow or compromised sites also carry security risks, so read what happens if your website gets hacked.

The most common mistake is optimising a lab score that visitors never notice. The second is ignoring performance after launch, when new content and plugins quietly add weight.

If you want help applying this to your own site, Web Maniacs can help you review your current scores and plan fixes.

Frequently Asked Questions

Why are Core Web Vitals more important than traditional speed metrics?

Core Web Vitals measure what visitors actually experience: how quickly the main content appears (LCP), how quickly the page responds to input (INP), and whether the layout stays stable (CLS). Google describes these metrics as measuring real-world experience, and it uses field data from real Chrome users when assessing them as a ranking factor. Traditional metrics such as Time to First Byte or DOMContentLoaded remain useful for diagnosing server and rendering problems, but they do not directly show whether a visitor can use the page comfortably. Treat Core Web Vitals as the outcome measure and traditional metrics as the diagnostic tools that explain it.

Do traditional speed metrics still matter for website performance?

Yes. traditional measures such as page-load and DOM Ready times are still useful in general cases, although they can miss user experience in single-page applications. They are valuable for pinpointing where time is lost, for example a slow server response that delays everything after it. The practical approach is to use Core Web Vitals to decide whether the experience is acceptable, then use traditional timing metrics to find the cause when it is not.

Can a site have good traditional speed metrics but poor Core Web Vitals?

Yes. A page can load its HTML quickly and still perform poorly on Core Web Vitals. A common cause is a large hero image or heavy JavaScript that delays rendering of the main content, which affects LCP and INP even when Time to First Byte looks healthy. Layout shifts from late-loading fonts, ads or embeds can also raise CLS without changing load timings at all. Checking field data in addition to lab results will show these gaps.

What tools should I use to measure Core Web Vitals?

Google PageSpeed Insights is a free starting point because it reports both field data from the Chrome User Experience Report and lab diagnostics from Lighthouse. Lighthouse in Chrome DevTools gives deeper, code-level diagnostics for developers. Cloudflare Web Analytics offers privacy-focused real user monitoring of LCP, INP and CLS, and WP Rocket can help WordPress sites improve scores without manual coding. Use field tools to confirm real performance and lab tools to investigate causes.

GoogleAdd webmaniacs.co.nz as a preferred source on Google →

Website Not Showing on Google? Steps to Fix It

Quick Summary

If your website isn’t appearing in results, the first step is confirming whether Google has indexed it, which you can check by searching “site:” followed by your domain. Common causes include a new site not yet crawled, a noindex tag, a robots.txt block, or missing internal links, and the fixes are testable one by one. This is the core reason why is my website not showing up on google search results in New Zealand.

  • Search “site:yourdomain.co.nz” to see whether Google has indexed your pages.
  • Check page source for a noindex tag and remove it from pages you want visible.
  • Make sure robots.txt does not contain Disallow: / blocking the entire site.
  • Submit a sitemap in Search Console and link key pages from your main navigation.
  • Verify and match your Google Business Profile details to your website for local visibility.

Table of Contents

Check Whether Google Can See Your Website at All

Before you change anything, find out whether Google has stored your site in its index, because if you are wondering why is my website not showing up on google search results in New Zealand, this is the first thing to confirm.

Start with a quick test. Open Google and type “site:” followed by your domain, with no space after the colon. If you see results, Google knows your site exists. If you see nothing, your site is likely not indexed yet.

Many businesses find that a brand-new website simply hasn’t been picked up yet. That’s normal, and it’s fixable.

Using the site: operator to test indexing

The site: operator is your fastest diagnostic tool. Here’s how to use it well:

  • Search site:yourdomain.co.nz to see every indexed page
  • Search site:yourdomain.co.nz your business name to check a specific page
  • If you see your homepage but not inner pages, the problem is usually internal linking or a sitemap gap
  • If you see no results at all, move to the indexing checks below

Watch out: a site: search can take a little time to reflect new changes, so don’t panic if a fresh page doesn’t appear the same day.

Why Your Website Is Not Indexed by Google

Indexing problems usually come down to a handful of technical blockers, but the useful skill is knowing how to test each one rather than guessing. Work through these in order, because the first two account for most cases.

  • The site is new and hasn’t been crawled yet
  • A noindex instruction tells Google to stay away
  • The robots.txt file blocks Googlebot from reading the site
  • Pages have no internal links pointing to them, so Google can’t find them
  • The site has very thin content, which gives Google little reason to store it
  • The domain is not fully propagated, so Google reaches an old server or none at all

Noindex tags and robots.txt blocks

These two settings cause more hidden problems than almost anything else, and both are easy to confirm once you know where to look.

A noindex tag sits in the page’s HTML head and tells search engines not to list that page. Check your page source for <meta name="robots" content="noindex">. Many website builders and SEO plugins add this tag by accident, especially during development, and forget to remove it at launch. If you find it on a live page you want indexed, remove it and then request indexing through Search Console so Google revisits the page rather than waiting for its next scheduled crawl.

Your robots.txt file lives at yourdomain.co.nz/robots.txt. If it contains Disallow: /, you’re blocking the entire site from crawlers. Remove that line or narrow it to the specific folders you actually want hidden. A subtler trap is a robots.txt that blocks CSS and JavaScript files; Googlebot then cannot render the page properly and may treat it as low quality. Check that your robots.txt does not disallow your theme or script directories.

Watch out: a noindex tag and a robots.txt block can both be present at once, so fixing one will not restore indexing until the other is also cleared.

Confirming crawl access and internal linking

Once robots.txt and noindex are clear, confirm Google can actually reach your pages. In Search Console, the URL Inspection tool shows whether Googlebot was allowed to crawl the page and when it last tried. If the status says “Blocked by robots.txt” or “Excluded by noindex”, you have found the cause.

Internal linking is the next common gap. A page with no links pointing to it is effectively invisible, even if it is technically crawlable. Check that your main service and location pages are linked from the homepage or a top-level menu, not buried three clicks deep. A sitemap helps discovery, but Google still treats internal links as a signal of importance, so a page that only appears in the sitemap is weaker than one linked from navigation.

Thin content and duplicate pages

Google is less likely to store pages that add little. If a page is a near-duplicate of another, or contains only a few lines of generic text, it may be crawled but not indexed. Consolidate near-duplicate pages or add genuinely useful detail, and check for parameter or filter URLs that generate many thin variants of the same content.

How to Submit a Sitemap to Google Search Console

A sitemap is a list of your important pages that you hand directly to Google. It speeds up discovery, especially for new sites.

First, set up Google Search Console for your domain if you haven’t already. Then follow these steps:

  1. Find your sitemap address, usually yourdomain.co.nz/sitemap.xml
  2. Open Search Console and select your property
  3. Click “Sitemaps” in the left-hand menu
  4. Enter the sitemap path and click “Submit”
  5. Check the status column after a few days

A status of “Success” means Google can read the file. If you see an error, the sitemap address is likely wrong or the file isn’t publicly accessible.

Using the Google Search Console URL Inspection Tool

The URL Inspection tool tells you exactly what Google knows about a single page. It’s the most precise check you can run.

Get Started →

Small business owner checking a website URL on a laptop in a bright New Zealand office to fix search ranking issues

Paste a full page address into the search bar at the top of Search Console. Google will tell you whether the page is indexed, when it was last crawled, and whether any issues were found. If the page isn’t indexed, click “Request indexing” to ask Google to look at it. If the page is indexed but still hard to find, check whether Google Maps visibility issues are affecting your local presence.

If you are asking why is my website not showing up on google search results in New Zealand after a launch, a common mistake is requesting indexing for every page at once. Prioritise your key service and location pages instead, and give Google time to process them.

!A small business owner at a desk in a bright New Zealand office, reviewing a website URL on a laptop screen with a notepad beside them

How Long Google Indexing Takes for a New or Updated Site

Timing is the question most owners ask first. Google doesn’t publish a fixed schedule, and indexing speed varies from site to site.

A new site can take anywhere from a few days to several weeks to appear. Updated pages on an established site are often picked up faster. If your site has been live for more than a month with no indexing at all, the cause is almost always technical rather than a waiting game.

Local visibility works on its own timeline. Ranking for local searches builds over months, not days.

Checking Google Business Profile, DNS and Mobile Issues

Some problems sit outside the website itself, and these are the gaps competitors often skip. Each one can stop a site appearing even when the on-page checks pass.

Google Business Profile. For local businesses, your Google Business Profile is often what people see first, and it is a separate system from organic indexing. Make sure it is claimed, verified, and matches your website’s name, address and phone number exactly. Mismatched details weaken your local signals and can split the association between your profile and your site. Add your website address to the profile, keep your opening hours current, and post updates regularly. A profile that is unverified or has a suspended status will not show in the local pack, which many owners mistake for an organic indexing problem.

DNS and propagation. If you recently changed hosts or domain settings, DNS changes can take up to 48 hours to spread. During that window, Google may reach an old server or none at all. Confirm your domain points to the right host by checking your A record and CNAME, and check that your SSL certificate is valid; an expired certificate can cause Googlebot to abandon the crawl. A common pattern is a site that works on the owner’s browser because of cached DNS but fails for Googlebot, so test from a different network or use an online DNS checker.

Mobile-first indexing. Google indexes the mobile version of your site first, so a desktop-only check can miss the real problem. Open your site on a phone and confirm that text is readable, buttons are tappable, and no content is hidden behind hover states or desktop-only menus. In Search Console, the URL Inspection tool reports the “Crawled as” user agent; if it shows Googlebot smartphone and the rendered screenshot is blank or broken, your mobile rendering is failing.

Manual actions. Open Search Console’s “Manual actions” report. If Google has penalised your site for spam or unnatural links, it will be listed there. Fixing these requires removing the problem and submitting a reconsideration request. A manual action can remove a site from results suddenly even when every technical check passes, so check this report before assuming the cause is a crawl issue.

Several problems sit outside the website itself, and each can keep a site from appearing even when the on-page checks pass.

Problem Cause Fix
Local listing missing Profile unverified or suspended Claim and verify the Google Business Profile
Business details mismatch Name, address or phone differ from website Make details match exactly across both
Site unreachable for Googlebot DNS changes still spreading Wait up to 48 hours, then check A record and CNAME
Crawl abandoned SSL certificate expired Renew and confirm the certificate is valid
Blank mobile render Content hidden on phone Check mobile rendering in URL Inspection
Sudden removal from results Spam or unnatural links penalty Check Manual actions report and submit reconsideration

Booking a Visibility Check With Web Maniacs

If you’ve worked through these steps and your site still isn’t appearing, professional help can save you weeks of guesswork.

Pricing depends on the size and condition of your site, so check the Web Maniacs pricing page for current details or request a quote. Get Started with Web Maniacs to find out what’s stopping your site from appearing on Google.

Frequently Asked Questions

Why is my website not showing up in Google search results?

The most common reason is that Google has not indexed the site yet, which is normal for a new website. Other causes include a noindex tag left on pages, a robots.txt file blocking crawlers, or content that does not match what people search for. Start by checking whether your site appears with the site: operator, then work through indexing settings in Google Search Console to find the blocker.

How do I check whether Google has indexed my website?

Type site:yourdomain.co.nz into Google. If results appear, your homepage and other pages are indexed. If nothing appears, open Google Search Console, go to the URL Inspection tool, and enter your homepage address. It will report whether the page is on Google or not, and why.

How long does it take for a new website to appear on Google?

Google can take anywhere from a few days to several weeks to find and index a new site, depending on whether other websites link to it and whether you have submitted a sitemap. Submitting your sitemap in Search Console and requesting indexing for your homepage usually speeds up discovery. Ranking for competitive terms takes longer than appearing in results at all.

Can a robots.txt file stop Google from indexing my website?

Yes. A robots.txt file that contains Disallow: / tells Googlebot not to crawl any page on the site. Many website platforms create this file automatically during development, and it is often left in place after launch. Check yourdomain.co.nz/robots.txt and remove any rule blocking pages you want Google to see.

GoogleAdd webmaniacs.co.nz as a preferred source on Google →

7 Steps to Improve Email Open Rates for E-commerce

Last Updated: November 1, 2026

Quick Summary

To improve email open rates for e-commerce, clean your list of inactive and invalid addresses, segment subscribers by purchase history and behaviour, and write specific, benefit-led subject lines. Automated flows like abandoned-cart reminders also open at higher rates because they arrive when shopper intent is highest.

  • Remove hard-bounced addresses and suppress contacts with no opens in the last 90 to 180 days.
  • Abandoned-cart emails average open rates above 50%, about 15% higher than other marketing emails.
  • Reported e-commerce campaign open rates average around 31%, with top performers reaching 45% or higher.
  • Test send times over several weeks and judge the winner on clicks and revenue, not opens alone.
  • Mobile inboxes often cut subject lines off after roughly 30 to 40 characters, so put key words first.

Table of Contents

What an Email Open Rate Measures and Why It Matters for E-commerce

An email open rate is the share of delivered emails that a subscriber opens. Open rates are often the first number to check when a campaign underperforms. Open rate is the gate. If people never open the email, nothing inside it can earn a sale. Once they do open, the site they land on decides whether they buy, so see how to improve website usability for e-commerce conversions.

Email open rate is calculated by dividing unique opens by delivered emails, then multiplying by 100. A list of 10,000 delivered emails with 3,100 unique opens gives a 31% open rate. Open rate is a simple number, but it can mislead. Read it alongside clicks and revenue.

The benchmark data is clear on one point. Automated emails outperform campaign emails on revenue. Omnisend reports that automated emails generate 22 times more revenue per email than campaign emails, and convert nearly 19 times higher (Omnisend email marketing benchmarks).

Open rates also feed into your deliverability. Mailbox providers watch how people engage with your mail. Low opens over time can push your messages toward spam folders, which hurts every campaign you send after that.

  • Open rate: the percentage of delivered emails that get opened
  • Click rate: the percentage that lead to a click
  • Revenue per email: the money each sent email brings in

Robly advises looking past opens toward clicks, conversions and revenue per email, rather than relying on opens alone (Robly email marketing statistics for 2026). We agree. Use open rate as a diagnostic, not a scorecard.

What Counts as a Good Email Open Rate for E-commerce

A good e-commerce open rate depends on your list, your sending habits and your email type. The reported average for e-commerce campaigns is around 31%, and top performers reach 45% or higher, according to analysis of more than 183,000 brands (Threadpoint eCommerce email benchmarks 2026).

Your own baseline matters more than any industry average. Track your last 10 campaigns and note the typical result. Then aim to beat that number.

Welcome emails are a different case. Reported welcome email open rates run above 60%, with some sources citing approximately 91% (ConvertCart e-commerce email statistics 2026). These emails reach people who just subscribed, so they open at higher rates.

Keep your expectations realistic. Treat any single benchmark as a rough guide, not a target you must hit.

Step 1: Clean Your List of Inactive and Invalid Addresses

Removing dead addresses is the fastest way to improve your open rate. Invalid addresses bounce, and subscribers who never open drag down your engagement signals.

Start with these actions:

  • Remove addresses that hard-bounced
  • Suppress contacts with no opens in the last 90 to 180 days
  • Send a re-engagement email to inactive contacts before removing them
  • Check new sign-ups for typos like “gmial.com”

Be careful with the numbers. MailerLite notes that removing non-openers can raise the reported open rate by shrinking the denominator, without persuading a single extra person to open (MailerLite email marketing guidance). Clean your list for deliverability and engagement quality, not to make the metric look better.

Step 2: Segment Your Subscribers for Relevance

Segmentation sends the right email to the right person. A first-time buyer and a repeat customer care about different things, so they should not get the same message. Most guides stop at “segment your list.” The useful part is knowing which e-commerce segments to build and what each one changes about the message, because relevance is what earns the open.

Build segments from data you already have, and pair each with a message decision:

  • Purchase history, first-time buyer vs repeat buyer. A first-time buyer needs reassurance and a reason to return; a repeat buyer responds to replenishment, loyalty perks and early access. Same product, different subject line.
  • Product interest, category or item viewed. Someone who browsed running shoes should not receive a homewares promotion. Category-level segments let the subject line name the exact product family the subscriber already showed interest in.
  • Lifecycle stage, new subscriber, active customer, lapsed customer. New subscribers are still deciding whether to trust you; lapsed customers need a reason to re-engage. The lifecycle stage should set the tone before the subject line is written.
  • Customer value, high-value vs low-value buyers. High-value customers can carry a more premium, service-led message; low-value buyers often respond to entry-level offers and education.
  • Engagement, active openers vs lapsed subscribers. Active openers can handle more frequent sends; lapsed subscribers need a re-engagement message and, if they stay silent, removal.

Automated flows are the easiest place to start, because they trigger on behaviour rather than guesswork. Keep in mind that a slow landing page wastes the clicks good timing earns, so check how fast your pages load in this guide to improving website speed for e-commerce. Abandoned-cart reminders are a good example. Robly reports that abandoned-cart emails average open rates above 50%, about 15% higher than other marketing emails (Robly email marketing statistics 2026). The reason is not the subject line, it is that the message arrives at the moment the subscriber’s intent is highest.

Get Started →

Apply the same logic to the other e-commerce flows:

  • Browse abandonment: reference the category or product viewed, not a generic “come back” line.
  • Back-in-stock: lead with the product name and the fact it is available again; urgency here is real, not manufactured.
  • Post-purchase: send care, usage or review content rather than another promotion, so the subscriber keeps opening future mail.
  • Promotional campaigns: split the send by purchase history and engagement so the same discount does not land identically on every inbox.
Pro Tip
A simple test of whether your segmentation is working: if two segments would receive the same subject line and the same first sentence, they are not really separate segments for that campaign.

Matching the first contact to the person’s intent does more for opens than any subject line trick. Segmentation is the input; the subject line is only the output.

Step 3: Write Subject Lines That Earn the Open

Your subject line does one job: get the email opened. Keep it short, specific and honest. Mobile inboxes often cut subject lines off after roughly 30 to 40 characters, so put the key words first.

Marketer at a desk reviewing draft subject lines to improve email open rates on a laptop

Subject line patterns that work well for e-commerce:

  • Name a clear benefit: “Restock your favourite running socks”
  • Use the subscriber’s name or past purchase where it fits
  • Create light urgency with a real deadline, never a fake one
  • Ask a question when the product answers it

Test one variable at a time, such as length or whether you include an emoji. Run the test on a sample of your list, then send the winner to the rest. Keep a short log of results so your next campaign starts from evidence.

Preheader text is the second line people see. Write it to add context, not repeat the subject line.

Step 4: Choose the Best Time to Send E-commerce Emails

Send timing affects opens, but the best time varies by audience, by email type and by season. The honest answer is that no universal “best time” exists, which is why the useful skill is running a valid timing test rather than copying a chart.

A common pattern is that automated flows (welcome, abandoned cart, back-in-stock) should send immediately on trigger, because intent decays fast. Campaign emails are where timing tests pay off.

Run a valid send-time test

Most timing advice fails because the test is not controlled. Use this framework:

  • Change one variable at a time. Test send time only, keep the subject line, content and audience identical across windows.
  • Use a matched sample. Split a comparable group of subscribers across the windows, not your whole list at once.
  • Run long enough to matter. A single send is noise. Test across several weeks so day-of-week and one-off events do not distort the result.
  • Judge on downstream metrics. Compare clicks, conversions and revenue per recipient, not opens alone, a window that lifts opens but not clicks has not helped the business.
  • Retest periodically. Audience behaviour shifts with seasonality and list growth, so a winning window is a current finding, not a permanent rule.
Watch Out
Avoid testing timing and subject line in the same campaign. If both change, you cannot tell which one moved the result, and the learning is wasted.

Frequency is part of timing

Send frequency matters as much as the clock. Too many emails train people to ignore you, and ignored mail drags down the engagement signals mailbox providers watch. If opens fall, cut volume before you change content, fewer, better-targeted sends usually recover opens faster than a new subject-line formula.

Measure opens with the right caveat

Before you credit a timing change with an open-rate lift, account for how opens are measured. Many mailbox providers now pre-load images and apply privacy protections that can register an open even when the subscriber never read the email. That means open rates can drift upward for reasons unrelated to your campaign. Treat opens as a directional signal and confirm timing wins against clicks, conversions and revenue per recipient.

Key Takeaway
A timing test is only useful if it changes a business number. If a new send window does not improve clicks or revenue per recipient, keep the old one, regardless of what it does to the open rate.

7 Steps to Improve Email Open Rates: Quick Reference

Step What to do Expected effect
1. Clean list Remove invalid and inactive addresses Better deliverability
2. Segment Group by purchase and behaviour More relevant emails
3. Subject lines Test benefit-led, specific wording Higher opens
4. Send timing Test three windows over four weeks Better engagement
5. Automate Build welcome and cart flows Higher revenue per email
6. Test Change one variable per campaign Clear learning
7. Review Track opens, clicks and revenue Ongoing improvement

Booking a Web Maniacs Review of Your Email and Store Setup

Open rates are only part of the story. Your email works best when the store behind it converts visitors into buyers. Web Maniacs offers custom web and app solutions and digital marketing services.

If you want a second opinion, contact Web Maniacs to discuss your email setup and store. Get Started with Web Maniacs to talk through your options.

Frequently Asked Questions

Is a 37% open rate good?

A 37% open rate sits above the commonly reported average e-commerce campaign open rate of around 31%. Top performers are reported to reach 45% or more. Context matters, though. Open rates depend on list quality, send type and how opens are measured, so compare your figure against your own trend over time as well as against published benchmarks.

Is 35% a good email open rate?

A 35% open rate is above the roughly 31% average reported for e-commerce campaigns, but below the 45% or higher that top performers reach. Whether it is good for you depends on what your list looks like and what kind of email you sent. Welcome and automated emails typically open at higher rates than broadcast campaigns, so judge campaigns against campaigns and track the figure month by month.

What is a good email open rate for e-commerce?

Published benchmarks put the average e-commerce campaign open rate at around 31%, with top performers at 45% or more. Welcome emails are generally reported to achieve notably higher open rates than campaign emails. Treat these as reference points rather than targets. A reliable baseline comes from your own last three to six months of campaigns, which shows whether your changes are working.

How often should an e-commerce business email its subscribers?

Frequency should match how much value each email delivers and how engaged your list is. Start with a steady cadence you can sustain, such as one campaign a week plus automated flows, and watch unsubscribe rates, spam complaints and open trends. If engagement drops after you increase volume, reduce frequency or segment the sends to the people most likely to respond.

GoogleAdd webmaniacs.co.nz as a preferred source on Google →

7 Email Marketing Software Tradeoffs Before You Automate

Last Updated: October 31, 2026

Quick Summary

Email marketing software wins when messages must go out on schedule to the right segments without manual effort, while manual campaigns suit small, personal lists. Neither wins on every measure, so the right choice depends on list size, send frequency and team capacity. Start manual when sends are rare, and add software once repetitive work consumes meaningful time.

  • Software reports opens, clicks and unsubscribes automatically, while manual sends rarely do.
  • Setup time is often the largest hidden cost for small teams, not the subscription fee.
  • Run the break-even calculation at current list size and again at double it.
  • Add one automation at a time, such as a welcome sequence, and test it with your own address.
  • Run a controlled split test on your own list before judging whether software performs better.

Table of Contents

Email marketing software and manual campaigns both put your message in front of customers, but they ask very different things of your time, budget and team. The honest answer is that neither approach wins on every measure. The right choice depends on where your business sits and what it can sustain.

This guide sets out the trade-offs plainly, so you can decide whether to automate, stay manual, or combine the two.

Email Marketing Software vs Manual Campaigns: What Actually Differs

Email marketing software sends campaigns, schedules them and tracks results through a platform. Manual campaigns mean writing and sending each email yourself, usually from a standard email client or a basic mailing tool.

Software is useful when messages need to go out on time, to the right segment, without anyone pressing send.

Many businesses find that the biggest gap is in measurement. Software can report opens, clicks and unsubscribes automatically.

How Email Marketing Software Works in Practice

Most platforms follow the same basic pattern. You import or sync a contact list, group subscribers into segments, design a template, and then schedule a send or set up a trigger.

Integration is where the real effort sits. If you are thinking about linking your accounting or sales data, check first whether the integration is worth the setup time for your business size. Read whether an Xero API integration is worth it for a small business.

Expect a learning curve. Segmentation rules, automation logic and deliverability settings all take time to understand properly, and a rushed setup is hard to fix once it is live.

Email Marketing Software for Small Business: Costs, Limits and Break-Even

Most comparisons stop at the subscription fee. That is the smallest part of the decision. A fair comparison of software-assisted campaigns against manual sending has to put four costs on the same page: the platform fee, the setup time, the ongoing labour, and the cost of mistakes.

The four costs that actually matter

1. Platform subscription. Platform pricing varies by provider and plan. Read a plain explanation of how connected SaaS tools are integrated.

2. Setup time. Importing and cleaning a list, building templates, configuring segments, connecting your website or store, and testing automations is a one-off project, not an afternoon.

**3.

4. Error correction. Manual list management carries a real cost that rarely appears in comparisons: sending to someone who unsubscribed, duplicating a contact, or emailing the wrong segment.

A worked break-even method

You do not need a precise forecast to make a sensible call. Work through three numbers in the same currency and the same month:

  • Monthly platform cost for the tier you will need at your expected list size.
  • Hours per month your team currently spends on sending, list admin and reporting, multiplied by a realistic hourly cost for that person’s time.
  • Incremental sales or enquiries you can credibly trace to email, based on your own past campaigns rather than a vendor claim.

Break-even is the point where the platform fee plus the reduced labour cost is covered by the time you get back and the revenue you can attribute. If the hours saved are small and the revenue is uncertain, manual sending stays cheaper for longer than most guides admit. If repetitive sends are already consuming a meaningful slice of the week, the platform fee is usually the smaller number.

Pro Tip
Run the calculation twice, once at your current list size and once at double it. The tier jump is where most small-business budgets break, and it is the number a vendor quote will not show you.

Limits worth checking before you commit

Beyond price, check what each tier actually restricts: contact limits, monthly send caps, the number of active automations, access to segmentation, and how far back reporting goes.

!A small business owner comparing a software subscription quote against a handwritten list of monthly sending hours

The subscription fee is only part of the decision, so the article breaks the costs down as follows.

Cost What it covers Why it matters
Platform subscription Monthly fee by provider and plan Check the tier you need as your list grows
Setup time Import, templates, segments, testing Usually the largest hidden cost for small teams
Ongoing labour Writing, reviewing, monitoring each send Software shifts labour but does not remove it
Error correction Fixing wrong sends and duplicates Creates trust and compliance problems

Email Campaign Automation Examples Across Growth Stages

What makes sense depends on where your business is. Early on, a single welcome email and a monthly newsletter may be all you need. As your list grows, segmented sends by product interest or purchase history become more useful.

Get Started →

Automation is worth adding when a task repeats often and follows a clear rule. If you find yourself sending the same follow-up to every new customer, that is a candidate.

Trigger-Based Workflows That Replace Repetitive Sends

Trigger-based workflows remove the need to remember a send. A common example is a welcome sequence that starts when someone joins your list, followed by a reminder if they have not engaged after a set number of days.

Set these up carefully. Test each step with your own address before going live, and make sure the exit conditions work, so a customer who buys stops receiving the sales sequence.

Manual Email Marketing Best Practices Worth Keeping

Manual sending has real strengths that automation can flatten.

Small business owner writing a personalized email at a desk with email marketing software on a laptop.

Keep the habits that make manual work effective. Write subject lines that describe what is inside.

Manual campaigns can often be tested quickly and can respond to current events faster than a scheduled automation.

!A small business owner writing a personalised email at a desk beside a notepad and coffee in a bright New Zealand workspace

When to Automate Email Marketing: A Growth-Stage Decision Framework

Most advice on this question is really about email marketing versus marketing automation. The decision in front of you is more practical: should this business keep sending manually, or move to software, and when? Determining the ideal balance of marketing automation vs manual requires a clear understanding of your current operational constraints and the long-term scalability of your outreach strategy.

Stage 1: solo operator, small list, low frequency

At this stage manual sending is usually the right call. If you are emailing a few hundred contacts once or twice a month, the platform fee buys you little that a disciplined routine cannot do, and the setup time is better spent on the message itself. Keep the manual habits that make this work: one clear message per email, a consistent send time, a simple spreadsheet recording opens, replies and enquiries, and a clean unsubscribe process.

Stage 2: small team, growing list, regular sends

This is where the balance tips. The signals are practical rather than theoretical:

  • You are sending at least weekly, or running more than one campaign stream at a time.
  • List admin, deduplicating, removing unsubscribes, splitting segments, is taking a recognisable block of time each month.
  • You have started missing send dates, or delaying a campaign because nobody had time to build it.

When two or more of those are true, a single well-built automation, usually a welcome sequence or a post-purchase follow-up, is a sensible first step. Start with one trigger, test it thoroughly with your own address, and confirm the exit conditions work so a customer who buys stops receiving the sales sequence.

Stage 3: scaling business, segmented audience, multiple journeys

At this stage manual sending stops being a viable growth channel. Segmented campaigns by product interest or purchase history, lifecycle sequences that run across weeks, and reporting that ties email to revenue all depend on software. The risk here flips: the danger is no longer overspending on a platform, it is under-investing in the data connections that make the platform useful.

Watch Out
The most common failure is automating too much too soon. A sequence that is badly written or badly timed can damage a relationship you spent years building. Add one workflow at a time, and keep a human review step on anything that speaks for your brand.

A fair test before you switch

Rather than relying on broad return-on-investment claims, run a controlled comparison on your own list. Split a segment into two comparable halves, send one campaign manually and one through software, and record four things: conversion or enquiry rate, revenue per recipient, deliverability (how many bounced or landed in spam), and the hours each approach consumed. Run it over two or three sends before drawing a conclusion, one campaign is noise, not evidence.

If you decide to move: a transition plan

  1. Clean the list first. Remove unsubscribes, duplicates and hard bounces before importing, and keep a record of consent.
  2. Build two or three templates that match your current tone rather than starting from a generic design.
  3. Connect the data sources, website, store or CRM, and verify that new sign-ups and purchases flow through correctly.
  4. Set up one automation and run it alongside manual sends for a month.
  5. Train the person who will maintain it, and document the segments and triggers so the setup survives staff changes.

Measure open rate, click-through rate and traced enquiries before and after each change. Learn why tracking marketing ROI is essential for growth. That is what separates a useful decision from a hopeful one.

!A team reviewing a staged email plan on a whiteboard, with manual sends on one side and automated workflows on the other

Choosing Your Next Email Step With Web Maniacs

Start with the decision you face now, not the tool you might eventually buy. If your list is small and your messages are personal, a disciplined manual routine may serve you well.

Web Maniacs helps New Zealand businesses set up digital systems that connect customer data, websites and marketing tools, so the email work fits into the wider picture. Get in touch to talk through your options and what a sensible next step looks like for your business.

Frequently Asked Questions

What is the difference between email marketing software and manual campaigns?

Manual campaigns are sent by hand, one message at a time, usually from a standard email account or spreadsheet list. Email marketing software stores subscriber lists, schedules sends, segments audiences and tracks open rates, click-through rates and conversions automatically. The software costs money and takes setup time, but it removes repetitive work and lets campaigns run without someone pressing send. Manual sending gives more personal control and costs little beyond staff time, which is why many small businesses start there before investing in a platform.

Is email marketing software better than sending emails manually?

It depends on volume and goals. Software is better once you have a growing subscriber list, need scheduled or triggered emails, or want to measure campaign performance accurately. Manual sending can be better for a small list of high-value customers where a personal note matters more than automation. Most growing businesses benefit from a hybrid approach: automated workflows for welcome sequences and reminders, with hand-written newsletters or outreach for relationship building.

When should a business switch from manual email campaigns to automation?

Consider switching when manual sending starts taking several hours a week, when you lose track of who received which message, or when you want emails to respond to customer actions such as sign-ups or abandoned carts. Track the time spent on each send and compare it with the monthly cost of a platform. If the time saved and the improvement in engagement cover the cost, the switch is justified. Start with one automated workflow before moving everything.

Can manual email marketing still work for a small business?

Yes. Manual email works well for timely updates, event invitations, and personal follow-ups with a small, engaged audience. It allows quick testing of different subject lines and formats without building templates. The main limits are consistency and scale: sends are easy to forget, segmentation is harder, and results are harder to measure. Keeping a simple schedule and a clean list helps manual campaigns remain effective while the business grows.

GoogleAdd webmaniacs.co.nz as a preferred source on Google →