July 2026 - Web Maniacs

Secure Cross-Platform Mobile Apps for Beginners: A 2026 Guide

Table of Contents

Last Updated: July 31, 2026

Why Security Matters for Cross-Platform Mobile Apps

Security vulnerabilities in mobile applications cost organisations millions in data breaches, regulatory fines, and lost customer trust annually. At Web Maniacs, we’ve observed that the challenge intensifies when developing across multiple platforms simultaneously, each platform has distinct security models, and a vulnerability in one can expose your entire user base.

Mobile apps handle sensitive data: payment information, personal identifiers, location data, and authentication credentials. Unlike traditional web applications where security happens primarily on the server, mobile apps distribute security responsibilities across client-side and backend systems. A malicious actor can reverse-engineer your app binary, intercept network traffic, or exploit local storage vulnerabilities directly on a device.
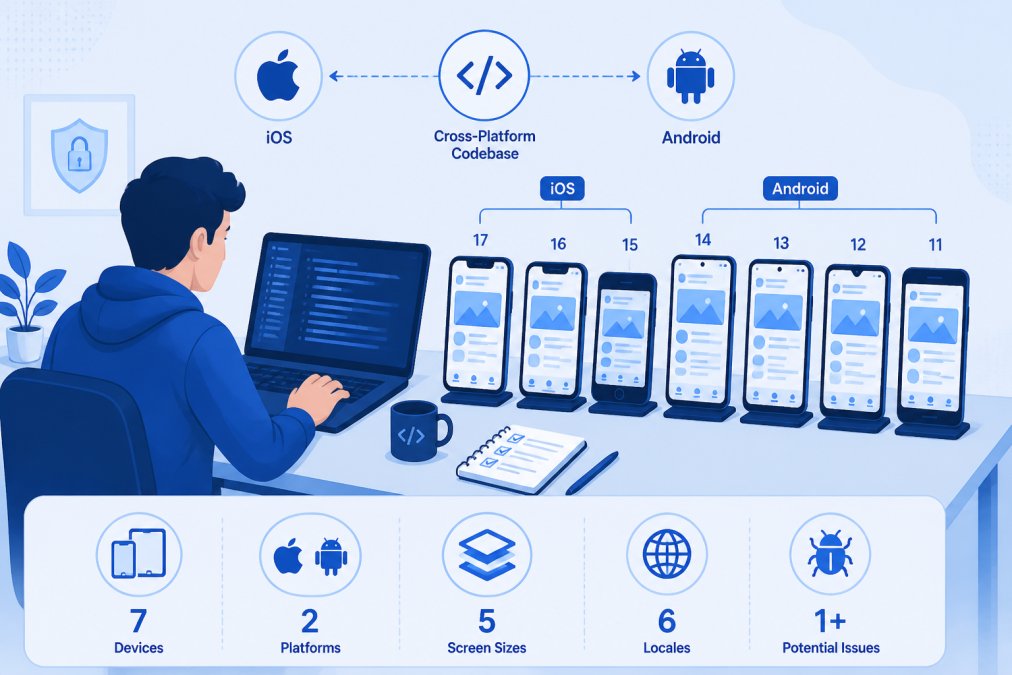
Developer working at a laptop with multiple mobile devices (iOS and Android phones) displayed on a desk showing different security testing screens, demonstrating cross-platform mobile app security testing in a modern development environment

Understanding Security Challenges in Cross-Platform Development

The most common mistake beginners make is treating iOS and Android security identically. Both platforms have strong built-in security features, but they work differently. Android relies on its permission model and sandbox architecture, while iOS uses tighter app isolation and code signing enforcement.

Cross-platform frameworks like React Native, Flutter, and Cordova introduce additional complexity by abstracting away platform-specific security mechanisms. When you use a framework, you’re trusting that framework’s security implementation.

Platform-Specific Security Nuances

iOS enforces code signing requirements that prevent unsigned apps from running. Android requires apps to be signed but allows users to install apps from unknown sources (though this is increasingly restricted on modern versions).

Data storage differs significantly. iOS provides encrypted storage through the Keychain, which is hardware-backed on modern devices. Android offers the Android Keystore, which provides similar functionality but requires explicit configuration. Many beginners store sensitive data in shared preferences without encryption, leaving data vulnerable to extraction.

Network security implementations vary too. Both platforms support HTTPS, but Android historically allowed cleartext traffic by default (changed in Android 9), while iOS was stricter from the beginning. Certificate pinning, a technique to prevent man-in-the-middle attacks, requires different implementation approaches on each platform.

Permission models also differ. Android’s permission system is granular and explicit, requiring apps to declare permissions and users to grant them. iOS uses a simpler model with fewer permissions but enforces them strictly through runtime prompts.

Step 1: Implement Data Encryption at Rest and in Transit

Encryption protects data stored on the device and data transmitted between your app and backend servers. Both are essential and require different approaches.

Encrypting Sensitive Data at Rest

Never store sensitive data in plain text, even in supposedly private app directories. On iOS, use the Keychain for authentication tokens and passwords, it’s encrypted by default and tied to the device’s secure enclave. For larger data sets, use Core Data with encryption enabled.

On Android, use the Android Keystore for cryptographic keys and sensitive data. Encrypt application data using Keystore-generated keys before storing in SQLite or Realm databases.

For cross-platform frameworks, use platform-specific plugins rather than implementing encryption in shared code. A React Native app should call native Keychain code on iOS and native Keystore code on Android.

Securing Data in Transit with HTTPS and Certificate Pinning

All network communication must use HTTPS. Certificate pinning adds an additional security layer by verifying that the server’s SSL certificate matches an expected certificate or public key.

Implementing certificate pinning requires storing your server’s certificate or public key in your app and validating it during TLS handshake. On iOS, use URLSession delegate methods. On Android, use Network Security Configuration or implement custom TrustManager logic.

The challenge with pinning is certificate rotation: when your server certificate expires, you must update your app. Plan for this by pinning multiple certificates (current and upcoming) or pinning the intermediate certificate rather than the leaf certificate.

Watch Out
Certificate pinning errors will cause your app to completely fail connecting to your backend if the certificate changes unexpectedly. Always test certificate rotation in a staging environment before deploying to production.

Step 2: Set Up Authentication and Authorization Protocols

Authentication verifies who the user is. Authorization determines what authenticated users are allowed to do.

OAuth and Two-Factor Authentication

OAuth 2.0 is the industry standard for delegated authentication. Instead of storing user passwords in your app, you redirect users to an identity provider (Google, Apple, Facebook) where they authenticate. Your app receives a token that proves authentication without handling the password.

For cross-platform apps, use OAuth 2.0 with the Authorization Code Flow, designed specifically for native mobile apps. Libraries like AppAuth (available for both iOS and Android) implement this flow correctly.

Two-factor authentication (2FA) adds a second verification factor beyond the password. Common approaches include time-based one-time passwords (TOTP) via authenticator apps, SMS codes, or push notifications. Implement 2FA on the backend: your app collects the second factor and sends it to your server for verification.

Never implement custom authentication schemes. Standard protocols exist because security experts have spent years identifying and fixing edge cases.

Session Management and Tokenization

After authentication, your app needs to maintain a session with the backend using tokenization: the server issues a short-lived access token (typically valid for 15-60 minutes) and a longer-lived refresh token (valid for days or weeks).

Store access tokens in memory or in a secure, temporary location. Never persist access tokens to disk in plaintext. Store refresh tokens in platform-specific secure storage: Keychain on iOS, Keystore on Android.

Implement token expiration and rotation. Shorter token lifespans limit the window of exposure if a token is compromised.

Cross-Platform Mobile App Security Best Practices

Input Validation and Secure Coding

Validate all input on the client side (for user experience) and always re-validate on the server (for security). Client-side validation can be bypassed; server-side validation cannot.

Prevent injection attacks by using parameterized queries for database operations. Never concatenate user input into SQL queries. Avoid hardcoding secrets in your source code, use a secure configuration service or environment variables during the build process.

Implement proper error handling that doesn’t leak sensitive information. Error messages shown to users should be generic ("Login failed") rather than specific ("User not found").

Choosing Secure Frameworks

Flutter has strong security foundations: it compiles to native code, has good support for platform-specific security APIs, and the Dart language has memory safety features. Flutter apps can directly access Keychain on iOS and Keystore on Android.

React Native requires careful implementation. JavaScript doesn’t have direct access to secure storage, so you must use native modules for sensitive operations. Cordova apps are essentially web apps running in a WebView, which means they inherit web application vulnerabilities.

Regardless of framework, prioritize frameworks with active security maintenance. Check the framework’s security advisory history and update frequency.

Pro Tip
When evaluating frameworks, check not just the framework’s security features but the security of popular plugins. A framework is only as secure as its ecosystem.

Step 3: Manage Dependencies and Audit for Vulnerabilities

Modern mobile apps depend on dozens of third-party libraries. Each library is a potential security vulnerability if it contains unpatched flaws.

Third-Party Library Risk Assessment

Before adding any dependency, assess its security posture. Check the library’s maintenance status: is it actively maintained? How quickly does the maintainer respond to security issues?

Review the library’s dependencies. A library might be secure, but if it depends on an unmaintained library, you inherit that risk. Tools like Snyk Snyk dependency scanning platform can visualize your entire dependency tree and flag known vulnerabilities.

Evaluate whether a library needs network access, file system access, or other sensitive permissions. A utility library that requires internet access is suspicious.

Continuous Dependency Auditing

Audit your dependencies regularly, not just at initial integration. Set up automated scanning in your CI/CD pipeline using tools like Snyk or Veracode Veracode application security testing.

Configure your build system to fail if high-severity vulnerabilities are detected. Keep dependencies updated, updates often include security patches. Document your dependency update policy to ensure consistency.

OWASP Mobile Security: Essential Principles for Your App

The Open Worldwide Application Security Project (OWASP) publishes guidance on mobile application security through their Mobile Application Security Verification Standard (MASVS).

Threat Modeling and Vulnerability Assessment

Threat modeling systematically identifies potential attacks against your application. Map your app’s components: client app, backend API, database, third-party services. Then identify potential threats at each boundary.

Once you’ve identified threats, assess the likelihood and impact of each. Focus your security efforts on high-likelihood, high-impact threats first. Perform security code reviews focusing on authentication logic, encryption implementation, and API communication code.

Penetration Testing on Real Devices

Automated testing tools catch common vulnerabilities, but sophisticated attacks require manual testing on actual devices. Test on a jailbroken iOS device and a rooted Android device to see what data is stored and monitor network traffic.

Use network traffic analysis tools like Burp Suite or mitmproxy to inspect HTTPS traffic. Attempt to reverse-engineer your app using tools like Frida or Ghidra. If you can extract API keys or encryption keys, so can an attacker.

Secure Coding Practices for Mobile Apps

Code Obfuscation and Runtime Protection

Code obfuscation makes your compiled app binary harder to reverse-engineer. Tools like ProGuard (for Android) and Guardsquare’s DexGuard Guardsquare mobile app protection solutions rename classes and methods to meaningless names and remove debug information.

Runtime Application Self-Protection (RASP) detects when an app is running on a jailbroken/rooted device or being debugged. Your app can respond by refusing to run or alerting your backend. Implement root/jailbreak detection as an additional layer, but understand its limitations.

Biometric Authentication and Advanced Security Features

Biometric authentication (fingerprint, face recognition) provides better security than passwords when implemented correctly. On iOS, use LocalAuthentication framework. On Android, use BiometricPrompt.

Biometric authentication should supplement, not replace, other security measures. After biometric verification, still issue a session token for subsequent requests. Implement adaptive security: increase security requirements when risk is higher.


Securing cross-platform mobile apps requires attention to platform-specific details, careful dependency management, and systematic threat assessment. Web Maniacs helps development teams implement these security practices through custom mobile app development that integrates authentication protocols, data encryption, and secure coding from the start. Our team handles platform-specific security nuances so your app protects user data across iOS and Android. Get started with Web Maniacs and build mobile apps your users can trust.

Security Practice Purpose Platform Consideration
Data encryption at rest Protect stored sensitive data iOS Keychain vs Android Keystore
HTTPS and certificate pinning Secure network communication Both platforms, different implementation
OAuth 2.0 authentication Delegate authentication safely Framework-agnostic standard
Dependency auditing Identify vulnerable libraries Automated scanning in CI/CD
Code obfuscation Prevent reverse engineering Android ProGuard, iOS compilation options
Biometric authentication Improve security and UX Platform-specific APIs required
Threat modeling Systematic vulnerability identification Both platforms equally
Penetration testing Real-world attack simulation Requires jailbroken/rooted devices

Frequently Asked Questions

What are the most common security vulnerabilities in cross-platform mobile apps?

Common vulnerabilities include insecure data storage, weak authentication mechanisms, unencrypted API communication, and vulnerable third-party dependencies. Cross-platform apps face additional risks because security gaps on one platform may affect both iOS and Android versions. Input validation failures, inadequate session management, and exposed cryptographic keys are frequent issues. Regular vulnerability assessments and penetration testing help identify and fix these before launch.

How do I implement data encryption for my cross-platform mobile app?

Encrypt sensitive data at rest using platform-specific encryption libraries (AES-256 for Android, CommonCrypto for iOS) and frameworks like SQLCipher for encrypted databases. For data in transit, enforce HTTPS with TLS 1.2 or higher and implement certificate pinning to prevent man-in-the-middle attacks. Cross-platform frameworks like React Native and Flutter offer built-in encryption packages. Always store cryptographic keys securely and never hardcode them in your source code.

What's the difference between OWASP mobile security and general app security?

OWASP Mobile Security focuses specifically on mobile-specific threats like insecure storage, weak cryptography, and reverse engineering risks. General app security covers broader concerns like SQL injection and XSS. OWASP MASVS (Mobile Application Security Verification Standard) provides a framework for testing mobile apps across both native and cross-platform environments. Following OWASP guidelines ensures your app addresses mobile-specific attack vectors that desktop applications may not face.

How often should I audit dependencies and apply security patches?

Audit dependencies at least monthly and immediately when security advisories are released for libraries you use. Implement automated dependency scanning tools that integrate with your CI/CD pipeline to flag vulnerabilities during development. Apply critical security patches within 48-72 hours of release. For cross-platform apps, test patches on both iOS and Android before deploying to production to ensure compatibility and stability across platforms.

This article was written using GrandRanker

Hybrid App Development Explained for Non-Technical Founders

Table of Contents

Last Updated: July 30, 2026

What Is Hybrid App Development Explained for Non-Technical Founders

Building a mobile app no longer requires choosing between expensive native development and compromised web solutions. Hybrid app development is the practical middle ground: a single codebase written in web technologies that deploys to both iOS and Android, eliminating the need to build two separate applications.

Hybrid apps use HTML, CSS, and JavaScript wrapped inside a native container that provides access to device features like cameras, GPS, and push notifications. Frameworks like React Native and Flutter now deliver performance nearly indistinguishable from purely native apps for most use cases. According to Gartner’s 2026 Mobile Development Report, organisations choosing hybrid approaches reduce time-to-market by 40-60% compared to native-first strategies.

How a Single Codebase Works Across Devices

The magic of hybrid development lies in abstraction. Your code communicates with a bridge layer that translates instructions into native API calls for each platform. You write your app logic once in JavaScript, React, or Dart, and the framework packages that code with a lightweight native wrapper for deployment to the App Store or Google Play.

This architecture solves the fundamental problem of cross-platform development: code reusability. Instead of maintaining separate iOS and Android codebases that inevitably drift apart, you maintain one source of truth. Bug fixes, feature updates, and design changes happen once, not twice.

Pro Tip
The real efficiency gain isn’t just in initial development, it’s in maintenance. A feature that takes two weeks to build natively takes 3-4 days with a hybrid framework, and updates roll out simultaneously to both platforms.

Web Technologies Inside a Mobile App

Your hybrid app runs inside a WebView, essentially a browser engine embedded in a native application shell. Frameworks like Ionic provide pre-built components that mimic iOS and Android design patterns.

The critical difference from Progressive Web Apps is that hybrid apps have full access to device APIs. Your code can trigger the camera, read contacts, send SMS messages, or store data offline. Modern hybrid frameworks like React Native and Flutter don’t use WebViews; they compile directly to native components, delivering near-native speed while maintaining code reusability.

Hybrid vs Native App Development: What Founders Need to Know

Native apps are written specifically for one platform using that platform’s native language. iOS uses Swift; Android uses Kotlin. Hybrid apps require trade-offs in specialisation but sacrifice nothing in capability. For most startups building marketplaces, booking systems, or service platforms, this trade-off favours hybrid development.

The cost difference is substantial. Native development requires hiring iOS and Android developers, two specialists with different skill sets. Hybrid development requires one team of full-stack developers, translating to 30-50% lower development costs.

Watch Out
One genuine limitation: if your app requires deep platform-specific features (like advanced AR capabilities or complex device integrations), native development may be necessary. However, 80% of business applications never hit this ceiling.

Performance and User Experience Differences

The performance gap between hybrid and native has collapsed. React Native and Flutter compile to native code, not interpreted JavaScript. Your app runs at speeds comparable to native applications for standard operations: scrolling, animations, form input, and network requests.

User experience consistency is where hybrid shines. Your design looks and functions identically on iOS and Android. When you discover a usability issue, you fix it once and deploy to both platforms simultaneously, rather than fixing it in two places and waiting for two separate app store approvals.

App Store Approval and Device Feature Access

Both the Apple App Store and Google Play accept hybrid apps without discrimination. Device feature access through hybrid frameworks is comprehensive: camera, microphone, contacts, calendar, GPS, accelerometer, and most other sensors. The practical limitation is that newer device features sometimes take weeks for frameworks to support, though this rarely affects most applications.

Benefits of Hybrid App Development for New Zealand Startups

The primary advantage for New Zealand founders is resource efficiency. Hybrid development lets you move faster and cheaper, which matters enormously in the critical first 18 months. Research from [McKinsey’s 2026 Software Development(/custom-software-development-services-nz/) Study | mckinsey.com] shows that companies launching products 40% faster gain significant competitive advantage.

The second advantage is team flexibility. A developer skilled in React can build hybrid apps with React Native. You’re not locked into hiring specialists in obscure languages, which matters in New Zealand’s smaller talent market.

Code Reusability and Faster Development

Writing code once and deploying to two platforms is the core promise of hybrid development. A feature that would take two weeks to build natively takes 3-4 days with hybrid frameworks.

Development Task Native (iOS + Android) Hybrid Time Saved
Initial feature build 10-14 days 3-4 days 65-70%
Bug fix deployment 5-7 days 1-2 days 70%
Design update 3-5 days 1 day 75%
Performance optimisation 4-6 days 2 days 60%

Reduced Development Cost and Team Requirements

Native app development requires at least two developers: one iOS specialist and one Android specialist. In New Zealand, experienced mobile developers command salaries between NZ$90,000 and NZ$140,000 annually. Hybrid development requires one full-stack developer or a small team of JavaScript-skilled developers at NZ$80,000-NZ$120,000 annually, representing 40-50% cost savings immediately.

Key Takeaway
A hybrid app costs 40-50% less to build and maintain than equivalent native apps, with development timelines compressed by 60-70%. For startups, this efficiency is transformational.

Cost of Hybrid App Development in New Zealand

Total cost depends on application complexity, team location, and framework choice. Pricing for a simple MVP with basic features, user authentication, and data display, a mid-complexity application with custom backend integration and payment processing, or a complex application with real-time features and advanced integrations is available on the Web Maniacs website. Application scope is the primary cost driver; more features mean more development time. Design complexity, backend integration, and team location all affect cost significantly.

No-Code vs Low-Code vs Custom Development

No-code platforms like Adalo let non-technical founders build applications without writing code. Adalo publishes true native iOS and Android apps from a single codebase, starting at approximately NZ$60 per month. You can build and launch a functional app in days rather than months.

The limitation is flexibility. No-code platforms excel at standard use cases: marketplaces, booking systems, directory apps. If your application requires custom logic or highly specific features, no-code platforms struggle.

Low-code platforms like SAP Build Apps sit between no-code and custom development, providing visual development tools with the ability to write custom code when needed. For a non-technical founder with a simple MVP, no-code platforms like Adalo offer exceptional value. For a founder with a more complex vision, low-code or custom development is necessary.

React Native dominates the hybrid development landscape. Created by Meta, React Native uses JavaScript and React principles to build native apps. Companies like Shopify, Coinbase, and Uber use React Native. The framework compiles to native code, delivering near-native performance with a mature ecosystem and large developer community.

Flutter is Google’s alternative, using the Dart programming language. Flutter compiles to native code and delivers excellent performance. The framework is newer than React Native but growing rapidly, with hot-reload features that make development extremely fast.

Ionic uses web technologies (HTML, CSS, JavaScript) with Angular, React, or Vue frameworks. Ionic is ideal if your team has web development skills. For no-code development, Adalo stands out by publishing true native iOS and Android apps.

React Native and Flutter for Native Performance

React Native’s strength is its ecosystem and developer availability. Most web developers can learn React Native quickly because it uses JavaScript and React patterns they already know. Flutter’s strength is developer experience, with exceptional hot-reload features and a comprehensive widget library.

For a New Zealand startup hiring local developers, React Native is the safer choice because more developers know JavaScript. Both frameworks deliver native performance; the choice is largely about team skills and preference.

Ionic and Cordova for Web Technology Developers

Ionic is ideal if your team consists of web developers who want to build mobile apps without learning new languages. Ionic apps run in a WebView, meaning they’re technically hybrid rather than truly native. For most applications, marketplaces, booking systems, content apps, the performance difference is negligible.

No-Code Platforms: Adalo, Glide, and Bubble

Adalo publishes true native iOS and Android apps from a visual builder. Non-technical founders can build functional apps in days, with a relational database, user authentication, and payment processing, starting at NZ$60 per month.

Glide creates Progressive Web Apps from spreadsheets or databases. Glide is excellent if your data lives in Google Sheets and you want to build a quick interface around that data. However, Glide doesn’t publish native mobile apps to the App Store or Google Play.

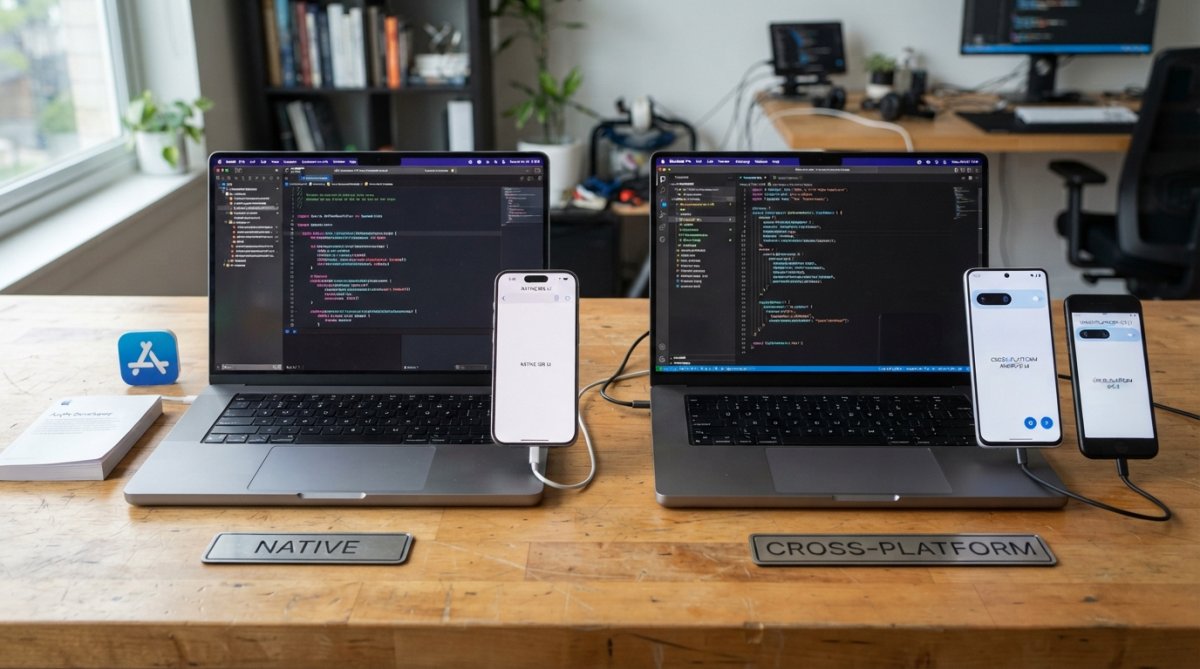
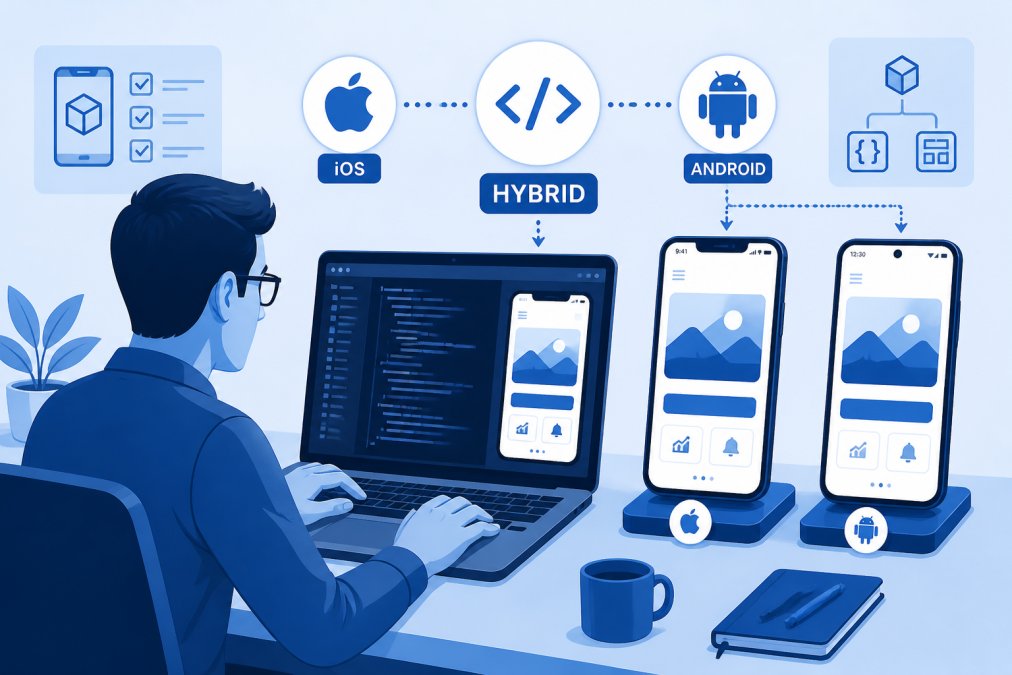
Developer working on laptop with iOS and Android phones displaying different app interfaces side by side, showing hybrid app development in action with code editor visible

When to Choose Hybrid App Development Over Native

Choose hybrid development if your timeline is tight, your budget is limited, or your team consists of full-stack developers rather than platform specialists. Hybrid development is ideal for MVPs and early-stage products. Choose native development if your app requires extreme performance (games, real-time rendering), deep platform-specific features, or if you’re building for a single platform only.

Time-to-Market and MVP Launch Considerations

Time-to-market is where hybrid development shines. A hybrid MVP can launch in 2-4 months. An equivalent native MVP typically takes 4-6 months or longer. This time advantage is crucial for startups because market timing matters enormously. The faster launch allows you to test your business hypothesis earlier.

Scalability, Technical Debt, and Long-Term Maintenance

Hybrid development doesn’t sacrifice scalability. Your application scales based on your backend infrastructure, not on whether you used hybrid or native frameworks. Technical debt is where hybrid development shows an advantage. You’re maintaining one codebase, not two, meaning one place to fix bugs and implement security updates. Maintenance costs for hybrid apps are typically 30-40% lower than equivalent native apps.

Key Takeaway
Hybrid development reduces maintenance costs by 30-40% and prevents technical debt from accumulating across multiple codebases. For long-term sustainability, hybrid development is the more pragmatic choice for most applications.

Hybrid vs Cross-Platform vs Progressive Web Apps: Which Path for Your Startup

Hybrid apps are web code inside a native wrapper. React Native and Flutter are technically "cross-platform native" frameworks, compiling to native code rather than running in a WebView.

Progressive Web Apps (PWAs) are websites that behave like apps. They install on your home screen, work offline, and send push notifications. For most startups, hybrid apps are the better choice than PWAs because they distribute through app stores, providing discovery and legitimacy.

When PWAs Make Sense Instead of Hybrid Apps

Progressive Web Apps are ideal if your primary audience is desktop users or mobile web users. PWAs work across all browsers and devices without requiring app store approval.

PWAs are ideal if you want to avoid app store gatekeeping. PWAs bypass the 30% commission and policy restrictions that Apple and Google impose. The limitation of PWAs is discoverability. Users find apps through app stores; they find PWAs through web search or direct links. For consumer applications relying on app store discovery, PWAs are a disadvantage. For B2B applications, a PWA might be ideal.

Cross-Platform Frameworks Beyond Hybrid

Xamarin (now .NET MAUI) is Microsoft’s cross-platform framework using C# and .NET. NativeScript uses JavaScript or TypeScript to build truly native apps. The practical reality is that React Native and Flutter dominate the market. Most job postings for hybrid development are for these two frameworks.

Finding Developer Talent for Hybrid App Development in New Zealand

New Zealand has a growing pool of React Native and Flutter developers. Wellington and Auckland have the largest concentrations. Salaries for experienced hybrid developers range from NZ$80,000 to NZ$120,000 annually, comparable to full-stack web developers.

Finding local talent is easier than finding native specialists because hybrid development uses languages (JavaScript, Dart) that are taught widely. Many web developers can transition to hybrid development with weeks of training.

Hiring Full-Stack Teams vs Outsourcing to Agencies

Building an in-house team makes sense if you’re committed to building multiple products or maintaining your application long-term. Outsourcing to an agency makes sense if you’re building your first MVP and want to validate your idea before committing to a full team.

Web Maniacs offers project-based development for startups building their first MVP. For companies building long-term products, Web Maniacs can provide ongoing maintenance and feature development.

What to Look for in a Hybrid App Development Partner

Look for a partner with demonstrated experience in hybrid frameworks (React Native or Flutter). Ask for case studies and references. Look for a partner who understands your business, not just your technical requirements.

Look for a partner who communicates clearly and frequently. Development surprises are expensive. Regular communication prevents misunderstandings and keeps projects on track. Look for a partner who can scale with you as your MVP grows.

Web Maniacs provides expert digital solutions, including custom software development, website design, and mobile app creation, tailored to help your business thrive online. Our approach combines custom development with strategic guidance, ensuring your technical decisions align with your business goals. We handle the full lifecycle: from MVP launch through scaling and ongoing maintenance. Get started with Web Maniacs and transform your app idea into a revenue-generating product that reaches both iOS and Android users without the cost and complexity of native development.

Frequently Asked Questions

What is hybrid app development and how does it differ from native apps?

Hybrid app development uses a single codebase built with web technologies like HTML5, CSS, and JavaScript to create apps for iOS and Android simultaneously. Unlike native apps, which are built separately for each platform using platform-specific languages, hybrid apps wrap web code in a native container. This approach reduces development time and cost but may have slightly lower performance compared to truly native applications optimised for each mobile operating system.

What are the main benefits of hybrid app development for New Zealand startups?

Hybrid app development offers significant advantages for startups: code reusability across iOS and Android reduces development cost and time-to-market, you need fewer developers with expertise in a single codebase rather than multiple languages, and maintenance becomes simpler. For early-stage founders with tight budgets, hybrid frameworks like React Native and Flutter allow you to launch an MVP quickly, test your business model, and scale later without rewriting your entire application.

How much does hybrid app development cost compared to native development?

Hybrid app development is typically 30-50% cheaper than building separate native apps because you're maintaining one codebase instead of two. Costs depend on complexity, features, and whether you use no-code platforms (starting from NZ$60-115 per month for tools like Adalo or Bubble) or hire developers (typically NZ$151-200+ per hour for custom work). A basic MVP might cost NZ$8,000-20,000 with hybrid frameworks, versus NZ$15,000-40,000+ for native development.

What frameworks should I consider for hybrid app development in New Zealand?

Popular hybrid frameworks include React Native and Flutter for high-performance native-feeling apps, Ionic for web developers using JavaScript, and no-code platforms like Adalo, Glide, and Bubble for non-technical founders. React Native and Flutter offer better performance and access to native device features, while Ionic is ideal if you have web development skills. No-code platforms eliminate coding entirely but may have limitations for highly complex applications. Choose based on your team's skills, timeline, and performance requirements.


Hybrid app development represents the pragmatic path forward for most New Zealand startups. You get native performance and app store distribution without the cost and complexity of building two separate applications. The frameworks are mature, the developer talent exists, and the cost savings are substantial. The only question is which framework fits your team’s skills and your timeline. Start with your business goals, not your technical preferences, and the right choice becomes obvious.

This article was written using GrandRanker
5 Best Mobile App Development Platforms for NZ Startups

Table of Contents

5 Best Mobile App Development Platforms for NZ Startups

Last Updated: July 29, 2026

Building a mobile app as a startup in New Zealand requires speed, affordability, and flexibility to pivot. The 5 best mobile app development platforms for startups in NZ address these needs differently, from no-code visual builders to open-source frameworks offering complete control. At Web Maniacs, we’ve worked with dozens of NZ startups navigating these choices, and the right platform can cut your time-to-market in half while reducing development costs significantly.

Some platforms let non-technical founders build apps without writing code. Others give experienced developers native performance and flexibility. Understanding which category fits your team’s skills and timeline matters far more than chasing the "best" tool in abstract terms.

Quick Comparison: 5 Best Mobile App Development Platforms for Startups in NZ

Platform Type Starting Price Best For Key Advantage
FlutterFlow Low-code NZ$49/month Cross-platform rapid deployment Exportable Flutter code for ownership
Bubble No-code NZ$49/month Web and mobile SaaS apps Flexible usage-based pricing scales with growth
Glide No-code NZ$32/month Spreadsheet-based data apps Fastest time-to-launch for simple tools
React Native Open-source Free High-performance native apps Single JavaScript codebase, large community
Ionic Open-source Free Hybrid apps using web skills Familiar HTML/CSS/JavaScript stack

How We Evaluated These Platforms

We assessed each platform across five dimensions: time to first working prototype, total cost of ownership for a typical NZ startup, learning curve for teams without mobile experience, ability to scale without rebuilding, and customisation flexibility.

Low-code and no-code platforms prioritise speed, you can launch something functional in days or weeks without specialist developers. Open-source frameworks like React Native and Ionic demand more technical skill upfront but give you native performance and complete control.

Pro Tip
The biggest mistake startups make is choosing a platform based on feature count rather than whether it matches their team’s actual skills. A powerful low-code platform is useless if your team wants to build with code, and an open-source framework becomes an anchor if you don’t have developers who know JavaScript or React.

1. FlutterFlow: Low-Code Cross-Platform Development with Code Export

FlutterFlow stands out because it gives you low-code speed without vendor lock-in. You build mobile apps visually using drag-and-drop, but the platform generates real Flutter code that you own and can export. If you outgrow the visual builder, you can take the codebase and continue developing with standard Flutter tools.

The platform handles time-consuming tasks: UI design, state management, API integration, and app store deployment. A typical NZ startup can move from wireframe to a live app in the Apple App Store and Google Play Store within 4-6 weeks.

FlutterFlow pricing starts at NZ$49 per month for the Basic plan (billed annually), which includes deployment. The code export feature means you’re learning real Flutter development patterns, not a proprietary language. If you hire a Flutter developer later, they can read and modify your codebase immediately.

FlutterFlow’s visual builder handles most common app patterns beautifully, but highly custom animations or platform-specific features still require dropping into code. For 80% of startup apps, e-commerce, service marketplaces, content platforms, simple SaaS tools, this isn’t a constraint.

Screenshot of flutterflow.io interface
FlutterFlow – Build Beautiful, Modern Apps

2. Bubble: No-Code Web and Mobile Apps Without Writing Code

Bubble lets you build complete applications, database, logic, user interface, integrations, without touching code. You define workflows, database schemas, and UI elements using drag-and-drop tools and configuration panels.

For non-technical founders or small teams without developers, Bubble eliminates the biggest barrier: you don’t need to hire someone who knows JavaScript, databases, or deployment infrastructure. A solo founder can build a functional SaaS product, test it with real users, and iterate based on feedback.

Bubble’s pricing starts at NZ$49 per month for the Starter plan (billed annually) for web apps. Usage-based pricing means costs scale with traffic and database size, ideal for startups paying for growth as it happens.

Bubble’s strength emerges when integrating third-party services. The platform has a massive plugin ecosystem, payment processors, CRM systems, communication APIs, with pre-built connectors handling authentication and data flow. Building a marketplace that accepts payments and sends automated notifications takes days in Bubble, not weeks.

For NZ startups building their first product or validating a business idea quickly, Bubble is exceptionally strong.

Screenshot of bubble.io interface
Bubble: Build web & mobile apps with the only no-code AI app builder

3. Glide: Transform Spreadsheets Into Data-Driven Applications

Glide inverts typical app development. Instead of building a database schema and then a UI, you start with data you already have, a Google Sheet, Excel file, or Airtable base, and Glide transforms it into a working mobile and web app.

This approach is remarkably fast for specific problems: internal tools, customer portals, inventory management systems, and simple data collection apps. A field service company can build a job dispatch app. A nonprofit can create a volunteer scheduling tool. A retail business can build an inventory app for staff.

Glide pricing starts at NZ$32 per month for the Explorer plan (billed annually), the lowest entry point here. The free plan is genuinely useful for prototyping, you get a full-featured app builder with limits on user count and update volume.

A spreadsheet that took weeks to maintain manually becomes a live app in a day. Glide handles the database layer automatically by syncing with your existing spreadsheet, eliminating entire categories of technical decisions.

Glide excels at data-centric apps but struggles with apps requiring complex custom logic or integration with multiple external systems. For NZ startups with a specific data management problem and limited technical resources, Glide is often the fastest path from idea to working product.

Screenshot of glideapps.com interface
No Code App Builder: Create Custom, AI-Powered Apps | Glide

4. React Native: Open-Source Framework for High-Performance Native Apps

React Native is an open-source framework maintained by Meta and the community. You write JavaScript once and it compiles to native iOS and Android apps that perform like apps written in Swift or Kotlin. There’s no vendor lock-in, no monthly subscription, and no proprietary tools controlling your app.

For experienced development teams, this approach is profound. You’re not constrained by a visual builder’s capabilities. You can integrate with any third-party library in the JavaScript ecosystem and optimise performance to the metal.

React Native projects typically cost between NZ$30,000 and NZ$80,000 for simple MVPs, with costs in developer time rather than platform fees. A skilled React Native developer in Auckland or Wellington typically charges NZ$80-150 per hour, and a simple app MVP takes 8-12 weeks with one developer.

The JavaScript/React community is enormous, meaning there’s a library for almost every problem. This ecosystem abundance means you spend less time building infrastructure and more time on differentiating features.

React Native’s real strength isn’t for solo founders or non-technical teams. It’s for startups with some development capacity needing the performance and flexibility that only native code provides.

Screenshot of reactnative.dev interface
React Native · Learn once, write anywhere

5. Ionic: Web Technologies for Fast Hybrid Mobile App Development

Ionic lets you build mobile apps using HTML, CSS, and JavaScript, technologies web developers already know. You write your app once using standard web technologies, and Ionic packages it as native iOS and Android apps running in a WebView container.

The advantage is accessibility. Web developers can immediately start building mobile apps without learning new languages or frameworks. You can hire developers more easily because web development skills are more common than mobile-specific skills.

Ionic’s core framework is free and open-source. Your costs are primarily in developer time, not platform fees. The framework integrates with popular JavaScript frameworks like Angular, React, and Vue, giving you flexibility in code structure.

Ionic apps run in a WebView, meaning they don’t have the same access to device hardware as truly native apps. For most use cases, content apps, productivity tools, service marketplaces, this limitation is irrelevant.

Ionic is the right choice for teams with web development expertise wanting to extend that expertise into mobile without learning platform-specific languages.

Screenshot of ionic.io interface
Ionic: Enterprise App Platform

Mobile App Development Cost in New Zealand: What to Budget

Understanding true app costs requires separating platform costs from development costs. A low-code platform like Bubble or FlutterFlow might cost NZ$50-100 per month, but you’re still investing significant time. An open-source framework like React Native has zero platform costs, but you’re paying developer salaries or contractor rates.

For a simple MVP with basic functionality, user authentication, a few screens, and one or two integrations, budget between NZ$8,000 and NZ$25,000 using a low-code platform with in-house resources, or NZ$30,000 to NZ$60,000 hiring a contractor.

For a more substantial app with custom features, complex workflows, and multiple integrations, budget NZ$60,000 to NZ$150,000 for a production-ready app.

Hidden costs often surprise startups: hosting infrastructure, third-party service subscriptions (payment processing, analytics, push notifications), app store fees, and ongoing maintenance. A modest app might incur NZ$200-500 per month in recurring costs once live.

Watch Out
The most common cost mistake is underestimating maintenance and support. A live app requires ongoing updates to fix bugs, maintain compatibility with new OS versions, and add features based on user feedback. Budget at least 15-20% of your initial development cost annually for maintenance.

Which Platform Should You Choose? Decision Framework

The right platform depends on three factors: your team’s technical skills, your timeline to launch, and your budget constraints.

If you have no developers and need to launch within 8 weeks: Glide or Bubble are your fastest paths. Glide is best if your app is primarily data-centric (inventory, forms, scheduling). Bubble is better if you need custom workflows or user authentication.

If you have one or two web developers and want to control your codebase: React Native or Ionic let you use existing JavaScript skills. React Native is better if performance matters or if you need native device features. Ionic is better if you want to share code between web and mobile versions.

If you want low-code speed with code flexibility: FlutterFlow bridges this gap. You get visual development speed with the ability to export and customise the underlying code.

If you’re hiring a development team: React Native or custom native approaches become viable. The team can optimise for performance and customisation in ways low-code platforms cannot match.

Startup founder and developer reviewing mobile app mockups on a tablet and laptop in a modern Auckland office, discussing platform options with a whiteboard showing app architecture in the background

Most startups should prioritise speed and validation. You can always rebuild on a stronger platform once you’ve proven the market wants what you’re building.


Building a mobile app as a NZ startup no longer requires choosing between speed and quality. The 5 best mobile app development platforms for startups in NZ address different needs, and the right choice depends on your team’s skills and timeline. Web Maniacs helps startups navigate this decision by assessing your specific requirements and recommending the platform that aligns with your goals. Our team has guided startups through every platform in this guide and can help you avoid costly mistakes. Get started with Web Maniacs and move from idea to live app in weeks, not months.


Key Takeaways

  • Low-code platforms (FlutterFlow, Bubble, Glide) prioritise speed and accessibility, letting non-technical founders launch in weeks. Choose based on whether your app is data-centric (Glide), workflow-heavy (Bubble), or needs code export flexibility (FlutterFlow).

  • Open-source frameworks (React Native, Ionic) require developer expertise but offer better performance, customisation, and cost efficiency at scale. React Native is best for high-performance native apps; Ionic is best for teams with web development skills.

  • Time-to-market matters more than feature perfection for startups. A working MVP launched in 6 weeks teaches you more than a perfect app launched in 6 months.

  • Total cost of ownership includes platform fees, developer time, hosting, and maintenance. Budget 15-20% of your initial development cost annually for ongoing support.

  • Your team’s existing skills should drive the platform choice. Hiring new developers to use a particular platform is more expensive than using skills your team already has.

Frequently Asked Questions

How much does it cost to develop a mobile app for a startup in New Zealand?

Mobile app development costs in NZ vary significantly based on platform choice and complexity. No-code platforms like Glide start from NZ$32/month, while low-code solutions such as FlutterFlow begin at NZ$49/month. Custom development using React Native or hiring local developers typically ranges from NZ$15,000 to NZ$250,000+ depending on features, team size, and project scope. Budget also depends on whether you choose cross-platform or native development approaches.

What are the benefits of using a no-code or low-code platform for app development in NZ?

No-code and low-code platforms accelerate time-to-market, reduce reliance on expensive developers, and lower initial development costs. They enable rapid prototyping and MVP creation, critical for NZ startups testing market fit. Platforms like Bubble and Glide make app development accessible to non-technical founders. Low-code solutions like FlutterFlow offer code export, giving you flexibility and ownership. These approaches reduce technical debt and allow you to launch quickly while maintaining the option to scale with custom development later.

Should a New Zealand startup choose native or cross-platform app development?

Cross-platform development is typically better for NZ startups with limited budgets. Frameworks like React Native and Flutter (via FlutterFlow) let you build for both iOS and Android from a single codebase, reducing costs and development time significantly. Native development offers superior performance and user experience but requires separate teams for each platform. Choose cross-platform if you're bootstrapped or pre-seed; native development makes sense once you have funding and need premium performance or platform-specific features for your user base.

What are the key factors to consider when choosing an app development platform for a startup?

Evaluate your team's technical skills, budget, time-to-market needs, and long-term scalability requirements. Consider whether you need code ownership (favours React Native, FlutterFlow with export), rapid deployment (Bubble, Glide), or enterprise features. Assess post-launch maintenance costs and support availability. For NZ startups, prioritise platforms with transparent pricing, strong documentation, and active communities. Factor in whether you'll need to integrate with existing systems, handle complex workflows, or maintain the app independently after launch.

Are there government grants or funding available for app development startups in New Zealand?

NZ startups can access support through Callaghan Innovation, which offers R&D tax credits and grants for tech development. The Government's Business Growth Fund and regional economic development initiatives may also support digital innovation. Many NZ councils offer startup support programmes. However, most grants are competitive and require demonstrable market potential. Consider combining grant funding with bootstrapping strategies like MVP development on no-code platforms to extend your runway and prove concept viability before seeking larger investment rounds.


External Resources

For deeper guidance on mobile app development in New Zealand, explore these authoritative sources:

[EXTERNAL_LINK: Google’s guide to app development best practices | developers.google.com]

[EXTERNAL_LINK: New Zealand Tech Industry Report 2026 | techalliance.nz]

[EXTERNAL_LINK: Flutter framework documentation and performance benchmarks | flutter.dev]

This article was written using GrandRanker

10 Best Cross-Platform Frameworks for Startups 2026

Table of Contents

10 Best Cross-Platform Frameworks for Startups 2026

Last Updated: July 28, 2026

Cross-platform development has become the default approach for startups launching mobile applications, with teams reducing time-to-market by 40-60% compared to native-only strategies. At Web Maniacs, we’ve tracked the evolution of these frameworks across hundreds of startup projects. Below, we examine each leading framework’s strengths, limitations, and ideal use cases.

Framework Comparison Table

Framework Primary Language Best For Startup Learning Curve Performance
Flutter Dart High-performance, visually polished apps Moderate Excellent
React Native JavaScript Web developer teams Low Good
.NET MAUI C# Microsoft ecosystem shops Moderate Excellent
Kotlin Multiplatform Kotlin Native UI with shared logic High Excellent
Ionic HTML, CSS, JavaScript Fast MVPs and PWAs Low Good
NativeScript TypeScript, JavaScript Truly native with web skills Moderate Excellent
Quasar Framework Vue.js Multi-platform from one codebase Moderate Good
Framework7 HTML, CSS, JavaScript Lightweight prototyping Low Good
SwiftUI Swift Apple ecosystem only Moderate Excellent
Xamarin C# Legacy enterprise support Moderate Good

Why Cross-Platform Development Matters for Startups

Building separate native applications for iOS and Android consumes engineering bandwidth that early-stage companies lack. Cross-platform frameworks allow startups to maintain a single codebase while targeting multiple platforms, translating directly to faster feature deployment and lower engineering costs. Startups using cross-platform frameworks typically achieve feature parity across platforms 2-3 months faster than those building native applications separately, launching an MVP in 8-12 weeks instead of 16-20 weeks.

Pro Tip
The framework choice matters less than framework consistency. Switching frameworks mid-project destroys momentum. Pick one, commit to learning its ecosystem, and invest in that community’s tooling.

Choosing the wrong framework creates technical debt that becomes increasingly expensive to unwind.

Flutter vs React Native 2026: Which Framework Wins for Startups?

Flutter and React Native remain the two dominant choices, but they solve different problems. Flutter compiles to native machine code and delivers superior performance out of the box. React Native leverages JavaScript and a massive ecosystem of third-party libraries that accelerate development velocity.

For startups prioritising visual polish and performance, Flutter consistently delivers. The framework’s hot reload feature lets developers see UI changes in milliseconds, critical when iterating rapidly on product design. React Native wins when your team already knows JavaScript or needs access to specific third-party libraries, though its performance is less predictable without optimisation effort.

Best For
Flutter: Startups building consumer apps where visual design is competitive (fintech, dating, social, e-commerce).

React Native: Web-first teams or startups where rapid prototyping matters more than pixel-perfect performance.

Flutter apps typically feel faster with less optimisation effort, making it the lower-risk choice for resource-constrained startups.

Mobile App Development Frameworks New Zealand Startups Should Know

New Zealand‘s startup ecosystem has particular constraints: smaller talent pools, distributed teams across time zones, and competition with Australian and international companies for engineering resources. Frameworks requiring specialised expertise become liabilities, if only three developers in Auckland know your chosen framework, hiring becomes a bottleneck.

Watch Out
Avoid frameworks with single-maintainer communities or limited commercial backing. If the framework’s primary developer stops contributing, your codebase becomes increasingly risky to maintain.

New Zealand startups benefit from frameworks with strong cloud integration capabilities and local hiring availability. JavaScript-based frameworks (React Native, Ionic, Framework7) maintain an advantage, JavaScript developers are plentiful and relatively affordable in New Zealand.

Cost-Effective App Development New Zealand: Framework Selection Guide

The total cost of building a cross-platform app depends less on the framework itself and more on your team’s familiarity with it. For startups with limited budgets, optimise for hiring velocity, library ecosystem richness, cloud integration costs, and maintenance burden.

A team of two developers using React Native can ship an MVP for approximately $40,000-$80,000 NZD. The same team using Flutter might ship 10-15% faster if already familiar with Dart, but costs increase 20-30% if learning Dart simultaneously.

Building Your Startup Tech Stack New Zealand: Framework Evaluation Criteria

Selecting a cross-platform framework is one decision within a larger tech stack architecture. The framework must integrate smoothly with your backend infrastructure, analytics tools, payment processors, and authentication systems.

Evaluate frameworks against these criteria: integration ecosystem (Firebase, Auth0, Stripe, Amplitude support), developer experience (local setup time), scalability trajectory, community documentation quality, and hiring/retention appeal.

Key Takeaway
The best framework is the one your team can execute with fastest. Technical superiority matters far less than execution velocity when competing against time and capital constraints.

Top Cross-Platform Frameworks Detailed: Pros, Cons, and Real-World Use Cases

1. Flutter: Google’s High-Performance Choice

Flutter compiles to native ARM code and delivers performance nearly identical to native iOS and Android applications. The framework’s hot reload feature enables developers to see UI changes in real-time without restarting the app, dramatically accelerating the design iteration cycle.

A diverse startup development team collaborating around a desk with multiple monitors displaying Flutter code editors and mobile app interfaces in a bright, modern office

Pros: Exceptional performance with minimal optimisation effort, hot reload dramatically reduces development cycle time, rich customisable widget library, excellent documentation, strong Firebase integration.

Cons: Requires learning Dart (smaller developer community than JavaScript), larger app file sizes (15-50MB), some advanced native features require platform-specific code, fewer third-party libraries than React Native.

Best for: Startups building consumer-facing applications where visual design and performance are competitive advantages (fintech, dating, social, e-commerce).

2. React Native: The JavaScript Ecosystem Leader

React Native leverages JavaScript and React’s component model, allowing web developers to build native mobile applications using familiar syntax. The framework’s greatest strength is its ecosystem, npm provides access to hundreds of thousands of libraries, many directly usable in React Native applications.

Pros: Shallow learning curve for JavaScript developers, massive ecosystem of third-party libraries, strong community, code reusability between web and mobile, excellent for rapid prototyping.

Cons: Performance is less predictable than Flutter without careful optimisation, bridge architecture adds overhead, some third-party libraries are poorly maintained, occasional native module development required, breaking changes between major versions.

Best for: Web-first teams transitioning to mobile, startups where rapid prototyping matters more than pixel-perfect performance, applications sharing code between web and mobile.

3. .NET MAUI: Enterprise-Grade Microsoft Solution

.NET MAUI (Multi-platform App UI) evolved from Xamarin.Forms and represents Microsoft’s modern approach to cross-platform development. The framework uses C# and XAML, allowing developers to use the entire .NET ecosystem while targeting iOS, Android, Windows, and macOS from a single codebase.

Pros: Leverages existing C# and .NET expertise, strong Microsoft cloud integration, native performance across all platforms, hot reload, enterprise-grade tooling.

Cons: Smaller community than Flutter or React Native, fewer third-party libraries, steeper learning curve for teams unfamiliar with C#, less suitable for startups without existing .NET infrastructure.

Best for: Enterprises and startups already committed to the Microsoft ecosystem, teams with existing C# expertise, applications requiring Windows or macOS support.

4. Kotlin Multiplatform Mobile: Native UI, Shared Logic

Kotlin Multiplatform Mobile (KMM) takes a different architectural approach: developers write business logic in Kotlin once, then build native UIs separately for iOS and Android. This hybrid approach maximises code reuse while preserving platform-specific UI design.

Pros: Truly native UI experience on both platforms, maximises code reuse for business logic, excellent interoperability with existing native codebases, strong IntelliJ IDEA tooling, superior performance.

Cons: Requires separate UI development for each platform, smaller community and fewer third-party libraries, steeper learning curve for teams unfamiliar with Kotlin, not ideal for speed-to-market prioritisation.

Best for: Teams with existing Android expertise, startups where native UI/UX is non-negotiable, applications requiring maximum performance.

5. Ionic: Web Technologies, Native Feel

Ionic builds cross-platform applications using HTML, CSS, and JavaScript. The framework wraps web content in a native container, providing access to device features through Capacitor. Ionic’s approach makes it exceptionally fast for teams transitioning from web development to mobile.

Pros: Minimal learning curve for web developers, rapid development and prototyping, single codebase for iOS, Android, web, and PWA, rich UI component library, excellent for content-driven applications.

Cons: Performance is less native-like compared to Flutter or React Native, WebView overhead, complex animations may feel sluggish, smaller plugin ecosystem than React Native.

Best for: Web developers building mobile applications, startups prioritising rapid MVP development, content-driven apps, progressive web applications (PWAs).

6. NativeScript: Truly Native Apps with Web Skills

NativeScript compiles JavaScript or TypeScript directly to native code, providing true native performance without WebView overhead. Developers can use JavaScript frameworks like Angular, React, or Vue while building genuinely native applications.

Pros: Truly native apps built with web technologies, full access to native APIs without bridges, support for popular JavaScript frameworks, strong performance, ability to reuse npm packages.

Cons: Smaller community and fewer learning resources, limited third-party library ecosystem, steeper learning curve for those unfamiliar with native concepts, less mature than Flutter or React Native.

Best for: JavaScript developers requiring native performance, teams needing direct access to native APIs, startups where using existing JavaScript expertise is critical.

7. Quasar Framework: Vue.js Versatility Across Platforms

Quasar Framework extends Vue.js to multiple platforms, allowing developers to build SPAs, PWAs, mobile apps, and desktop applications from a single codebase. The same codebase can target web browsers, iOS, Android, Windows, macOS, and Linux.

Pros: Single codebase for web, mobile, and desktop, excellent UI component library with Material Design, strong developer experience with hot reload, lightweight framework, reduced maintenance burden.

Cons: Requires Vue.js expertise, smaller community than React Native or Flutter, fewer third-party libraries and plugins, desktop application support is less mature.

Best for: Vue.js teams building complex applications across multiple platforms, startups requiring web, mobile, and desktop support.

8. Framework7: Lightweight and Fast Prototyping

Framework7 is a lightweight HTML framework for building hybrid mobile apps with a native iOS or Material Design appearance. It excels at rapid prototyping and MVP development, providing ready-to-use UI elements that look native on both iOS and Android.

Pros: Extremely lightweight with minimal overhead, rapid prototyping and MVP development, pure HTML, CSS, JavaScript with no special syntax, native iOS and Material Design themes included.

Cons: Single maintainer creates sustainability concerns, limited ecosystem and third-party libraries, performance degrades with complex applications, smaller community.

Best for: Rapid MVP prototyping, content-driven applications, startups with minimal engineering resources, web developers building simple mobile experiences.

9. SwiftUI: Apple Ecosystem Dominance

SwiftUI is Apple’s declarative UI framework for building applications across iOS, iPadOS, macOS, watchOS, and tvOS. It represents the future of Apple development with deep ecosystem integration.

Pros: Deep integration with Apple ecosystem and latest features, modern declarative syntax, excellent performance and native user experience, live previews, automatic Dark Mode and accessibility support.

Cons: Limited exclusively to Apple platforms, requires a Mac for development, requires paid Apple Developer Program membership ($162 NZD annually), smaller codebase reuse than cross-platform frameworks.

Best for: Startups exclusively targeting the Apple ecosystem, applications requiring maximum Apple services integration, teams with existing Swift expertise.

10. Xamarin: Legacy Enterprise Cross-Platform

Xamarin represented Microsoft’s earlier approach to cross-platform development before MAUI. While newer projects should prefer MAUI, Xamarin remains relevant for maintaining legacy applications.

Pros: Mature framework with proven enterprise adoption, strong C# and .NET ecosystem integration, good performance on both platforms, extensive documentation.

Cons: Being phased out in favour of MAUI, smaller community than competing frameworks, less suitable for new projects, fewer third-party libraries than React Native.

Best for: Maintaining existing Xamarin applications, enterprises with significant Xamarin investments, teams with strong C# expertise.

Security and Integration: Critical Startup Considerations

Cross-platform frameworks introduce security considerations that differ from native development. Most frameworks compile to native code or use secure WebView implementations, but security depends on how carefully developers implement authentication, data storage, and API communication.

Flutter and React Native both provide secure storage solutions through community-maintained libraries, but startups must actively implement these rather than relying on framework defaults. Integration capabilities matter significantly, you’ll need to connect your mobile app to payment processors (Stripe, PayPal), analytics platforms (Amplitude, Mixpanel), and backend APIs.

Watch Out
Never store sensitive data (API keys, authentication tokens, user passwords) in client-side code or unencrypted storage. All major frameworks provide secure storage solutions, but they require explicit implementation. Audit your integration code for credential leaks before deploying to production.

Developer implementation practices matter far more than framework choice alone. Startups should prioritise frameworks with strong community support for security best practices and active vulnerability disclosure processes.


Choosing the right cross-platform framework determines whether your startup can ship features quickly or gets bogged down in technical complexity. The best framework isn’t the technically superior one, it’s the one your team can execute with fastest while maintaining the performance and user experience your market demands.

Web Maniacs helps startups navigate these framework decisions by combining technical expertise with real-world project experience. Our team has built production applications across Flutter, React Native, and .NET MAUI, and we understand the trade-offs each framework presents. Get started with Web Maniacs and let our team help you build the right foundation for your startup’s growth.

Frequently Asked Questions

What are the most cost-effective cross-platform frameworks for startups in New Zealand?

Flutter, React Native, .NET MAUI, and Ionic are all open-source and free to use, making them cost-effective options. The primary cost difference lies in developer rates and project complexity. Flutter and React Native have the largest developer communities in New Zealand, which can reduce hiring costs. For cost-effective app development, consider your team's existing expertise, leveraging familiar languages (JavaScript for React Native, C# for .NET MAUI) reduces learning time and speeds time-to-market.

Is Flutter or React Native better for a new startup in New Zealand?

Both frameworks excel for startups, but the choice depends on your team and goals. Flutter offers superior UI/UX capabilities and faster development cycles, ideal for consumer-facing apps requiring polished interfaces. React Native suits teams with JavaScript expertise and existing web developers. Flutter's hot reload feature accelerates iteration, while React Native's larger ecosystem provides more third-party libraries. For New Zealand startups, React Native has a slightly larger local developer pool, making hiring easier.

Which cross-platform framework offers the best performance for mobile apps in 2026?

Flutter delivers native-level performance through direct compilation to ARM machine code, making it ideal for performance-critical applications. React Native provides good performance for most use cases but may require native modules for computationally intensive tasks. Kotlin Multiplatform Mobile offers truly native performance since it compiles to native code on each platform. For startups prioritising performance without sacrificing development speed, Flutter remains the strongest choice among cross-platform frameworks.

What should New Zealand startups consider when selecting a mobile app development framework?

Evaluate your team's existing skills, project timeline, and budget constraints. Consider the framework's ecosystem maturity, community support, and available local developer talent. Security is critical, ensure the framework provides robust data protection and compliance with relevant regulations. Integration capabilities with popular startup tools (payment gateways, analytics, CRM systems) matter for scaling. Finally, assess long-term maintenance requirements and the framework's roadmap to ensure it aligns with your growth plans.

How long does it take to build an MVP with cross-platform frameworks?

Cross-platform frameworks significantly reduce MVP development time compared to native development. Flutter and React Native typically enable MVP delivery in 3-6 months for experienced teams, depending on complexity. Ionic and Framework7 accelerate prototyping further, often delivering MVPs in 6-12 weeks for web-first startups. Kotlin Multiplatform Mobile requires separate UI development per platform, extending timelines slightly. The actual timeline depends on feature scope, team size, and existing expertise with the chosen framework.

This article was written using GrandRanker
Native vs Cross-Platform App Development: 2026 Comparison Guide

Table of Contents

Last Updated: July 27, 2026

Native vs Cross-Platform App Development: Key Differences Explained

Choosing between native and cross-platform app development shapes your budget, timeline, and long-term maintenance costs. A native vs cross-platform app development comparison 2026 reveals that the performance gap has narrowed significantly, but fundamental trade-offs remain. The question isn’t which approach is objectively "better", it’s which aligns with your specific constraints and goals.

What Is Native App Development?

Native app development means building separate applications for each platform using platform-specific languages and tools. For iOS, you write in Swift using Xcode. For Android, you use Kotlin with Android Studio. Each codebase is optimized directly for its operating system, with full access to device hardware, latest OS features, and native APIs.

Native apps compile to machine code that runs directly on the device with no abstraction layer. This translates to superior performance and the ability to use modern features, AR, VR, advanced graphics, the moment Apple or Google releases them. You also get seamless integration with platform design guidelines.

The trade-off is clear: you maintain two separate codebases. A feature built for iOS must be rebuilt for Android. Bug fixes happen twice. For teams with limited resources, this doubles complexity.

What Is Cross-Platform App Development?

Cross-platform development uses a single codebase to deploy to multiple platforms. Frameworks like Flutter (using Dart) or React Native (using JavaScript) handle compilation to native code for both iOS and Android. Typically 70-90% of your logic runs identically across platforms.

This approach prioritizes development speed and cost efficiency. One team builds one codebase, deployment timelines compress, and maintenance becomes simpler because a single change propagates everywhere.

The cost is a layer of abstraction. Your code doesn’t compile directly to native machine code in the same way. Instead, the framework interprets or transpiles your code into platform-specific instructions. This introduces minimal performance overhead with modern frameworks. You also depend on framework maturity; if the framework doesn’t support a specific device feature, you may need to write platform-specific code anyway.

Performance Comparison: Native vs Cross-Platform in 2026

The performance gap between native and cross-platform apps has become almost irrelevant for most applications.

Flutter and React Native now compile to native ARM code, meaning runtime overhead is minimal for standard business logic. Animations, scrolling, and UI interactions feel nearly identical to native apps. For e-commerce, social media, productivity tools, and most enterprise applications, users cannot perceive a performance difference.

Where native still wins is in extreme scenarios: graphically intensive games with millions of polygons, real-time AR applications with complex rendering pipelines, or apps that push the device to its thermal limits. For casual puzzle games or note-taking tools, cross-platform performance is indistinguishable from native.

Key Takeaway
For 95% of business applications in 2026, performance is no longer a deciding factor between native and cross-platform. Choose based on timeline, budget, and team skills instead.

Pros and Cons of Native App Development

Pros:

Native development delivers unmatched performance and responsiveness. You have immediate access to new iOS and Android features the moment they’re released. Design fidelity is pixel-perfect because you’re building directly against Apple and Google’s design systems. For complex applications requiring deep hardware integration, medical apps accessing biometric sensors, augmented reality experiences, or apps needing minimal battery drain, native is often the only practical choice.

Cons:

Two codebases mean two teams (or one stretched thin). A feature that takes one developer two days becomes four days of work across both platforms. Time to market suffers because you’re building twice. You’re also locked into hiring developers with specific expertise: Swift developers for iOS, Kotlin developers for Android. The talent pool is smaller and more expensive than generalist JavaScript developers.

Pros and Cons of Cross-Platform App Development

Pros:

One codebase deployed to iOS, Android, and web means your team moves faster. A feature built once reaches all platforms simultaneously. Cost is dramatically lower because you’re not duplicating effort. One developer can maintain features across all platforms. Maintenance becomes simpler because a security patch or bug fix goes out once and reaches everyone.

Cons:

You’re dependent on framework maturity. React Native and Flutter are solid, but they’re not as feature-complete as native SDKs. If you need to access a device capability that the framework doesn’t support, you’ll write platform-specific code anyway, negating the reuse advantage. Performance optimization is harder because you’re working through an abstraction layer. App binary size is typically larger with cross-platform frameworks.

Watch Out
Cross-platform frameworks improve constantly, but their feature support lags behind native SDKs by 6-12 months. If your roadmap includes recently released features, you may hit a wall.

Flutter vs React Native: New Zealand 2026 Framework Comparison

Flutter: Strengths and When to Use It

Flutter uses Dart, a language designed specifically for building UIs, which means Flutter’s architecture is clean and intuitive. Hot reload, seeing code changes instantly without restarting the app, is genuinely faster in Flutter than in React Native.

Flutter compiles to native code and produces smaller app binaries than React Native. The widget system is comprehensive, meaning you rarely need to write platform-specific code. For teams building polished consumer apps where UI consistency and animation smoothness matter, Flutter is the stronger choice.

New Zealand-based teams using Flutter report faster development cycles and fewer framework-related bugs. Once your team invests 2-3 weeks to become fluent in Dart, productivity accelerates.

Best for: Consumer apps, MVP launches, teams that prioritize UI polish and animation quality, projects with tight timelines.

React Native: Strengths and When to Use It

React Native leverages JavaScript and React, skills that are ubiquitous in web development. If you have a web team, they can transition to React Native faster than they can learn Dart. The ecosystem is larger with more third-party libraries and more developers available for hire.

React Native’s performance is nearly identical to Flutter for standard applications. The real advantage is team velocity if you already have JavaScript developers. The framework is familiar, debugging tools are mature, and the community is massive.

Best for: Teams with existing JavaScript expertise, projects that share code between web and mobile, startups hiring JavaScript developers, applications that don’t require modern device features.

Pro Tip
In New Zealand’s tech market, Flutter is gaining ground because local development agencies recognize the performance and time-to-market advantages. React Native remains popular among teams with web backgrounds.

Mobile App Development Cost New Zealand 2026: Native vs Cross-Platform

The cost difference is stark and favors cross-platform development for most projects.

A native iOS app built by a competent team in New Zealand costs approximately 30-40% more than a cross-platform equivalent. A simple MVP might cost NZD $40,000-60,000 for native (iOS + Android combined), while the same app in Flutter or React Native costs NZD $25,000-40,000.

For larger applications, the gap widens. A mid-market app with 50+ features costs NZD $150,000-250,000 to build natively across both platforms. The same scope in cross-platform costs NZD $90,000-150,000. The savings come from code reuse, parallel development, and the abundance of lower-cost cross-platform developers.

Annual maintenance for a native app runs 15-20% of initial development cost. Cross-platform maintenance runs 8-12% because changes propagate once.

Development Speed and Time to Market

Cross-platform development is 40-50% faster than native for most applications. An MVP that takes four months to build natively takes 2.5 months in Flutter or React Native. This speed advantage is often more valuable than cost savings because reaching the market first matters in competitive spaces.

For teams in New Zealand competing against international companies, this speed advantage is critical. You can launch, gather user feedback, and iterate faster than a team building native apps.

Native development makes sense only when you have a specific performance or feature requirement that justifies the slower timeline. For most applications, the question should be: "Can we afford to wait six months longer?" If the answer is no, cross-platform is the practical choice.

Maintenance and Long-Term Costs

Native apps have higher long-term costs because of the dual-codebase problem. Every OS update requires testing and potentially fixes in both codebases. Security patches happen twice.

Cross-platform apps have lower ongoing costs, but they’re more vulnerable to framework deprecation. React Native and Flutter are both backed by major companies (Meta and Google respectively) and have large communities, so this risk is low in 2026.

A practical approach: use cross-platform for the initial launch to reach market quickly and validate your concept. If the app gains traction and performance becomes critical, plan a native rewrite for the highest-traffic sections.

Security Implications and Best Practices for Each Approach

Native apps have direct access to the platform’s security APIs. iOS developers use Keychain for secure credential storage. Android developers use the Keystore system. These are battle-tested, platform-optimized security mechanisms.

Cross-platform frameworks abstract these APIs, which introduces risk. The framework must implement secure credential storage in a way that works across both platforms. Most frameworks do this correctly, but the abstraction layer is an additional point of failure.

Best practices for native development: use platform-specific security APIs directly. Store sensitive data in Keychain (iOS) or Keystore (Android). Implement certificate pinning for API communication.

Best practices for cross-platform development: choose a framework with a strong security track record. Use the framework’s built-in security libraries. Regularly audit your dependencies because cross-platform apps often rely on more external libraries.

Watch Out
A vulnerability in a cross-platform framework affects both iOS and Android simultaneously. Security updates are more critical and must be deployed faster.

Team Skills and Hiring Considerations

The team you have (or can hire) often determines which approach makes sense.

Professional illustration showing team and diverse and development concepts for native vs cross-platform app development

Native development requires specialized expertise. iOS developers know Swift and Xcode. Android developers know Kotlin and Android Studio. These are distinct skill sets. In New Zealand’s tech market, native developer salaries are higher because the pool is smaller. A mid-level iOS developer commands NZD $90,000-120,000 annually. The same level of JavaScript developer costs NZD $70,000-95,000.

Cross-platform development is more forgiving on hiring because it relies on more common skills. A TypeScript or Java developer becomes productive in Dart within 2-3 weeks. React Native uses JavaScript, which is ubiquitous.

For teams building long-term, native development creates deeper expertise. For teams prioritizing speed and flexibility, cross-platform development is pragmatic.

A hybrid approach: hire a small native team for platform-specific features and a larger cross-platform team for business logic and UI.

Factor Native Development Cross-Platform Development
Time to Market 6-9 months (two builds) 3-5 months (single build)
Initial Cost NZD $40K-60K (simple MVP) NZD $25K-40K (simple MVP)
Annual Maintenance 15-20% of dev cost 8-12% of dev cost
Performance Optimal Near-optimal (95%+ of native)
Developer Availability Limited, expensive Abundant, moderate cost
Feature Access Immediate (new OS features) 6-12 month lag
Code Reuse 0% 70-90%
Best For High-performance apps, games MVPs, business apps, fast launches

Building a mobile app is a substantial investment, and the native vs cross-platform decision shapes every phase of development. The real challenge isn’t choosing the "best" approach, it’s aligning your choice with your timeline, budget, and team. Web Maniacs helps businesses navigate this decision by matching your specific constraints to the right framework. Whether you need a rapid MVP launch with cross-platform efficiency or a high-performance native app with modern features, our team delivers custom solutions designed to strengthen your brand identity and connect you with users. Get started with Web Maniacs and ship your app with confidence.

Frequently Asked Questions

What are the key differences between native and cross-platform app development in 2026?

Native app development uses platform-specific languages, Swift for iOS and Kotlin for Android, to build applications optimised for each operating system. Cross-platform app development uses frameworks like Flutter or React Native to build a single codebase that works on both iOS and Android. Native apps typically offer superior performance and full hardware access, whilst cross-platform approaches reduce development time and cost by sharing code across platforms. The performance gap has narrowed significantly by 2026, making cross-platform viable for most business applications.

How much does native app development cost compared to cross-platform in New Zealand in 2026?

Native app development generally costs more because you need separate teams or developers for iOS and Android, effectively doubling development effort. Cross-platform frameworks like Flutter and React Native reduce costs by allowing a single team to build for both platforms simultaneously, typically resulting in 30-40% cost savings. However, the final cost depends on app complexity, required hardware access, and your team's existing expertise. For a detailed quote tailored to your specific project requirements, Web Maniacs can provide a personalised assessment on their pricing page.

Which framework should we choose: Flutter or React Native for New Zealand businesses in 2026?

Flutter offers faster development, superior UI/UX consistency, and excellent performance through native compilation. It's ideal if you prioritise smooth animations, graphics rendering, and a polished user experience across devices. React Native leverages JavaScript and existing web developer skills, making it better if your team already knows React or JavaScript. Both frameworks have strong community support in 2026. Choose Flutter for performance-critical apps; choose React Native if you want to reuse web development talent and reduce hiring complexity.

What are the security implications of native versus cross-platform app development?

Native apps provide direct access to operating system security features and APIs, allowing developers to implement platform-specific security best practices immediately. Cross-platform frameworks introduce an abstraction layer that may delay access to newly released OS security features. However, mature frameworks like Flutter and React Native now support most security requirements through native modules and plugins. Both approaches can be equally secure when developed by experienced teams following security best practices. The key is ensuring your development team understands platform-specific security guidelines for each OS.

How long does native versus cross-platform app development typically take in 2026?

Cross-platform development is significantly faster, typically reducing time to market by 40-50% compared to native development. A single cross-platform codebase eliminates the need to build and maintain separate iOS and Android applications. Native development requires separate development cycles for each platform, increasing timeline length. For an MVP (Minimum Viable Product), cross-platform frameworks enable faster market entry. Native development becomes more appealing when you have longer timelines and need maximum performance or deep platform-specific features. Your business goals and timeline should guide this decision.

This article was written using GrandRanker
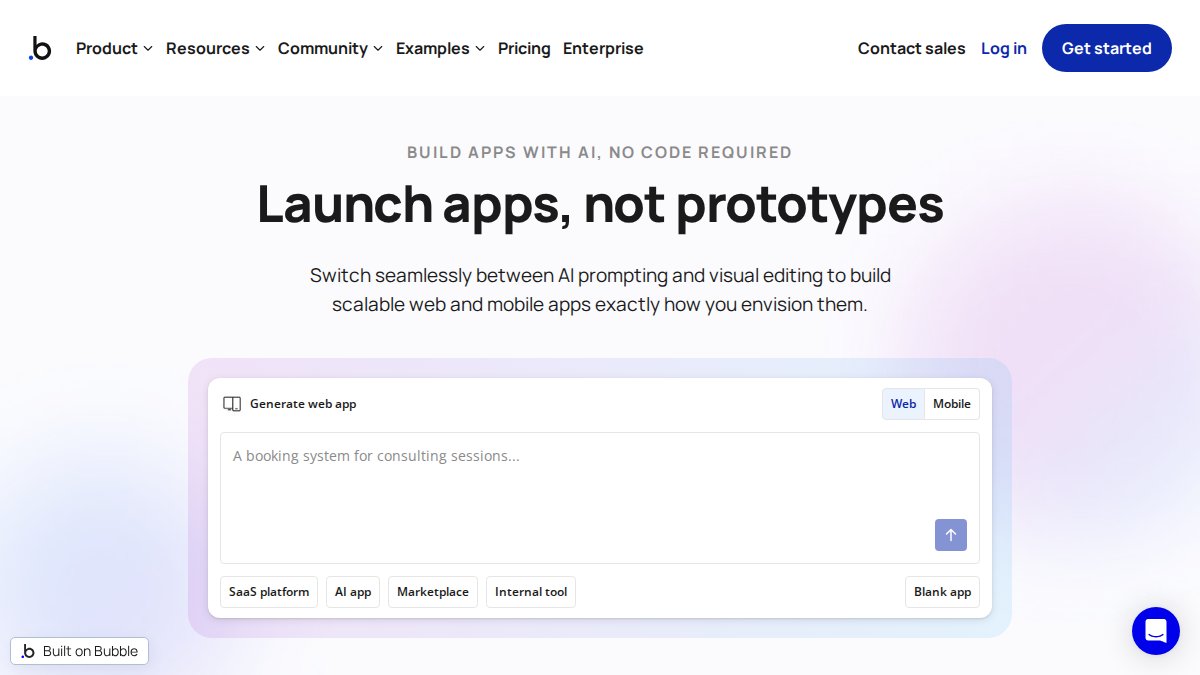
App Developers New Zealand: Find the Right Partner for Your Project

Table of Contents

Last Updated: July 26, 2026

What App Developers in New Zealand Offer

Finding the right app developers new zealand is crucial for turning your business vision into reality. The landscape of development services has become increasingly sophisticated, offering end-to-end solutions that combine strategic planning, user experience design, backend infrastructure, and post-launch support. At Web Maniacs, we understand that choosing a development partner requires more than technical capability, it demands a team that understands your business goals and delivers measurable results.

Mobile App Development Services

Mobile app development services in New Zealand have evolved toward results-driven digital transformation. Professional developers integrate user experience design, scalability planning, and business strategy from day one, handling everything from requirements gathering through quality assurance and app store submission.

Backend development expertise has become essential as applications grow more complex. Developers build strong APIs, manage cloud solutions, and ensure your application scales as your user base expands. Integration with existing business systems, payment processing, CRM platforms, or custom databases, is now standard practice.

Post-launch support distinguishes mature development partners. Maintenance, bug fixes, feature updates, and performance optimization continue after launch, ensuring your application remains competitive as user expectations and technology standards evolve.

Cross-Platform and Native Development

The choice between cross-platform frameworks and native development represents a significant decision. Cross-platform solutions using React Native or Flutter allow developers to write code once and deploy across iOS and Android, reducing development time and cost. Native development, building separate applications, often delivers superior performance and platform-specific features.

Web Maniacs and other leading app developers new zealand offer both approaches, helping clients understand trade-offs based on specific requirements. Cross-platform development excels for businesses prioritizing speed to market and budget efficiency. Native development suits applications demanding high performance, complex animations, or deep device integration.

Top App Development Companies in New Zealand

Web Maniacs: Custom Solutions with Results-Driven Strategy

Web Maniacs leads the field by combining custom software development with results-driven digital marketing strategy. The team specializes in creating mobile applications that drive measurable business outcomes through intuitive design and strategic implementation.

What distinguishes Web Maniacs is the emphasis on strengthening brand identity while increasing online visibility. Rather than treating app development as a technical checkbox, the team approaches each project as an opportunity to enhance customer connection and improve user experience. Their personalized approach ensures your app reflects your business’s unique value proposition.

The company excels at handling complex requirements, integrating mobile apps with existing business systems, and providing comprehensive post-launch support. Teams understand that app success extends beyond initial release, ongoing optimization, user feedback incorporation, and feature evolution determine long-term impact.

Diverse team of software engineers collaborating at desks with multiple monitors displaying code and app design interfaces in a modern Auckland office environment

Catch Design: Award-Winning User Experience Focus

Catch Design has built its reputation on delivering award-winning mobile applications with exceptional user experience. The team specializes in native iOS and Android development alongside cross-platform technologies like React Native and Flutter.

What sets Catch Design apart is obsessive focus on user experience and product design. Rather than building features and hoping they resonate, the team conducts extensive research and testing to ensure every interaction feels intuitive. This human-centred approach has resulted in applications users genuinely enjoy using.

CodeSmiths NZ: Complex Backend Development Expertise

CodeSmiths NZ has established itself as the go-to partner for applications requiring sophisticated backend infrastructure. The team excels at handling complex requirements that demand strong database architecture, secure API design, and scalable cloud solutions.

For businesses building applications that integrate with multiple systems or handle sensitive data, CodeSmiths NZ brings specialized expertise that prevents costly mistakes. Their backend capabilities ensure your application remains stable, secure, and performant as transaction volumes increase.

Koda Web: Balanced Functionality and Budget-Conscious Design

Koda Web provides customized mobile app solutions with practical focus on clean design and genuine functionality. The team develops native iOS and Android applications alongside HTML5 web-based mobile solutions, offering flexibility for varying technical requirements.

What appeals to many New Zealand businesses is Koda Web’s balanced approach, they don’t over-engineer solutions or add unnecessary complexity. Instead, the team focuses on delivering exactly what your business needs at a cost that makes sense for your budget. This pragmatic methodology suits small to medium-sized enterprises needing professional-quality applications without enterprise-level pricing.

Zapperr Software Solutions: Professional Delivery at Transparent Rates

Zapperr Software Solutions NZ/AU has built trust through consistent professionalism and transparent communication. The team delivers end-to-end mobile software engineering solutions with emphasis on timely delivery and clear project management.

What distinguishes Zapperr is commitment to effective communication throughout development. Rather than disappearing during development, the team maintains regular updates and ensures clients understand progress at each stage. This approach reduces surprises and builds confidence in the partnership.

How to Choose an App Developer in New Zealand

Step Focus Area Key Questions
1 Project Scope & Goals What problem does your app solve? What’s your timeline and budget?
2 Technical Expertise Do they have experience with your required platforms? Can they handle your complexity level?
3 Post-Launch Support What maintenance and support do they provide after launch? How responsive are they to issues?
4 Cost Transparency Are pricing and deliverables clearly defined? Are there hidden costs or change order processes?
5 Legal & IP Ownership Who owns the code and intellectual property? What are the terms if the relationship ends?

Step 1: Define Your Project Scope and Business Goals

Before evaluating app developers new zealand, clarify exactly what you’re building and why. Document your core requirements: What problem does your app solve? Who are your target users? What functionality is essential versus nice-to-have? What’s your realistic timeline and budget?

Business goals matter as much as technical requirements. Are you building an app to generate direct revenue, support customer retention, improve operational efficiency, or establish market presence? Developers who understand your business objective make smarter technical decisions that serve your actual goals.

Pro Tip
Create a one-page project brief describing the problem, target user, core features, and success metric. Share this with potential developers, their response reveals whether they think strategically or just execute specifications.

Step 2: Assess Technical Expertise and Platform Compatibility

Ask potential developers about their experience with your specific use case. Have they built similar applications? Do they understand your industry’s performance requirements? Can they handle your complexity level?

Evaluate their technology stack. Do they use current frameworks and languages? While bleeding-edge technology isn’t always necessary, developers using outdated approaches may struggle to scale your application or attract future talent to maintain it.

Step 3: Evaluate Post-Launch Support and Maintenance

Ask potential developers about their support model. What happens after launch? How quickly do they respond to bugs? Do they charge for maintenance, and if so, at what rate? What’s included versus what costs extra?

Understand their approach to feature updates and performance optimization. As your user base grows, your app may need optimization. As user feedback arrives, you’ll want to implement improvements. A developer who disappears after launch forces you to find someone new who must learn your codebase, an expensive scenario.

Watch Out
Developers who won’t commit to post-launch support in writing should raise red flags. This is where problems emerge: bugs discovered by real users, performance issues under actual load, or compatibility problems with new OS versions. Lock down support terms before signing.

Step 4: Clarify Cost Transparency and Budgeting

Prevent cost disagreements by establishing crystal-clear cost structures upfront. Understand how the developer charges, fixed project fee, hourly rates, or milestone-based payments, and what happens if scope changes.

Ask for detailed cost breakdown. What’s included in the base price? What triggers additional charges? How are change requests handled? The most transparent developers provide written cost structures that leave no ambiguity.

Budget constraints are legitimate business realities. Honest developers discuss your budget constraints and help you prioritize features that deliver maximum value within your financial limits.

Who owns the code your developer creates? This question carries enormous business implications. Clarify intellectual property ownership in writing before development begins. Ideally, you own all code and intellectual property created specifically for your application, giving you maximum flexibility for future development or business exit scenarios.

Understand non-compete and confidentiality terms. These should be reasonable and shouldn’t prevent legitimate business activities. Review contract termination clauses to understand what happens if the relationship ends before completion.

App Development Cost in New Zealand: What to Expect

Factors That Influence Pricing

App development costs vary dramatically based on complexity, platform choice, timeline, and developer experience. A simple utility app costs significantly less than an enterprise application with complex backend requirements and real-time data synchronization.

Platform choice directly impacts cost. Native iOS and Android applications cost more than cross-platform solutions using React Native or Flutter. However, native development often delivers superior performance and user experience, making the additional investment worthwhile for certain applications.

Feature complexity drives costs substantially. A straightforward app with basic functionality costs far less than one requiring sophisticated backend infrastructure, machine learning integration, or complex real-time data handling. Developers charging lower rates for complex projects often deliver lower quality.

Timeline affects pricing. Developers working under aggressive deadlines charge more due to resource constraints and higher risk. Reasonable timelines allow for better planning, fewer errors, and ultimately better outcomes.

Key Takeaway
The cheapest developer rarely delivers the best value. Mid-tier developers with solid track records and transparent pricing often provide the best balance of quality, reliability, and cost-effectiveness for New Zealand businesses.

Transparency vs Hidden Costs

Reputable app developers new zealand provide transparent pricing that accounts for realistic project requirements. Watch for developers quoting suspiciously low prices, these often hide cost overruns, poor quality, or scope creep that becomes expensive later.

Hidden costs emerge from vague scope definitions. If a developer quotes a fixed price without detailed requirements documentation, they’ll either deliver less than expected or request change orders for reasonable requirements. Clear scope prevents these disputes.

Post-launch costs frequently surprise businesses. Hosting, maintenance, app store fees, and ongoing optimization add up. Understanding these continuing costs helps you budget realistically for your application’s lifetime.

Cross-Platform Frameworks and Agile Methodology

Cross-platform development using React Native and Flutter has matured significantly, making these frameworks viable for most application types. Developers now evaluate each project’s specific requirements and recommend accordingly rather than debating native versus cross-platform in abstract terms.

Agile methodology has become standard practice. Iterative development with regular feedback cycles produces better outcomes than waterfall methods where requirements are locked in before development begins. This approach acknowledges that user needs evolve as development progresses.

Mobile-first design philosophy continues strengthening. Professional developers now design for mobile users first, ensuring the application works brilliantly on smartphones before considering larger screens.

AI Integration and Scalable Cloud Solutions

Artificial intelligence integration has moved from experimental to practical. Apps incorporating AI for personalization, predictive analytics, or automation are becoming standard. Developers who understand machine learning implementation can build applications that learn from user behavior and improve over time.

Cloud solutions enable scalability that would be prohibitively expensive with traditional infrastructure. Developers using cloud platforms can build applications that handle growing user bases without proportional cost increases.

Post-Launch Support and App Store Optimization

Successful app developers now treat launch as the beginning rather than the end. Post-launch optimization, user feedback incorporation, and continuous improvement have become expected rather than optional. This shift reflects the reality that apps succeed through ongoing evolution.

App Store Optimization (ASO) increasingly influences app success. Developers who understand app store algorithms, keyword optimization, and conversion rate optimization can help your app achieve visibility and drive real business results.

Why Post-Launch Maintenance and Support Matter

App development doesn’t end at launch, it begins there. Your application enters the real world where actual users reveal requirements you couldn’t predict during planning. Operating systems release updates requiring compatibility adjustments. User feedback suggests features that would improve satisfaction. Performance issues emerge under actual load conditions.

Developers who disappear after launch force you into expensive scenarios. Finding a new developer means someone must learn your codebase from scratch, charging premium rates for this knowledge transfer. They may not understand your original architectural decisions, potentially making poor choices during modifications.

Regular maintenance prevents technical debt accumulation. Small issues left unaddressed become expensive problems. Security vulnerabilities discovered after launch require immediate attention. Performance problems that annoy early users become critical as your user base grows.

Successful apps evolve continuously. User feedback drives feature improvements. Competitive pressure forces innovation. Technology advances require updates. Developers committed to post-launch support enable this evolution rather than treating your app as a completed artifact.


Finding the right app developers new zealand requires evaluating technical capability, business understanding, and commitment to your long-term success. Web Maniacs brings results-driven strategy to mobile app development, combining custom software engineering with digital marketing expertise that ensures your application drives measurable business outcomes. With personalized development tailored to your specific requirements, comprehensive support beyond launch, and focus on strengthening brand identity through intuitive app design, Web Maniacs delivers applications that connect you with customers and achieve sustainable growth. Get started with Web Maniacs and transform your app vision into a competitive advantage.

Frequently Asked Questions

What should I look for when choosing app developers in New Zealand?

When selecting app developers in New Zealand, prioritise technical expertise in your required platforms (iOS, Android, or cross-platform), portfolio evidence of similar projects, clear communication practices, and transparent post-launch support terms. Verify their experience with agile methodology, ask about their quality assurance processes, and ensure they clarify IP ownership upfront. Check references and assess whether they understand your business goals beyond just technical delivery.

How much does app development cost in New Zealand?

App development costs in New Zealand vary significantly based on project complexity, platform choice (native vs cross-platform), team size, and timeline. Simple MVPs typically cost less than complex enterprise applications. Pricing models differ, some developers charge hourly rates, whilst others quote fixed project fees. Request detailed breakdowns from multiple developers to compare value. Web Maniacs offers transparent pricing on their website; visit their pricing page for current rates and a free trial to understand your investment.

What are the latest app development trends in New Zealand for 2026?

New Zealand app developers are increasingly adopting cross-platform frameworks like React Native and Flutter to reduce development time and costs. Agile methodology remains standard for iterative, responsive development. AI integration, scalable cloud solutions, and emphasis on post-launch maintenance are growing priorities. App Store Optimization (ASO) and digital marketing strategies are now integral to launch planning. Developers are also focusing more on robust backend development and API integration to support long-term scalability and business growth.

Should I choose native app development or cross-platform development in New Zealand?

Native development (separate iOS and Android apps) offers superior performance and platform-specific features but requires larger budgets and longer timelines. Cross-platform frameworks (React Native, Flutter) reduce costs and accelerate time-to-market by using a single codebase. Choose native if your app demands high performance or platform-exclusive functionality; choose cross-platform if budget, speed, and multi-platform reach are priorities. Many New Zealand developers now specialise in both, so discuss your specific business requirements with them to determine the best fit.

This article was written using GrandRanker
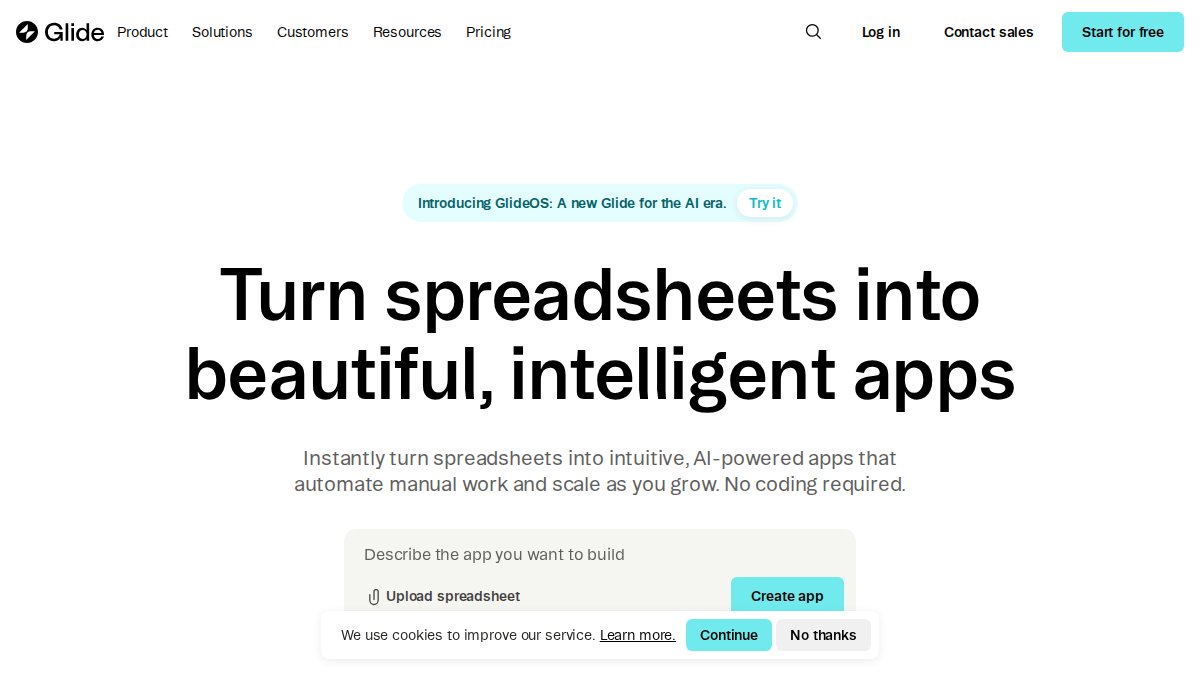
Why Custom Software Beats Website Builders in 2026

Table of Contents

Last Updated: July 25, 2026

Why Custom Software Beats Website Builders: The Core Differences

Website builders excel at getting something live quickly through templates and drag-and-drop interfaces. But this simplicity comes at a cost. When your business needs custom functionality, system integration, or the ability to scale beyond preset limitations, template-based platforms hit a wall. Custom software is built specifically for your requirements without forcing you into someone else’s architectural decisions.

Initial savings from website builders often disappear as you pay for workarounds, limitations become friction points, and technical debt accumulates. Custom software requires more upfront investment, but that investment translates into a platform that grows with your business rather than constraining it.

Pro Tip
The inflection point usually arrives around year two or three of growth. By then, most businesses realise that migrating away from a builder costs far more than building custom from the start would have.

Template-Based Constraints vs. Custom Functionality

Website builders operate within predefined templates and feature sets. You choose from available options, customise colours and text, and publish. This approach works until your business needs something the builder wasn’t designed to do. Need a custom checkout flow? A proprietary calculation engine? Integration with your legacy accounting system? The builder either can’t do it, charges premium rates for limited customisation, or forces you into workarounds.

Custom software development removes these constraints entirely. Your developers build exactly what your business requires. Consider a scenario common in New Zealand e-commerce: a business selling products with complex pricing rules based on volume, geography, and customer type. Website builders offer basic pricing tables. Custom software lets you build pricing logic that reflects your actual business model. The flexibility extends to integrating with your existing CRM, inventory management system, accounting software, or proprietary data sources, capabilities website builders offer only through limited official partnerships.

Website Builder Limitations: Where Drag-and-Drop Falls Short

The convenience of website builders masks serious limitations that emerge as your business grows. These platforms are optimised for speed-to-market, not for long-term flexibility or performance at scale.

Code Bloat and Performance Penalties

Website builders generate code optimised for their platform, not for your specific use case. This means excess code running on every page, styling for disabled elements, JavaScript for unused functionality, and libraries loaded by default. This bloat directly impacts page load speed, affecting both user experience and search engine ranking.

Custom software starts lean. Your developers include only the code necessary for your requirements. A custom e-commerce site built for your specific products, workflows, and customer base will load faster than a generic builder site. This performance difference compounds when you add complexity. A website builder handling 1,000 daily visitors might perform adequately. At 10,000 daily visitors, the accumulated bloat becomes a bottleneck.

Vendor Lock-In and Data Ownership Risks

When you build on a website builder platform, you’re dependent on that vendor’s continued operation, pricing decisions, and feature roadmap. Migrating away from a builder is expensive and time-consuming, essentially rebuilding your entire site from scratch.

Custom software means you own your codebase, your data, and your infrastructure. You’re not locked into a vendor’s pricing or subject to their business decisions. Data ownership matters more than most business owners realise. Website builders store your data on their servers, subject to their terms of service. Custom software can store data wherever you choose, on servers you control, in cloud infrastructure you select, or in hybrid arrangements that suit your security and compliance requirements.

Watch Out
The cost of migrating away from a website builder typically ranges from three to five times the cost of building custom initially. By the time you realise you need to leave, you’re locked in by switching costs.

Performance and Page Load Speed: Custom Wins on Metrics That Matter

Page load speed directly affects conversion rates, user experience, and search engine ranking. Research from Google’s Core Web Vitals research shows that pages loading in under three seconds have significantly higher engagement and conversion rates than slower alternatives.

Developer monitoring website performance metrics on a dual-monitor setup, with graphs and analytics visible on screen in a modern office environment, sitting at ergonomic desk

Website builders typically deliver pages in the 3-5 second range for basic sites. Custom sites, optimised for your specific content and user base, consistently deliver pages in 1-2 seconds. A two-second improvement in load time can increase conversion rates by 10-15% for e-commerce sites.

The performance advantage comes from several sources. Custom code is optimised for your specific use case. Images are served in modern formats with appropriate compression. JavaScript is minimised and loaded asynchronously. CSS is critical-path optimised. Database queries are indexed and cached strategically. These optimisations are standard practice in custom development but difficult or impossible to implement within a website builder’s constraints.

Total Cost of Ownership: Why Initial Savings Become Long-Term Debt

Website builders appear cheaper upfront. Plans start at $20-50 per month. Custom software development costs thousands to tens of thousands of dollars. However, total cost of ownership tells a different story.

Hidden Costs of Website Builders

The monthly subscription is just the beginning. As your business grows, you encounter limitations requiring workarounds. You pay for premium plugins to add functionality the base platform lacks. You hire developers to implement custom code the builder can’t handle natively. Storage limits require upgrades. Traffic limits force you to higher-tier plans. Security features cost extra. Advanced integrations require paid add-ons. Over five years, a "cheap" website builder can cost $15,000-30,000 in subscriptions, add-ons, and workarounds.

Website builders also create technical debt. Every workaround, custom code snippet, and forced integration adds complexity. When you finally need to migrate away, you’re paying developers to untangle years of accumulated compromises.

Custom Software ROI Over Time

Custom software requires significant upfront investment, typically $25,000-100,000+ depending on complexity. When amortised over five years, this becomes $400-1,600 per month. Add hosting ($100-500/month) and maintenance ($500-2,000/month), and the total annual cost is competitive with a fully-loaded website builder ecosystem.

The difference is what you get for that investment. Custom software that directly supports your business model, integrates with your systems, and scales with your growth. For businesses generating $500,000+ in annual revenue, custom software typically pays for itself within 18-24 months through improved conversion rates, operational efficiency, and reduced friction.

Key Takeaway
The real cost comparison isn’t builder vs. custom software, it’s the total cost of a builder plus all its workarounds vs. custom software built right from the start.

Benefits of Custom Software: Beyond the Builder Baseline

Custom software development offers capabilities that website builders simply cannot match.

Enterprise-Grade Security and Maintenance

Website builders handle security at a platform level. Your site is one of thousands running on their infrastructure. For businesses handling sensitive customer information, payment data, or confidential business information, this approach creates risk.

Custom software allows you to implement security architecture tailored to your specific threat model. You control which data is encrypted, how authentication works, what audit trails exist, and how access is managed. You can implement compliance requirements (GDPR, PCI-DSS, NZ Privacy Act) directly into your application. Maintenance is similarly controlled, you choose when updates are deployed, test them thoroughly, and control rollback procedures.

API Integration and Ecosystem Flexibility

Modern businesses use multiple software tools. Website builders offer limited integration options, only with platforms they’ve officially partnered with. Custom software integrates with whatever systems you need. Your API can pull data from your ERP system, push leads to your CRM, sync inventory in real-time, and trigger automated workflows. This integration eliminates manual data entry, reduces errors, and creates a seamless ecosystem where information flows automatically between systems.

Scalable Website Solutions New Zealand Businesses Need: Design Flexibility and UX Control

New Zealand businesses increasingly compete in global markets. Your website must look professional, perform flawlessly, and deliver an experience that matches international standards.

Responsive Design and Custom Coding Freedom

Website builders include responsive design, but the adaptation is template-based. Your mobile experience looks similar to thousands of other builder sites. Custom software allows you to design the mobile experience specifically for how your customers use your product. A field service business in Auckland needs mobile experience prioritising job scheduling, location tracking, and quick data entry, very different from a marketing site’s mobile experience. Custom software lets you build this specific experience.

Custom coding freedom extends to animations, interactions, and user flows. Want a specific interaction that’s not available in the builder’s drag-and-drop interface? With custom software, you build it. The result is a site that feels uniquely yours.

SEO Optimization and Technical Control

Search engine optimisation requires technical control that website builders limit. You need control over your site’s structure, heading hierarchy, image alt text, schema markup, and internal linking strategy. Custom software gives you complete control. Your developers can implement structured data markup for rich snippets, optimise your crawl budget for large sites, implement custom redirects for SEO migrations, and build internal linking strategies that reflect your content hierarchy.

Migration Path: From Website Builder to Custom Software

Many New Zealand businesses start with a website builder, then outgrow it. Understanding the migration path helps you plan for this transition.

When and How to Make the Transition

The right time to migrate is when the builder’s limitations are actively costing you money. If you’re losing customers because of performance, missing functionality that requires workarounds, or paying more in add-ons than custom software would cost, it’s time to move.

The migration process requires planning. You need to preserve your SEO value by implementing proper redirects from your old site to new URLs. You need to migrate your data, customer information, and content accurately. You need to maintain your email deliverability by updating DNS records carefully. A good migration takes 4-8 weeks depending on site complexity.

Avoiding Technical Debt During Migration

The biggest mistake businesses make during migration is recreating their old site’s structure exactly. Instead of thinking "how do we rebuild what we had," think "how do we build what we should have had." This is your opportunity to fix architectural problems, improve performance, and implement features that were impossible before.

Pro Tip
The best migrations treat the old site as inspiration, not a blueprint. You’re not copying your old site to a new platform, you’re building the site you should have built from the start.

When Custom Software Beats Website Builders: Real Scenarios

Understanding when custom software is the right choice helps you make the decision confidently.

E-Commerce and Complex Business Requirements

E-commerce businesses with complex requirements, multiple product types, sophisticated pricing rules, custom shipping logic, or integration with inventory management systems, need custom software. A Wellington-based craft supplies distributor selling both retail and wholesale needs different pricing, minimum orders, and shipping rules for each channel. A website builder can’t implement this efficiently. Custom software handles it naturally.

SaaS Platforms and Web Applications

Software-as-a-Service platforms and web applications, tools that users log into and use regularly, require custom development. Website builders are designed for marketing sites and simple e-commerce, not for applications with user accounts, data persistence, complex workflows, and real-time functionality. A Christchurch-based business offering project management software to construction companies needs a web application with user authentication, real-time collaboration, file storage, and API access. Custom software is the only option.


The decision between website builders and custom software ultimately comes down to your business requirements, growth trajectory, and technical complexity. Website builders excel at getting simple sites live quickly and cost-effectively. Custom software wins when you need flexibility, scale, integration, and control.

For New Zealand businesses with complex requirements or serious growth ambitions, custom software typically delivers better long-term value. Web Maniacs specialises in building custom software that grows with your business, from initial requirements through scaling to enterprise-grade performance. Our approach combines personalised development with results-driven strategy, ensuring your digital presence directly supports your business goals. Get started with Web Maniacs and transform your digital presence from a template into a competitive advantage.

Frequently Asked Questions

When should a New Zealand business choose custom software over a website builder?

Choose custom software when your business requires scalability beyond template constraints, complex custom functionality, enterprise-grade security, or integration with existing systems. Website builders work for simple brochure sites, but custom software becomes essential as your business grows, traffic increases, or you need features builders cannot provide. If you anticipate needing fluid scaling, API integrations, or long-term maintenance control, custom software delivers better ROI despite higher upfront investment.

What are the main website builder limitations for growing New Zealand businesses?

Website builders impose significant constraints: drag-and-drop templates limit design flexibility, code bloat degrades page load speed, vendor lock-in restricts data ownership, and scalability plateaus quickly. Customization options are minimal, SEO control is restricted, and you cannot integrate custom functionality or enterprise systems. As your business grows, these limitations create technical debt. Many builders also charge escalating fees as your site demands more resources, making the initial cost savings disappear over time.

How does the cost of custom website development in New Zealand compare to website builders long-term?

Website builders appear cheaper initially (typically subscription-based monthly fees), but custom software offers better total cost of ownership over 3-5 years. Builder costs accumulate through monthly subscriptions, premium add-ons, plugin fees, and bandwidth charges. Custom software requires higher upfront investment but eliminates recurring vendor fees, reduces maintenance overhead, and scales without exponential cost increases. For businesses planning long-term growth, custom solutions often cost less overall and provide ownership of your digital asset.

Can a website built with a website builder be migrated to a custom solution?

Migration is possible but challenging. Website builders create vendor lock-in through proprietary data formats and hosting infrastructure. To migrate, you must extract content, redesign in a custom framework, rebuild functionality, and migrate databases, a time-consuming process with data loss risks. Planning for eventual migration by documenting content structure helps. However, starting with custom software from the beginning avoids this friction. If you anticipate growth beyond a builder's capabilities, custom development is a better long-term investment than building on a platform designed for simple sites.

What are the key benefits of custom software for New Zealand businesses compared to website builders?

Custom software delivers enterprise-grade security, unlimited scalability, complete design flexibility, API integration with your business ecosystem, superior page load speed, full SEO control, and true data ownership. You avoid vendor lock-in, reduce long-term costs, and gain competitive advantage through unique functionality. Custom solutions support complex business requirements, responsive design across all devices, and seamless maintenance without platform dependency. For e-commerce, SaaS platforms, or businesses with specific operational needs, custom software is the only option that fully aligns with your business strategy.

This article was written using GrandRanker
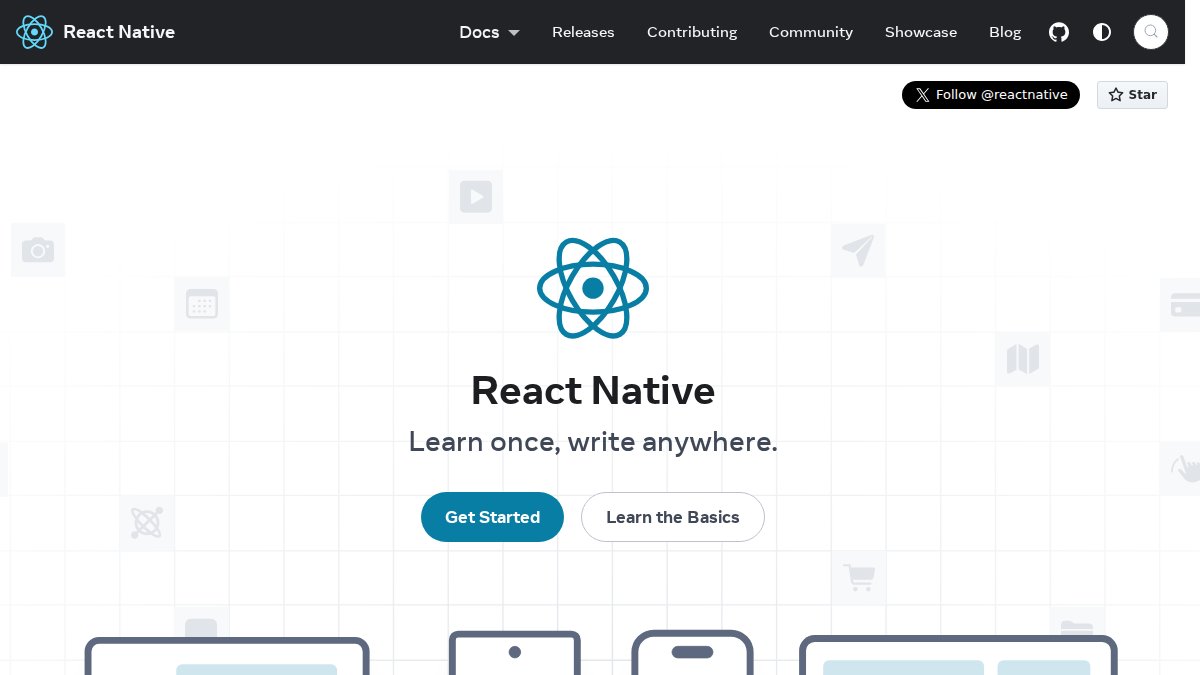
Top 5 SEO Strategies That Actually Work in 2026

Table of Contents

Last Updated: July 24, 2026

What Are the Top 5 SEO Strategies and Why They Matter

At Web Maniacs, we’ve analysed hundreds of websites across New Zealand and beyond. The five strategies covered have generated measurable results, from ranking improvements to conversion increases, across industries ranging from e-commerce to professional services.

The SEO landscape has shifted dramatically. Search engines now prioritise user experience, content depth, and genuine topical authority. AI-generated search results and voice queries have fragmented the traditional SERP. Your SEO strategy must account for multiple search surfaces, not just traditional Google rankings.

How Modern SEO Has Evolved

Search intent is now the foundation of everything. Google’s algorithm rewards sites that deeply understand why someone is searching, not just which keywords they typed. Pair keyword discovery with intent analysis, then build content that satisfies the actual question behind the search.

Technical SEO remains non-negotiable. Core Web Vitals (page speed, responsiveness, visual stability) are now ranking factors. Mobile-first indexing means your site’s mobile experience directly impacts desktop rankings. Schema markup has moved from optional to essential for capturing featured snippets and AI Overviews.

The biggest change: AI Overviews now appear above traditional organic listings. Your content must be optimised for extraction by AI systems through structured data, clear definitions, and answer-first content.


Strategy 1: Master Keyword Research and Optimization in New Zealand

Keyword research remains foundational, but execution has changed. Map search intent, identify gaps in competitor coverage, and prioritise keywords where you can realistically rank. Successful teams refresh their keyword strategy quarterly as search behaviour shifts and new competitors emerge.

Using Google Keyword Planner and Semrush for Research

Google Keyword Planner remains free and provides direct data from Google itself, though search volumes appear in ranges rather than exact numbers. According to Google’s Keyword Planner documentation, the tool works best when paired with other data sources.

Semrush fills the gaps by accessing billions of keywords and providing search volume, keyword difficulty, and competitive landscape data specific to New Zealand. For NZ businesses, Semrush’s local search filters let you isolate keywords where competitors are weak. The Pro plan starts at NZ$195 per month when billed annually.

Start with Keyword Planner to identify broad topics, then use Semrush to find long-tail variations with lower difficulty and decent volume. Target keywords where search volume exceeds 100 monthly searches but keyword difficulty sits below 50, the "golden zone" where you can rank without competing against established giants.

Pro Tip
Filter Semrush results by search intent. “Commercial” and “transactional” keywords have lower volume but higher purchase intent. For service businesses, prioritise commercial keywords like “SEO agency Wellington” over informational ones like “how does SEO work.”

Implementing Keywords Across Your Site

Placement matters, but density doesn’t. Distribute keywords strategically:

  • Page titles: Include your primary keyword in the first 60 characters. Example: "SEO Services Auckland | Web Maniacs Digital Marketing"
  • Meta descriptions: Write a compelling 155-character summary that includes your keyword naturally.
  • H1 and H2 headings: Use your primary keyword in the H1, then semantic variations in H2s.
  • Body content: Aim for keyword density of 0.5-1%. For a 1,000-word article, that’s 5-10 mentions.
  • Internal links: Link to related pages using keyword-rich anchor text.

Include your city or region in target keywords: "SEO agency Christchurch" instead of just "SEO agency."


Strategy 2: Build Technical SEO and Core Web Vitals Foundation

Web developer reviewing technical SEO metrics and Core Web Vitals scores on multiple monitors displaying analytics dashboards and code in a modern office environment with natural lighting

Technical SEO is the foundation beneath your content strategy. Core Web Vitals, Largest Contentful Paint (LCP), First Input Delay (FID), and Cumulative Layout Shift (CLS), are now ranking factors. Google prioritises sites that load fast, respond quickly to user input, and don’t shift unexpectedly as content loads.

Essential Technical SEO Checklist for NZ Websites

Start with the fundamentals:

  • XML sitemap: Submit a valid sitemap to Google Search Console.
  • Robots.txt: Ensure this file isn’t blocking important pages from crawling.
  • HTTPS: All pages must use HTTPS. Unsecured HTTP sites lose ranking boost.
  • Mobile responsiveness: Your site must render correctly on phones, tablets, and desktops.
  • Structured data (schema markup): Implement schema.org markup for your content type. E-commerce sites need Product schema, local businesses need LocalBusiness schema, articles need Article schema.
  • Duplicate content: Use canonical tags to tell Google which version is authoritative.
  • Broken links and redirects: Use Screaming Frog SEO Spider (free version crawls up to 500 URLs) to identify broken internal links.

Screaming Frog mimics Googlebot’s crawl behaviour and reveals issues your browser won’t show. The free version is limited to 500 URLs, but the £199 annual licence is worthwhile for serious SEO work.

Measuring and Improving Page Speed

Page speed affects both rankings and conversions. A one-second delay reduces conversion rates by 7% on average.

Use Google PageSpeed Insights to measure your site’s Core Web Vitals. Image optimisation alone often improves LCP by 40-60%. Convert JPEG images to WebP format, serve appropriately sized images for mobile devices, and lazy-load below-the-fold images. Content Delivery Networks (CDNs) like Cloudflare accelerate image delivery, especially for New Zealand users accessing content hosted overseas.

Watch Out
Prioritise Largest Contentful Paint (LCP) over “time to first byte” (TTFB). You can have a fast TTFB but slow LCP if images or critical assets are unoptimised. Focus on LCP first.

Strategy 3: Create High-Quality Content and Topic Clusters

Content quality is now the primary ranking factor. Google’s helpful content update (2024-2026) explicitly rewards original, expert-backed content and penalises thin, AI-generated, or duplicated material. AI-generated content must be reviewed, fact-checked, and improved by a human expert before publishing.

Topic clusters organise your content around core topics and related subtopics. Create a pillar page (comprehensive guide to a broad topic) and cluster pages (detailed explorations of subtopics). Internal links between cluster pages signal topical authority to Google. Example: A pillar page on "SEO for e-commerce" might link to cluster pages on "product page optimisation," "category page structure," and "schema markup for products."

Content Refresh and Semantic Search Optimization

Updating existing content often outperforms writing new content. A refreshed article that ranks #8 can jump to #3 within weeks if you improve depth, add recent data, and strengthen semantic relevance.

Semantic search means Google understands synonyms and related concepts. Your content should naturally include semantic variations: "technical SEO," "on-page optimisation," "site structure," "crawl budget," and "Core Web Vitals." Use tools like Semrush’s SEO Writing Assistant to identify semantic gaps. Focus on updating statistics with 2026 data, adding new sections addressing emerging queries, and improving weak sections with additional examples.

AI systems prioritise clear definitions, structured data, answer-first structure, and cited sources. State your answer in the first sentence, then explain. Use bullet lists and tables, AI systems parse these formats easily. Include author credentials and publication dates so AI systems can assess E-E-A-T (Experience, Expertise, Authoritativeness, Trustworthiness).


Strategy 4: Dominate Local SEO with Google Business Profile

For service-based businesses in New Zealand, local SEO is often more valuable than national rankings. A plumber in Auckland doesn’t need to rank nationally, they need to dominate "plumber Auckland" and appear in local map results.

Google Business Profile (formerly Google My Business) is the foundation. This free tool controls how your business appears in Google Maps, local search results, and Knowledge Panels.

NAP Consistency and Local Directory Optimization

NAP stands for Name, Address, Phone number. Consistency across all directories is critical. If your business appears as "Web Maniacs" on Google, "Web Maniacs Ltd" on Yelp, and "WebManiacs" on Yellow Pages, Google treats these as different businesses.

Audit your NAP across these directories: Google Business Profile, Apple Maps, Bing Places, and local NZ directories including Yellow Pages NZ, Localist, and Wotif. Correct any inconsistencies immediately using your exact legal business name everywhere.

Pro Tip
For multi-location businesses, create a separate Google Business Profile for each location. This prevents local authority from being diluted across locations.

Building Local Citations for NZ Businesses

Citations are online mentions of your business name, address, and phone number. Quality matters more than quantity. One citation from Yellow Pages NZ is worth more than ten citations from low-authority directories.

Priority directories for New Zealand businesses: Google Business Profile, Apple Maps, Bing Places, Yellow Pages NZ, Localist, and industry-specific directories. Focus on high-authority directories where your target customers actually search. Monitor your citations quarterly, outdated citations confuse customers and hurt rankings.


Backlinks remain one of the strongest ranking signals. A link from a high-authority, topically relevant site is worth far more than a link from a spam directory.

E-E-A-T (Experience, Expertise, Authoritativeness, Trustworthiness) is now explicitly part of Google’s ranking criteria. Building backlinks is part of building authority, but so is demonstrating genuine expertise through your content, author credentials, and brand reputation.

Understanding your competitors’ link profiles reveals opportunities. Ahrefs shows which sites link to your competitors, the authority of those sites, and the anchor text used.

Identify your top three ranking competitors, run a site analysis in Ahrefs, and examine their backlink profiles. Look for patterns: which domains link to multiple competitors, which content types attract the most links, and what anchor text they use. Ahrefs’ Lite plan (US$129/month) provides sufficient data for most small businesses. According to Ahrefs’ backlink research, the average top-ranking page has 77 backlinks. However, for new sites competing in moderate-difficulty niches, 10-30 high-quality backlinks often suffice.

Brand mentions, instances where your business is mentioned without a link, are increasingly important. Monitor brand mentions using Google Alerts or tools like Mention.

Effective link-building tactics include broken link building (find broken links on relevant sites and pitch a better resource), resource pages (identify and pitch to resource pages in your niche), skyscraper content (create content 10x better than top-ranking results), original research (publish original data, surveys, or studies that media outlets link to), and guest posting (write high-quality articles for established blogs with author bio links). Every link should feel natural, focus on creating content worth linking to, then promote it to relevant audiences.


Best SEO Tools for New Zealand Businesses

Tool Best For Starting Price Key Feature
Google Search Console All websites Free Direct data from Google on search performance
Google Analytics 4 Tracking conversions and user behaviour Free AI-powered insights and customer journey mapping
Google Keyword Planner Keyword research Free Direct Google keyword data
Semrush Comprehensive SEO platform NZ$195/month (annual) Keyword research, site audits, rank tracking
Ahrefs Backlink analysis US$129/month (Lite) Competitor backlink analysis and link opportunities
Screaming Frog SEO Spider Technical SEO audits £199/year (paid) or Free (500 URL limit) Website crawling and technical issue identification
Rank Math WordPress SEO plugin Free or US$59/year (Pro) On-page optimisation and schema markup

Free vs Paid Tools: Building Your SEO Stack

Start with free tools. Google Search Console and Google Analytics 4 provide more data than most paid platforms and are free forever. These two tell you which keywords drive traffic, which pages convert, and where your rankings are weak.

Add one paid tool when your business generates sufficient revenue to justify the cost. For most small businesses, that’s Semrush or Ahrefs. For WordPress sites, Rank Math or Yoast SEO handle on-page optimisation. Rank Math’s free tier is generous, including on-page analysis, schema markup, and internal linking suggestions.


Measuring ROI: From Rankings to Conversions

Ranking improvements mean nothing if they don’t drive business results. Connect SEO efforts to revenue.

Set up conversion tracking in Google Analytics 4. Define what a "conversion" means for your business: a purchase, contact form submission, phone call, free trial signup, or newsletter subscription. Track which keywords bring visitors who convert and which pages have high traffic but low conversion rates.

Calculate SEO ROI: (Revenue from organic traffic – SEO investment) / SEO investment × 100 = ROI %. Example: If organic traffic generates £50,000 in annual revenue and you invest £10,000 in SEO, your ROI is 400%.

Measure these metrics monthly: organic traffic, keyword rankings, conversion rate from organic traffic, and cost per acquisition from organic traffic. Most businesses see measurable improvements within 3-6 months. Competitive niches may take 6-12 months. Consistent effort compounds over time.


Conclusion

The top 5 SEO strategies, keyword research, technical SEO, content quality, local SEO, and backlink building, remain the foundation of visibility in 2026. However, execution has evolved. Search engines now reward depth, expertise, and user experience above all else.

If your business needs a comprehensive SEO strategy tailored to your specific market and audience, Web Maniacs combines custom website development with results-driven digital marketing. Our team handles keyword research, technical optimisation, content strategy, and local directory optimisation, delivering the integrated approach that moves rankings and drives conversions. Get started with Web Maniacs and transform your online visibility into sustainable business growth.

Frequently Asked Questions

What are the most important SEO strategies for New Zealand businesses?

The five core SEO strategies are keyword research optimization, technical SEO foundations, high-quality content creation, local SEO with Google Business Profile, and backlink building. For NZ businesses specifically, prioritising local SEO through Google Business Profile optimization and NAP consistency across local directories is critical. Additionally, ensuring your website meets Core Web Vitals standards and targets keywords with search intent relevant to your local market will drive qualified organic traffic and conversions.

How long does it take to see results from SEO strategies?

Most businesses see initial improvements within 3-6 months of implementing consistent SEO strategies, though competitive markets may take longer. Keyword rankings typically improve gradually as your site builds authority through backlinks and content. However, visibility gains and organic traffic increases can be tracked sooner through Google Search Console and Google Analytics 4. Patience and consistent execution of all five strategies, keyword research, technical SEO, content, local optimization, and link building, accelerate results significantly.

What are the best free SEO tools for businesses in New Zealand?

Google Search Console and Google Analytics 4 are essential free tools that provide direct data on your search performance and user behaviour. Google Keyword Planner offers keyword research data at no cost. Screaming Frog SEO Spider has a free version (limited to 500 URLs) for technical audits. For NZ-specific local SEO, Google Business Profile itself is free and critical for local visibility. These free tools form a solid foundation; paid tools like Semrush or Ahrefs add competitive analysis and deeper insights but aren't mandatory to start.

How does local SEO work for New Zealand service businesses?

Local SEO in New Zealand relies on three pillars: optimising your Google Business Profile with accurate NAP (name, address, phone) consistency; building citations in local NZ directories; and earning local backlinks and brand mentions. Ensure your website targets location-specific keywords (e.g., 'plumber Auckland' rather than just 'plumber'). Encourage customer reviews on your Google Business Profile, as review volume and ratings directly influence local rankings. Mobile-first indexing means your site must load quickly and display well on phones, essential for local searchers.

Which SEO strategy delivers the fastest ROI for small businesses?

Local SEO typically delivers the fastest ROI for small, location-based businesses. Optimising your Google Business Profile and securing local citations costs little and can drive qualified foot traffic and calls within weeks. For online businesses, keyword research combined with high-intent content targeting (e.g., 'buy X in NZ') can generate conversions faster than broad brand-building. However, sustainable ROI requires all five strategies working together, technical foundations prevent wasted effort, quality content builds trust, and backlinks establish long-term authority.

This article was written using GrandRanker
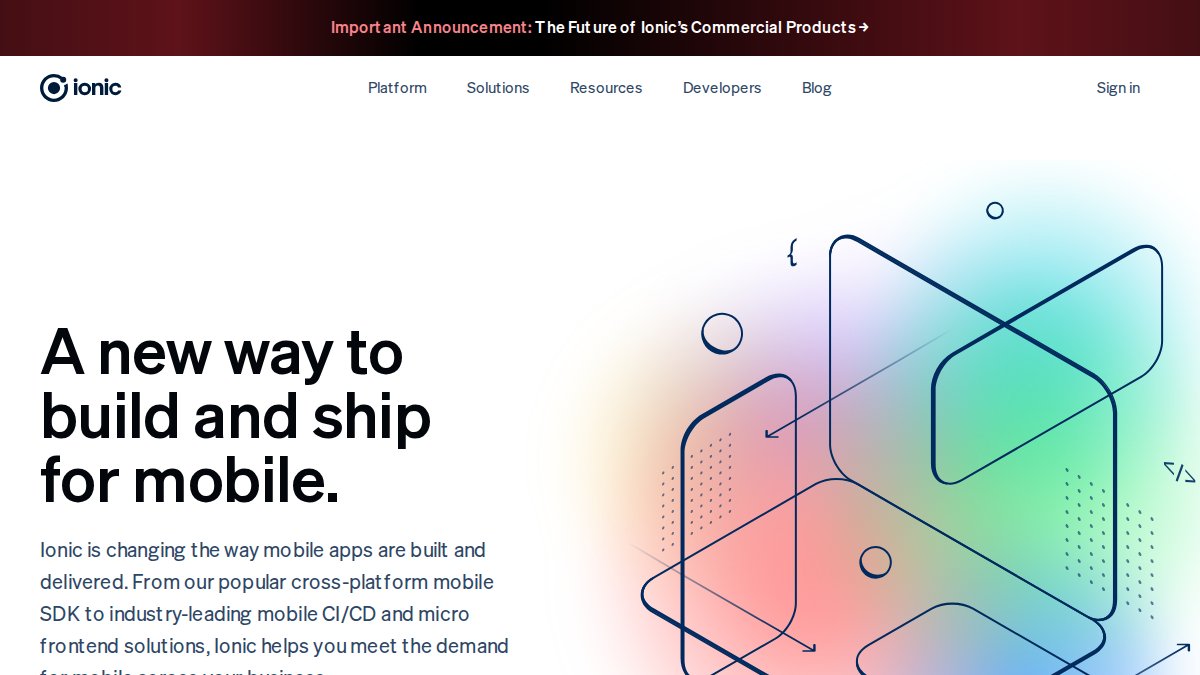
Apple Developer: A Complete 2026 Guide for NZ Creators

Table of Contents

Last Updated: July 23, 2026

What Is an Apple Developer?

An apple developer creates applications and software for Apple’s ecosystem: iPhone, iPad, Mac, Apple Watch, Apple TV, and Vision Pro. The role requires coding skills, access to Apple’s tools and frameworks, and understanding of Apple’s app review process. Developers design interfaces following Apple’s Human Interface Guidelines, write code in Swift or Objective-C, test on real devices, and navigate App Store submission. Apple maintains strict review guidelines, and rejections happen frequently for teams unfamiliar with them.

Developer working at a Mac with Xcode open on screen, multiple code editor windows visible with Swift code, interface builder panels, and a coffee cup on the desk

The opportunity is substantial. According to research from Apple’s App Store metrics, the App Store reaches over 2 billion active devices globally. For New Zealand developers, this means direct access to millions of potential users without geographic barriers. Apple expects high standards for security, privacy, and user experience.

Pro Tip
The biggest mistake new developers make is treating the App Store review process as a formality. Plan for 24-48 hours of review time, and always have a backup version ready in case your submission is rejected. Common rejections come from missing privacy disclosures or unclear app functionality.

Understanding Apple Developer Account Types

Your account choice affects pricing, team permissions, and legal liability.

Individual vs. Organisation Accounts

An individual apple developer account costs NZD $119 per year and suits solo developers, freelancers, and small teams. You maintain full control and receive all revenue after Apple’s 30% cut.

An organisation account also costs NZD $119 annually but requires legal business registration and additional verification. Teams can assign roles with granular permissions. If you’re building apps for clients or planning to scale, organisation accounts provide clear separation between personal and business liability.

Educational accounts are available to accredited institutions in New Zealand at no cost, though app distribution still requires a paid account. Enterprise accounts serve organisations distributing apps internally without using the App Store; these cost significantly more and require Apple approval.

Key Takeaway
Start with an individual account if you’re testing the waters. Switch to organisation when you have paying customers or a formal business structure. The account type is not permanent, you can upgrade later without losing your app history.

Educational and Enterprise Options

New Zealand educational institutions can apply for an apple developer programme account through Apple’s official education programme, granting access to WWDC recordings, development tools, and technical support at no cost. Apps still require a paid account to distribute on the App Store.

Enterprise programmes suit large organisations with internal app needs. Companies like banks, healthcare providers, and government agencies use enterprise distribution to deploy custom apps to employees without public App Store listings.

Joining the Apple Developer Programme in New Zealand

Getting started involves several concrete steps. The process takes 5-10 minutes to initiate, though Apple’s verification can take 24-48 hours.

Membership Requirements and Eligibility

You must be at least 18 years old with a valid Apple ID. For organisations, you’ll need business registration details (ABN, ACN, or equivalent New Zealand identifier). Apple requires a credit card for the annual NZD $119 membership fee and conducts background checks on all accounts.

You’ll need a phone number and valid email address for account recovery. Two-factor authentication is mandatory.

Step-by-Step Enrolment Process

Step 1: Create or Sign In to Your Apple ID (Time: 5 minutes)
Visit Apple’s developer programme registration page and sign in with an existing Apple ID or create a new one.

Step 2: Complete Your Developer Profile (Time: 10 minutes)
Enter your legal name, address, and phone number. If registering as an organisation, provide your business name and registration number. Apple verifies this information against government records.

Step 3: Accept the Legal Agreements (Time: 5 minutes)
Review Apple’s Developer Agreement and Programme Requirements. This document outlines your obligations, app review guidelines, and prohibited content. Most rejections stem from violating these terms.

Step 4: Set Up Payment (Time: 3 minutes)
Enter your credit card details for the NZD $119 annual membership. Apple charges on your membership anniversary.

Step 5: Verify Your Identity (Time: 24-48 hours)
Apple sends a verification email to your registered address. For organisation accounts, this may include phone verification or business document review.

Expected Result: Within 48 hours, you’ll receive confirmation that your apple developer account is active and can download Xcode and begin app development.

Essential Tools: Xcode and SDKs for Development

Xcode is Apple’s integrated development environment and the only official tool for building apps for Apple platforms. It’s free to download but requires an active developer account to test on physical devices and submit to the App Store.

Getting Started with Xcode

Download Xcode from the Mac App Store or Apple’s developer downloads page. The installer is approximately 12-15 GB, requiring about 30 minutes on a standard connection.

Xcode includes a code editor optimised for Swift, an interface builder for designing layouts, a simulator for testing without physical devices, and debugging tools. Setting up your first project takes 10 minutes: launch Xcode, select "Create a new Xcode project," choose iOS App, and Xcode generates a starter template with basic navigation.

Watch Out
Many developers skip simulator testing and jump straight to physical devices. The simulator is fast and free, use it for 80% of your testing. Only move to physical devices when you need to test sensors (camera, GPS, accelerometer) or performance on real hardware.

Understanding Apple SDKs and Frameworks

An SDK (Software Development Kit) is a collection of code libraries and tools that let you access Apple platform features. iOS SDK gives you access to camera, location services, notifications, and user interface components. macOS, iPadOS, tvOS, and visionOS each have their own SDKs with platform-specific capabilities.

Frameworks are pre-built code libraries handling common tasks. UIKit (now SwiftUI) manages user interface elements. Foundation provides data structures and utilities. CoreLocation accesses GPS. AVFoundation handles audio and video. When you download Xcode, you get the current SDK for all Apple platforms.

iOS App Development in New Zealand: From Concept to Launch

Building an iOS app involves several phases from initial concept through App Store submission.

Building with Swift and SwiftUI

Swift is Apple’s modern programming language designed for safety and performance. SwiftUI is the framework for building user interfaces with Swift code. Together, they’ve become the standard approach for new iOS app development.

Swift syntax is readable and forgiving. SwiftUI uses a declarative approach: you describe what the interface should look like, and SwiftUI handles rendering. This is faster to develop and easier to maintain than older UIKit approaches. A developer with experience in other languages can write functional iOS apps in 2-3 weeks using Swift and SwiftUI.

Testing, Deployment, and App Store Connect

Testing happens in stages: unit tests verify individual functions, integration tests check that components work together, and user acceptance testing involves real people using the app. Most teams allocate 30-40% of development time to testing.

App Store Connect is Apple’s web portal for managing your app’s metadata, screenshots, pricing, and distribution. Screenshots are critical, they’re the first thing potential users see. Use 5-6 screenshots showing key features.

Deployment means preparing your app for submission. You’ll generate a provisioning profile, archive your code, and upload it through App Store Connect. The process takes 15-20 minutes for experienced developers. Review typically takes 24-48 hours. Common rejection reasons include missing privacy disclosures, unclear app purpose, or bugs that crash on launch.

Mastering Xcode Tutorials and Code-Along Resources

Learning Xcode effectively requires hands-on practice. Building something tangible accelerates learning dramatically.

Where to Find Quality Learning Resources

Apple publishes official tutorials on Apple’s developer documentation site. These walk through building complete projects: a weather app, a to-do list, a photo editor. Each includes starter code and detailed explanations.

WWDC session recordings are invaluable. Apple’s engineers present talks on specific topics: "What’s New in SwiftUI," "Debugging with Xcode," "App Store Submission Best Practices." These sessions are 30-60 minutes and packed with practical insights.

Third-party resources like Hacking with Swift offer structured learning paths that are often clearer than Apple’s documentation for beginners.

WWDC Sessions and Developer Documentation

WWDC happens annually in June. Apple livestreams sessions and releases recordings immediately. For learners, prioritise sessions titled "What’s New in [Framework]" or "Getting Started with [Technology]."

Developer documentation is searchable and well-organised. When stuck on a specific API, search the documentation. Each page shows the function signature, parameters, return values, and code examples.

Pro Tip
Don’t try to memorise APIs. Learn the patterns instead. Once you understand how SwiftUI manages state, you can apply that pattern to any component. Patterns are reusable; memorised facts are fragile.

The App Store review process is the final gate before your app reaches users. Understanding the guidelines prevents frustrating rejections.

Common Reasons for App Store Rejection

The most common rejection reason is missing or unclear privacy disclosures. If your app accesses location, contacts, photos, or health data, you must explicitly state why and request user permission.

Buggy apps get rejected. If your app crashes on launch or has obvious functional errors, Apple’s testers will reject it. Misleading marketing also triggers rejection, if screenshots show features that don’t exist or descriptions oversell functionality, reviewers will reject it.

Unclear purpose causes rejections too. If reviewers can’t understand what your app does within 30 seconds, they’ll reject it. Payment-related violations are strict; if you charge for features that should be free or use in-app purchases misleadingly, rejection is certain.

Troubleshooting and Resubmission Strategies

When your app is rejected, Apple provides detailed feedback. Read it carefully and fix the issue rather than arguing the decision. Most rejections are fixable within 24 hours.

Resubmission is free and fast. Make your fix, upload a new build, and resubmit. The second review typically happens within 24 hours. Keep detailed notes on what caused each rejection to avoid the same mistakes on future apps.

Native vs. Cross-Platform Development: Making the Right Choice

Choosing between native iOS development and cross-platform frameworks affects timeline, cost, and app quality.

When to Build Native with Swift and SwiftUI

Native development means writing directly in Swift using Apple’s frameworks. The advantage is performance, native apps run at full speed without translation layers. They also access all of Apple’s latest features immediately.

Native development makes sense when building for iOS first with a dedicated team. If your app needs camera, AR, or advanced animations, native is the clear choice. The tradeoff is cost and timeline; a native iOS app takes longer to build than a cross-platform equivalent.

Cross-Platform Trade-Offs and Considerations

Cross-platform frameworks like React Native or Flutter let you write code once and deploy to iOS and Android. The appeal is obvious: one codebase, two platforms, roughly 50% less development time.

Cross-platform frameworks introduce performance overhead and don’t always support the latest Apple features. For New Zealand businesses targeting both iOS and Android, cross-platform makes financial sense. For apps where performance and modern features matter, games, photo editors, AR experiences, native is better.


Building apps for Apple’s ecosystem requires commitment to learning and attention to detail. The tools are free, the documentation is thorough, and the market opportunity is real. If you’re serious about iOS development, Web Maniacs can guide you through the entire process, from account setup through App Store approval. Our team has helped dozens of New Zealand developers launch successful apps by handling the technical complexity and navigating Apple’s review process efficiently. Get started with Web Maniacs and accelerate your path from concept to a live, approved app on the App Store.

Frequently Asked Questions

How much does it cost to join the Apple Developer Programme in New Zealand?

The Apple Developer Programme membership fee varies by account type and region. Individual developers typically pay an annual subscription fee, whilst organisations may have different pricing structures. Costs also depend on whether you're enrolling as a sole trader, company, or educational institution. Check Apple's official NZ Developer site or contact Apple Support for current pricing and any region-specific rates applicable to New Zealand.

What is the difference between an individual and organisation Apple Developer account?

Individual accounts are for solo developers or freelancers submitting apps under their own name. Organisation accounts are for companies, teams, or institutions submitting apps under a business entity. Organisation accounts require additional verification and legal documentation but allow multiple team members to manage the account and apps. Choose based on your business structure and whether you need team collaboration features.

Do I need a Mac to become an Apple Developer and build iOS apps?

Yes, you need a Mac to develop iOS apps using Xcode, Apple's official integrated development environment. Xcode runs only on macOS and is essential for building, testing, and deploying apps to the App Store. You'll also need macOS to access developer tools, SDKs, and frameworks. Whilst you can design or plan projects on other devices, actual development and App Store submission require a Mac.

Why do apps get rejected from the Apple App Store, and how can I avoid it?

Common rejection reasons include crashes, poor performance, inadequate functionality, misleading descriptions, privacy violations, and non-compliance with Human Interface Guidelines. To avoid rejection, thoroughly test your app on multiple devices, follow Apple's review guidelines closely, ensure your app description matches functionality, implement secure data handling, and obtain proper permissions. Review Apple's App Store Review Guidelines before submission and consider requesting feedback through beta testing via TestFlight.

This article was written using GrandRanker

How to Improve Website Conversion Rates: 7 Proven Strategies

Table of Contents

Last Updated: July 22, 2026

What Is Conversion Rate Optimization (CRO) and Why It Matters

Conversion rate optimization is the systematic process of testing, analyzing, and refining your website to turn more visitors into customers, subscribers, or leads. The difference between a website converting at 2% and one converting at 5% can mean tens of thousands of additional revenue annually. CRO isn’t about driving more traffic, it’s about making better use of the traffic you already have. Many businesses spend heavily on paid advertising only to send visitors to poorly designed landing pages or confusing checkout flows.

Understanding Your Current Conversion Rate

Your conversion rate is calculated by dividing conversions by total visitors, then multiplying by 100. If your website received 10,000 visitors and 150 made a purchase, your conversion rate is 1.5%.

Benchmarks vary by industry: e-commerce stores typically see 1-3%, B2B SaaS companies 2-5%, and service-based businesses 3-8% on lead generation pages. Focus on improving your own baseline month over month rather than chasing external benchmarks.

Establish clear tracking using Google Analytics or similar tools. Segment conversions by source, device type, and user behavior to reveal which traffic sources convert best and which pages leak visitors.

Key Takeaway
Your conversion rate baseline is your starting point for all CRO work. Without accurate tracking, you’re flying blind.

Optimize Your Landing Page for Maximum Conversions

Landing pages serve one purpose: move the visitor toward a specific action. The best landing pages remove distractions, clarify the value proposition immediately, and make the next step obvious.

Audit your current landing pages. Pages with a single call-to-action typically convert 25-50% better than pages with multiple competing CTAs. Place your primary CTA above the fold using contrasting colors. Test button text that emphasizes benefit: "Increase My Sales" converts better than "Submit."

Craft a Compelling Value Proposition

Your value proposition answers "Why should I care?" in 5-10 seconds. Weak value propositions sound generic; strong ones are specific and address your target customer’s primary pain point.

Pages with clear, specific value propositions see 40% higher engagement than vague alternatives. Instead of "Increase your productivity," try "Save 5 hours per week on manual reporting." Include social proof with numbers: "Helped 500+ e-commerce stores increase revenue by an average of 23%" is more persuasive than "We’re an industry leader."

:::pro-tip
Test your value proposition with someone unfamiliar with your business. Can they explain in one sentence what you do and why it matters?
:::

Simplify Your User Journey and Navigation

Map out your current user journey. How many clicks to conversion? How many form fields? How many decision points? Each creates abandonment opportunities. Users abandon websites most often due to unclear navigation and excessive form fields.

Simplify ruthlessly. Remove steps that don’t move visitors toward conversion. Collect basic information first (name, email), then follow up with qualification questions later, this increases lead volume significantly.

Mobile navigation requires special attention. Ensure buttons and links are large enough to tap easily. Avoid dropdown menus that require hover interactions.

Improve Website User Experience to Reduce Friction

User experience encompasses how visitors interact with your website. Poor UX creates friction, the resistance that prevents action. Common friction points include slow page loads, confusing layouts, unclear instructions, and broken forms.

Person using a smartphone to navigate a clean, fast-loading website with smooth checkout experience and clear product information visible on screen

Page Speed and Mobile Responsiveness

Pages loading in under 2.5 seconds see conversion rates up to 70% higher than pages taking over 4 seconds. Mobile responsiveness is non-negotiable, over 60% of web traffic comes from mobile devices.

Test page speed using Google PageSpeed Insights. Compressing images alone often improves load times by 30-50%. Lazy loading images provides another quick win. Design for mobile behavior: make buttons larger, reduce form fields, and minimize scrolling required to reach your primary CTA.

Form Optimization and Checkout Flow

Every form field you add drops completion rates. The average form abandonment rate is around 70% with more than 10 fields. Reduce to 3-5 essential fields and watch completion rates jump.

On lead generation forms, collect name, email, and phone number only. On e-commerce checkout, ask for shipping address, billing address, and payment method. Show progress on multi-step forms with "Step 1 of 3" indicators.

Address checkout concerns explicitly. Add trust signals near payment sections: security badges, money-back guarantees, or testimonials. Show shipping costs early. Allow guest checkout, requiring account creation before purchase reduces conversion rates by 20-30%.

Watch Out
Requiring account creation before purchase reduces conversion rates by 20-30% for most e-commerce sites. Offer it as an option after checkout instead.

A/B Testing for Conversion Rates: Test, Learn, and Iterate

A/B testing is the scientific method of CRO. Create two versions differing in one element, show each to a similar audience, and measure which converts better. Changing only one element per test ensures you know what drove results.

Start with high-impact elements: headline, primary CTA button, and form fields. A new headline might improve conversions by 15%; a button color change by 2%. Prioritize accordingly.

Calculate required sample size before testing. If your current conversion rate is 2% and you want to detect a 25% improvement, you’ll need roughly 2,000 visitors per variation. Track revenue per visitor, not just conversion count, a 10% conversion increase paired with a 20% order value decrease is a net loss.

What to Test and How to Measure Results

Document test results systematically: hypothesis, what changed, result, and statistical confidence level. Over time, this creates a knowledge base of what works for your audience.

Test Element Typical Impact Duration Difficulty
Headline 15-30% 2-3 weeks Medium
CTA Button Text 5-15% 1-2 weeks Low
Form Fields 10-25% 2-3 weeks Low
Page Layout 10-20% 2-3 weeks High
Value Proposition 20-40% 3-4 weeks High
Checkout Flow 15-35% 3-4 weeks High

Build Trust Signals and Social Proof in Your Sales Funnel

People hesitate to buy from strangers. Trust signals reduce that hesitation. Customer testimonials are credible because they come from people like your visitor. Video testimonials are particularly effective.

Reviews and ratings create trust through aggregation. Stores displaying prominent review counts and star ratings see conversion lifts of 10-20%. Display certifications and badges prominently. For B2B companies, showing customer logos builds confidence.

Key Takeaway
The most effective social proof is specific and recent. “98% of customers would recommend us” or “Helped Company X increase revenue by 23%” outperforms generic claims.

How to Improve Website Conversion Rates With Strategic CTAs

Your call-to-action is the bridge between interest and action. Place your primary CTA above the fold on every page. On longer pages, repeat your CTA every 300-500 words.

CTA button color should contrast with your page background. CTA text should emphasize benefit: "Get Started Free" converts better than "Sign Up." "Increase My Sales" converts better than "Submit."

Use urgency only when genuine. "Limited spots available" works if spots are actually limited. False urgency damages trust and conversions.

Post-Conversion Retention: Beyond the Initial Sale

Most CRO advice focuses on the first conversion. What happens after matters equally. Send a confirmation email immediately after purchase and a thank-you email 24 hours later.

Onboarding sequences reduce buyer’s remorse and increase product adoption. Measure customer retention metrics alongside conversion rate: What percentage make a second purchase? How long does it take? These metrics reveal whether your optimization efforts are sustainable.

Loyalty programs encourage repeat business. A simple "every 10th purchase is free" program works. Tiered programs rewarding higher spending work even better.


Improving website conversion rates requires systematic attention to how visitors experience your site. Most websites leave significant revenue on the table by ignoring user friction, skipping A/B testing, and failing to build trust. Web Maniacs specializes in custom website design and digital marketing strategies that address conversion optimization directly. Our team conducts comprehensive audits, identifies friction points, and implements targeted improvements from simplified checkout flows to compelling value propositions to strategic CTA placement. The result is websites that convert visitors into customers. Get started with Web Maniacs and transform your website into a revenue-generating asset.

Frequently Asked Questions

What is a good website conversion rate?

A good conversion rate depends on your industry and traffic source. E-commerce sites typically average 1-3%, while B2B lead generation pages often see 2-5%. However, the best benchmark is your own historical performance. Focus on improving your conversion rates month-over-month rather than chasing industry averages. Use analytics tools to track your sales funnel and identify where visitors drop off, then optimize those specific friction points to drive improvement.

How do I calculate my website's conversion rate?

Conversion rate is calculated by dividing the number of conversions by total visitors, then multiplying by 100. For example: (50 conversions ÷ 2,000 visitors) × 100 = 2.5% conversion rate. Track this metric in your analytics dashboard monthly. Segment by traffic source, device type, and landing page to identify which channels and pages drive the highest conversions. This data helps you allocate budget and resources to your best-performing conversion paths.

How does A/B testing improve conversion rates?

A/B testing (split testing) lets you compare two versions of a page to see which converts better. Test one element at a time, headline, CTA button color, form fields, or value proposition. Run tests for statistical significance (typically 100+ conversions per variation), then implement the winner. Common tests include call-to-action wording, page layout, form length, and social proof placement. Continuous A/B testing compounds improvements over time, making it essential for sustained conversion rate optimization.

What are the most common conversion rate killers I should avoid?

Common friction points include slow page speed, unclear value propositions, too many form fields, lack of trust signals, poor mobile experience, and confusing navigation. Visitors abandon pages when they can't quickly understand what you offer or why they should trust you. Use heatmaps to see where users click and drop off, then address those pain points. Test removing friction, fewer form fields, faster load times, and clearer CTAs, to see immediate improvements in your conversion funnel.

This article was written using GrandRanker